
There are a number of excellent articles in various magazines, books and websites on the types of shooting boards and the uses for which they were designed. It has struck me that few discuss how one tunes and uses these wonderfully useful tools. This article is intended to offer an insight into the design of a simple shooting board, how one tunes it for accuracy, accessories, and techniques in the use of a shooting board.
What is a Shooting Board?
A shooting board (sometimes called a “chute board”) is a jig that is used to dimension boards with a handplane. Typically, it involves planing end- or edge grain on boards. For example, trimming the end grain of a board used in a box or a drawer, or jointing the edge grain of a thin board (particularly those ½” and under).
While it is possible to develop a jig for any angle, the most common uses are in squaring or mitering.
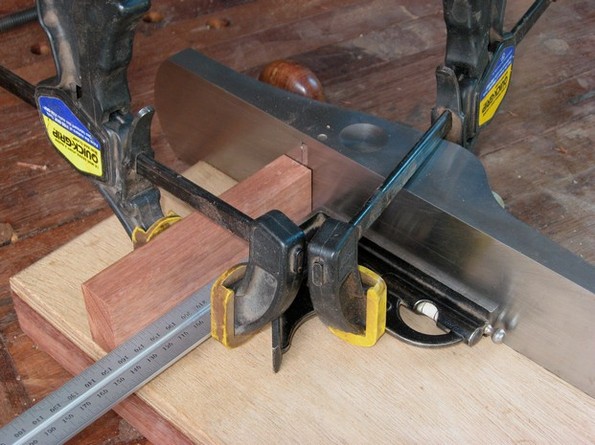
A shooting board is also typically used in conjunction with a handsaw, especially a mitre box (such as the Stanley #246, below), where the saw cuts close to the final dimension, and then the plane is guided on the shooting board to provide a superior finish and/or dimension to very close tolerances. A shooting board is a precision instrument.

Stanley #246 Mitrebox
Making a Shooting Board
The most basic design to construct is a flat board with a fixed straight fence. This will cater for 90% of most cabinetmaking needs. It will square end- and edge grain, and it can be adapted to shoot mitres with the addition of a mitre fence.
I built the following flat shooting board out of a few scraps: a 1 ½ " thick melamine countertop along with a 3/8" thick piece of plywood. The countertop is ideal as it is flat, heavy and the melamine is smooth. The plywood is flat and an even thickness.
Dimensions: 16” deep x 8” wide (including runway of 2 ½”).
Step 1: Glue the ply to the countertop, leaving room for the runway.


I added edging around the perimeter to make it look nice.
Step 2: Running in.
Before adding a fence, complete the “running in” procedure. This involves setting the blade in the plane to the expected depth of cut, and running it along the side of the runway as if you were shooting a board.
A common question is whether the plane will cut away and destroy the side of the runway when shooting.
Yes and no. Yes, the plane will remove part of the side during this step. And no, this will not destroy the shooting board. It will, instead, complete an important constructional requirement. This is the process of “running in”.
If you look carefully at the sole of your plane you will take note that the blade does not run across the full width but ends about 1/8" from the sides. When you run the plane down the runway for the first time, you remove a shaving depth from the side. This leaves behind a little ledge or lip. This lip thereafter becomes the combined fence and depth stop for the plane. The blade runs above this fence, and alongside the runway wall. If your blade does run across the full width, such as with a rabbet or shoulder plane, find another as these cannot leave the important lip and will keeping slicing away the side fence of the runway.

|
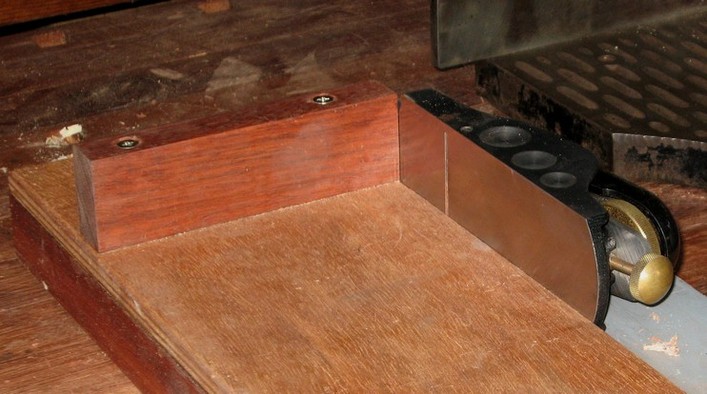
Step 3: Adding the fence
This is the critical moment! To get the fence square ... perfectly square .... you do not align it with the side of the runway fence. Instead, you align it with the sole of the plane placed flat against the runway fence. This will avoid any possible problems that can - and do - arise when the edge of the runway is not perfectly straight, or is worn from use.

Secondly, the extended blade rests against the near edge of the end of the fence. This obviates the need to plane away a slither of the fence as part of a “running in” procedure. Trying to plane away a 1-2” thick piece of hardwood end grain is likely to lead to damage to the wood in the form of breakout, or damage to the blade in the form of chipping, or both. It is not necessary to plane away this end of the fence if you plan ahead.
Step 4: Glue and screw the fence.
Set the depth of the blade for a fine shaving, and rest the end of the fence against this. Now glue-and-clamp the fence squarely to the sole of the blade.
Insert a couple of deep screws once the glue is dry. Finally, add a batten at the front underside to function as a bench hook or for secure clamping in a bench vise. I finish in a coat of Danish Oil. If the fence is too slippery, then add a layer of 360 grit sandpaper. Wax the runway. Now it is ready to shoot.
In use with Veritas LA Block Plane
An alternate procedure to the above is to rest the fence inside a dado. While this is a stronger construction, it is not necessary. The glued-and-screwed construction is very strong and these jigs are a means to an end, not the end in themselves.
There are two things you can try ...
The first is to use a shim to square up the workpiece against the fence. While this sounds like a right royal pain - and it would be for me if I had to do this every time I used the shooting board - in reality it is often necessary to adjust the board to plane a line that is not parallel to the side of the runway. I keep a few wedges (if the gap is large) or paper (playing cards or Post-it notes, if the gap is small) to adjust for parallel.
A far better plan is to add an adjustable fence, one that may be tuned - and re-tuned- when necessary. The one I show below is on my ramped shooting board. This has micro-adjustability, that is, it can be adjusted fore-and-aft by about 1/2".
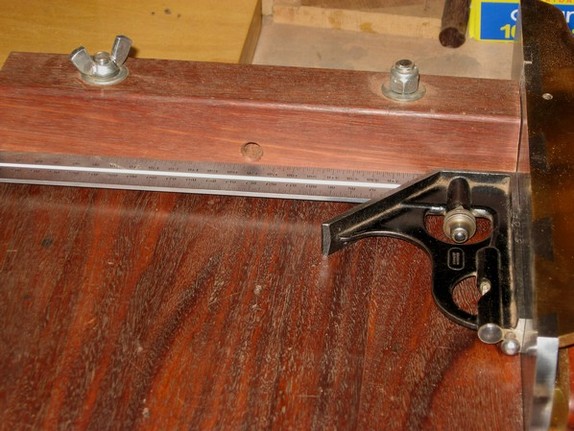
The mechanism is simply two bolts, one that is fixed and acts as a pivot (closest to plane), and the other that sits in an enlarged hole (a 1/4" diameter bolt sitting in a ½" diameter hole) and held by a butterfly nut.
Another Wooden Shooting Board Design
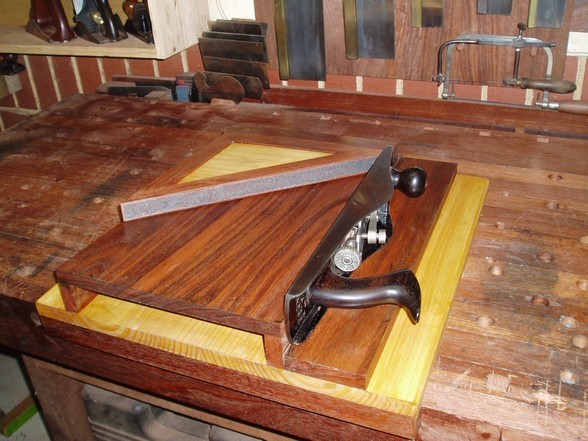
The Ramped Shooting Board
My go-to shooting board is a ramped design. This one is based on an example of Michael Connor, but is wider and has the addition of an adjustable fence.

This is built out of Jarrah. As with the flat board, there is a small ledge at the front to enable it to be used like a bench hook.
Dimensions are 17” deep x 14” wide. The ramp angle is 5°.
Why the ramp?
While the ramped board does not offer a "real" skew (the angle is too low for that), the skewed blade still enters the wood progressively, rather than all at once. This does produce a less jarring contact compared with a straight blade on a flat shooting board.
The other reason widely given is that a ramped board will allow a larger area of the blade to be use, so enabling it to remain sharp longer.
Accessories for the basic shooting board
The most useful accessory is mitre fence.
There are different ways to attach the mitre fence to the shooting board. My preference is to connect it to the front of the adjustable fence, since it is then possible to make fine adjustments to the mitre fence (in the same way one might make adjustments to the straight fence).
Here is the ramped board with attached mitre fence:
The mitre fence has an imbedded bolt. This clamps to the main fence, so …
Note that this picture pre-dates switching to an adjustable fence.
A second type of mitre board is one often used for picture framing. Here there is a double mitre fence, such that mitres may be shot from either side. The combined angle of the two mitres total 90°, thus cancelling out any errors.

Double mitre shooting board
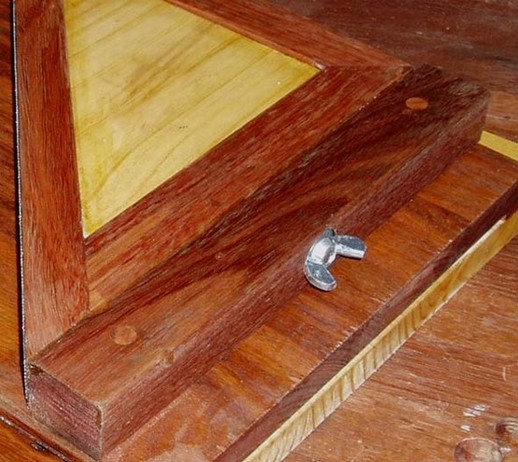
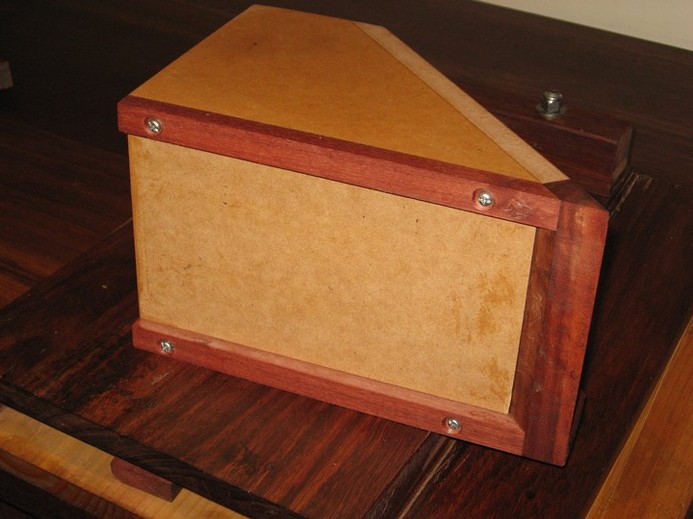
The third accessory is a Donkey’s Ear for longer mitre edges.
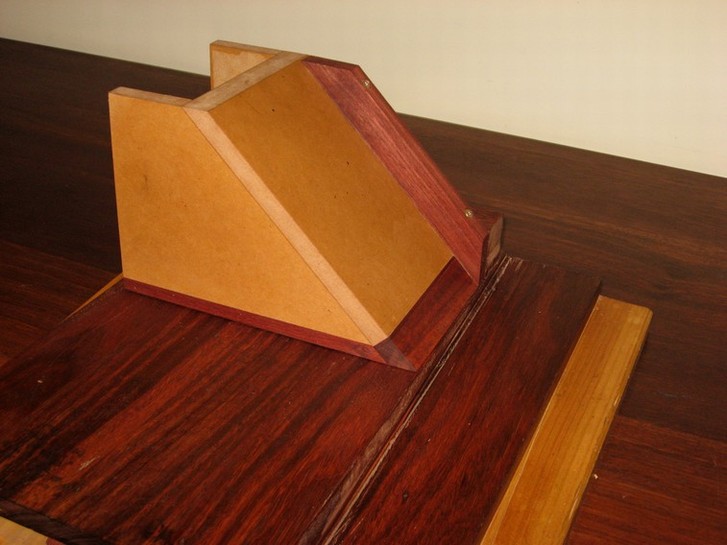
The base is 6" wide. Construction is MDF (because it is flat) and trimmed in Jarrah (because the MDF requires reinforcing at the edges). It is finished in Danish Oil.

There is one novel feature. If possible, I like to add in micro-adjustments in these jigs. Since this mitre jack requires being square in two planes, this is a difficult construction to get spot on. Therefore I have provide a way of fine tuning the board by way of screws at the corners of the underside...
Testing out this jig ….. I had 4 boards that I had cut and thicknessed and dimensioned by handplanes. These came from a Paulownia tree we cut down a few years ago.
The edges were now mitred:

The boards were grooved with a plough plane, then taped together (to align and secure the corners), and glued up with the base inserted in the grooves:
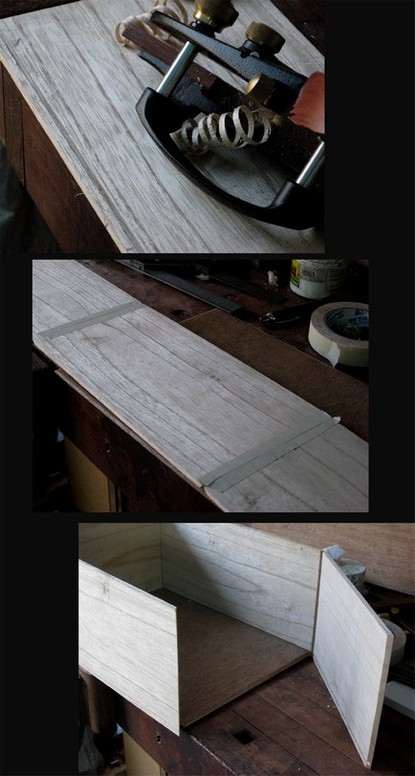
The final box (no finish):
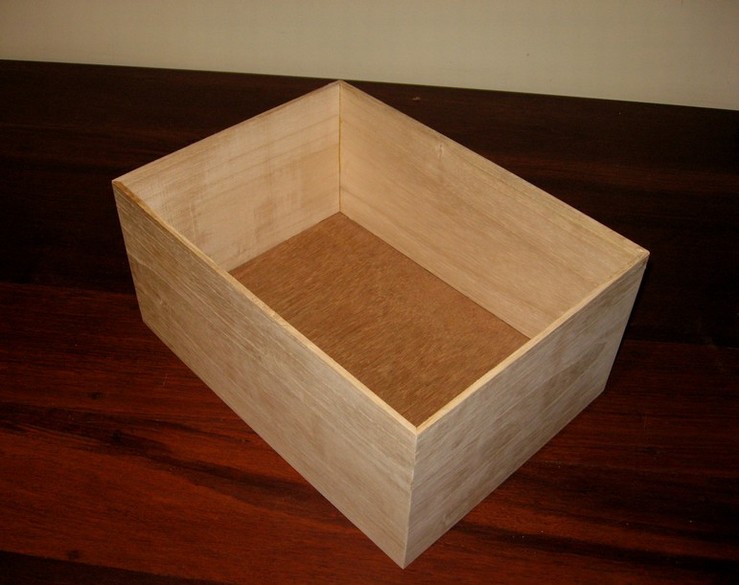
The box was perfectly square with each corner at a perfect 90 degrees. I guess the jig is a keeper.
The Stanley #51/52 Chute Board and Plane
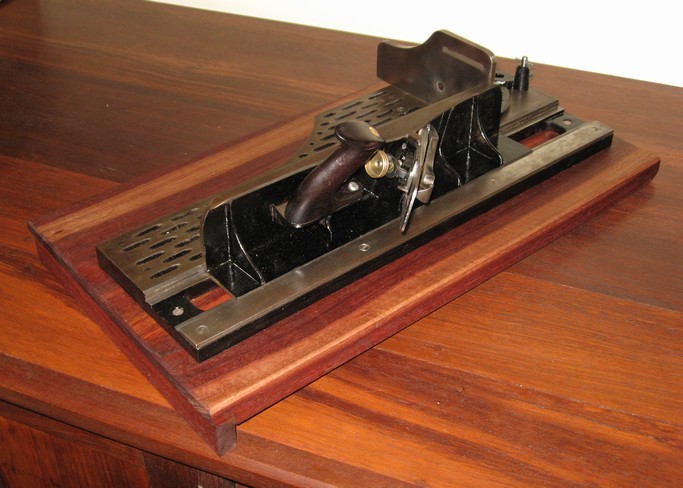
A recently completed restoration (see “Restoring a Stanley #51/52”)
Stanley built this combination between 1905 and 1943.
The #52 board is a cast iron base with a track along which runs the #51 plane. The plane is similar in size to a #5 ½ jackplane. Interestingly, it uses the wide blade of a #5 ½ (2 3/8” wide), but the frog is the same size as a #3.
The blade is skewed at 20° for a slicing cut.

… and the fence adjusts between 45° - 90°.
Essentially, these are collectors’ items and command high prices in the market place. They are great tools - serious tools - but the cost and limited availability places them out of the reach of most.
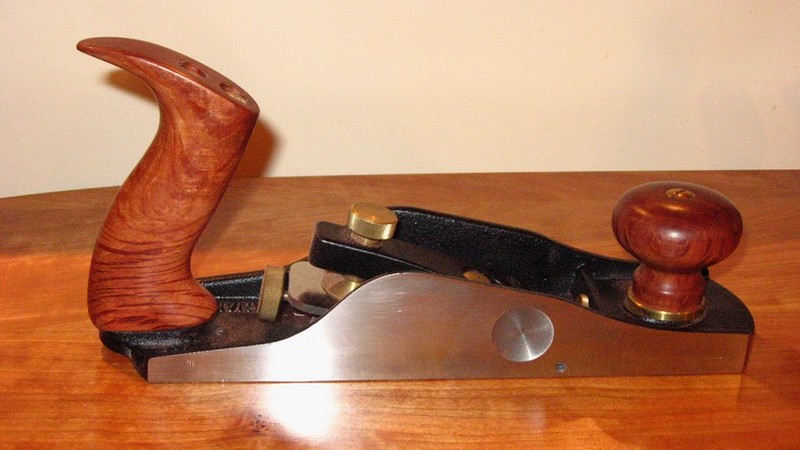
Which Plane for a Shooting Board?
The simple answer is that you can use just about any plane, however some are more comfortable and better suited for the purpose.
A low cutting angle slices end grain more easily, and the bevel up configuration has an advantage in this area. Below are some of my preferences from my experience (so note that this does not denote a "best of all planes" selection).
One of my early favourite planes for the shooting board was a HNT Gordon Try Plane. Its high cutting angle (60 degree bedding) managed to cut hardwood end grain well enough. It remains a choice if I am planing hardwood edge grain. I never really cared for a #7. It just felt too long and cumbersome. The HNT Gordon is about the same length as a #6, and this is about as large as I care to go.
Length has little to offer a shooting board plane. The Stanley #51 is 15" long, the same as a #5 1/2. A shooting board plane is not like a jointer. A jointer benefits from a long sole for registration. The shooting board plane obtains its registration from the side of the shooting board’s runway.
After acquiring a Stanley #62, this quickly became a favourite. The #62 is quite a light plane (think #5 size), but it remains a good choice when trimming softwood end grain. I like the delicate feel it provides. It does a pretty good job on hardwood, but there are better in that regard as this vintage plane has a reputation for having a fragile mouth. Lie-Nielsen has reproduced this plane in durable ductile iron.
 Stanley
#62
Stanley
#62
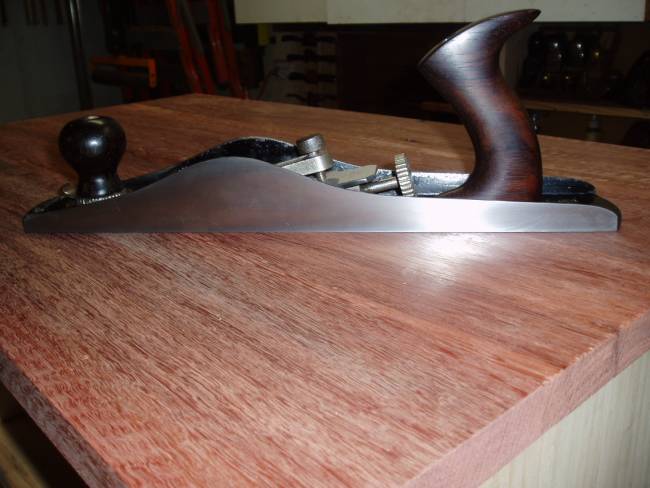
My current favourite shooting board plane is the Veritas (Lee Valley) LA Jack. It is a heavier plane (think #5 1/2 size) and is well designed for the purpose of shooting. Where the LV LA Jack is at a great advantage is that it carries much momentum through the cut, which is especially helpful with hardwood. The recessed "rings" on the sides are not decoration - they are finger grips.

LV LA Jack
As noted earlier, length is not important on the shooting board, and so a low angle plane such as the Veritas Low Angle Smoother (LAS) is not disadvantaged by its relative shortness. It is a very comfortable plane to use. It, too, has finger-grips on the side.
Veritas LA Smoother
And just to emphasize that size and weight are not fixed factors in choosing a plane for the shooting board, the other planes I occasionally use are the little LN #60 1/2 Block Plane or the slightly larger and heavier Veritas LA block plane. I find these preferable on very small pieces where delicacy is especially needed.
Problem shooting the shooting board
Some users complain that they fail to cut shavings in end grain and all they get is a “clunk” as the blade slams into the wood.
The "clunk" comes from a blade which projects too deeply for a fine cut. There are a number of reasons why this could occur:
The cause is where too much projection is given to a blade (too deep a cut). Just back off the blade.
The other possible cause is where the board is pushed too far across the fence into the blade. It may do this inadvertently. Try sandpaper on the fence.
There are other less obvious causes.
The one is that the plane has a sole that is not coplanar (i.e. toe-mouth-heel aligned). When the mouth is lower than the toe, the blade ends up being extended further to make a cut.
Another is when the bed/mouth are not aligned and the blade is poorly supported. The blade vibrates and this leads to chatter on end grain - not so much one large clunk as a series of small clunks (should that be clunkettes?).
Note that planing face grain is MUCH easier and many of these problems may not be evident then.
Using a shooting board
Holding the plane
The natural place to hold a shooting plane is over the mouth/bed/frog area. This permits one to simultaneously push the plane forwards and against the runway fence.
With the exception of purpose made planes, such as the Stanley or LN #9 and the Record T5, bench planes lack the facility to hold them easily on the runway. The HNT Gordon is another that has a built-in grip.
Lie Nielsen reproduction of Stanley #9, with Hotdog tote.
A nicely restored and updated Record T5
Recently I added a “hotdog” tote to the LAJ. These are styled after the original hotdog totes designed by Stanley for their #9 mitre plane. I was inspired to build these after Lie-Nielsen brought them out for their own LAJ.

LAJ with hotdog tote (see tutorial for building your own)
Holding the work
I find it interesting that some shooting boards have hold-downs for the workpiece.

Stanley #52 chute board with hold-down
The reason I question the use of a hold down is that the procedure I use involves pushing the workpiece along the front fence and into the plane with the left hand. My right hand pushes the plane along the runway fence and into the work piece.
After a shaving is removed, the work piece must be pushed again into the plane. A hold down would impede this movement.
The only time I could see a hold down being used is when one is planing side grain, as in the following picture.
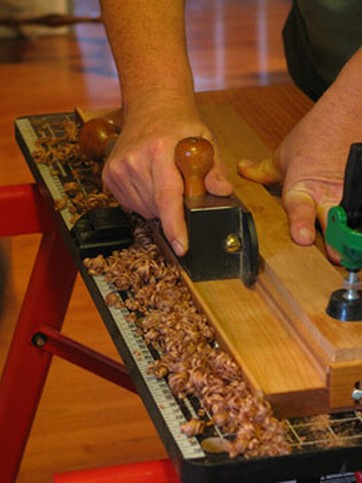
Mike Wenzloff’s shooting board with hold-down
When I read advice on how to use a shooting board it almost always emphasizes the importance of the fence as a backup to prevent breakout of the boards rear edge. So many strive to get the fence edge aligned with the edge of the workpiece. I consider this as having limited value in this jig.
When planing endgrain on a board clamped in a vise, it is not necessary to use a backup board to prevent breakout. This does indeed work - and is a popular technique to avoid breakout - but it is not the only way.
With both the boards in a vise and on the shooting board it is better to shave or pare a bevel at the rear of the board, then plane the board until this is removed. The advantage of this method is that it enables one to mark and work to the precise depth of the planing.
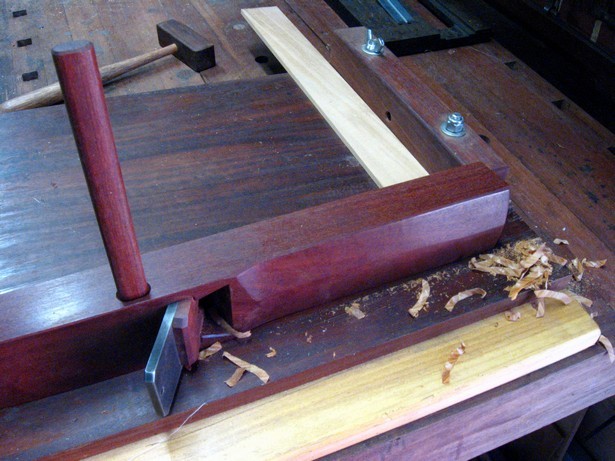
Begin with chamfering the end of the board that is the nominated reference side.
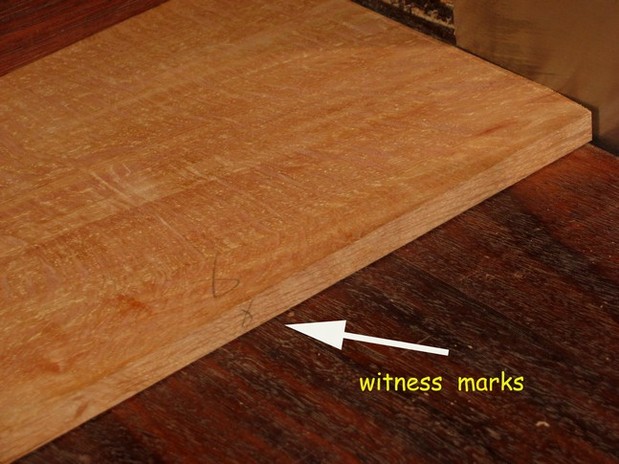
Second, butt the end of the board against the fence and chamfer the end with the plane on the shooting board. This assures a square chamfer.
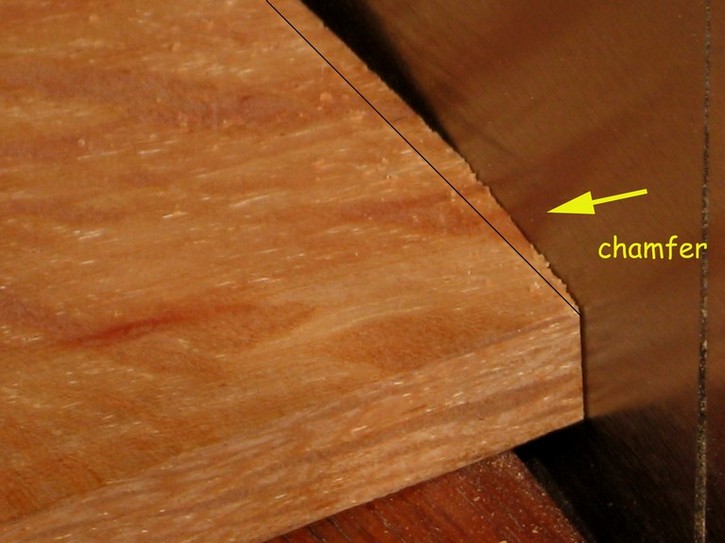
The third step is to turn the board around, rest the reference side against the fence, and plane to the end of the chamfer.
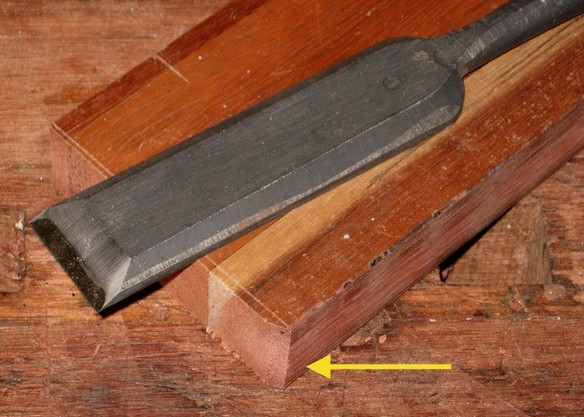
The chamfer may also be made using a chisel.
 a
tapering
chamfer
a
tapering
chamfer
This is not as secure a method as using the plane as it is more difficult to slice the edge squarely. The arrow in the above picture points to the spot where the chamfer tapers. When I plane into this, half of the edge can be seen to break out as it is unsupported where the chamfer is not cut low enough.
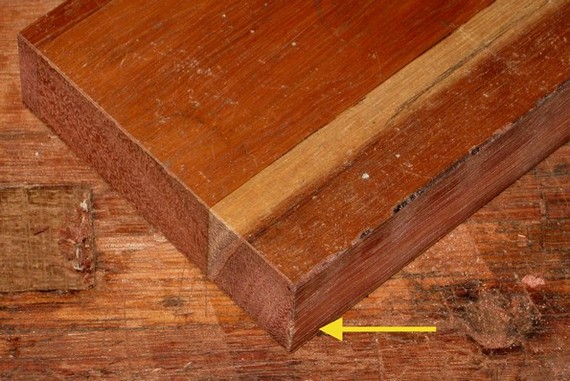 breakout
My friend Bugbear suggests a simple fix for this potential problem – all one needs to do is knife the vertical line using a square, then pare to this. Rule #1 is always mark accurately. Rule #2 is follow the guideline set in Rule #1.
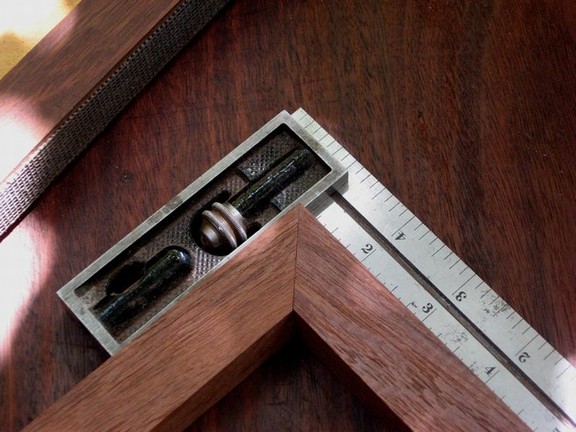
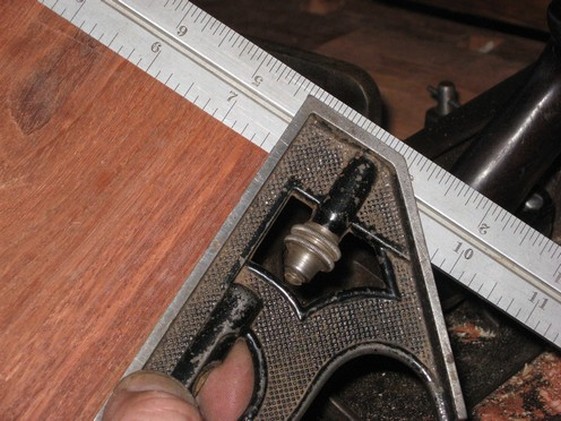
This is what we look for on a mitre …
And this is what we look for on a square fence
All the best with setting up and using your shooting board.
Regards from Perth
Derek
April 2008