Return
to Tool Reviews
Lee
Valley Chipbreaker
There has been much renewed
interest in the use of the chipbreaker in tuning a plane. We no
longer hold the belief that the chipbreaker is simply to support or
stiffen the blade. Indeed, the very first review I wrote was on the,
then, newly released LN chipbreaker. At that stage I believed that
the chipbreaker supported the blade. That must have been about 10
years ago. Today the chipbreaker is seen to be an important factor
when tuning a smoother to prevent tearout.
Very recently I
ordered a couple of Lee Valley chipbreakers. One was for a Stanley #3
I had restored, and the other was for a #4 1/2. There were also
PM-V11 blades to go with them.
Today
I had the thought to take some photos and thereby share with others
my observations about this purchase. For contrast I shall use #3
chipbreaker/blade combinations from Lee Valley, Lie-Nielsen, and
Stanley.
LV,
LN, Stanley

At
first glance the LV and LN chipbreakers are similar in shape and
design. The obvious difference is that the LV is shorter than the LN.
However, the most important difference is that the slot for the
lateral adjuster is 1/4” further back on the LN – which means
that it cannot be interchanged with the other chipbreakers here.
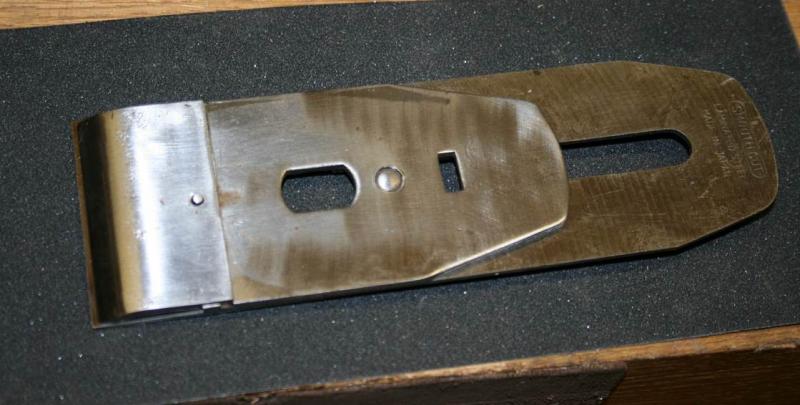
The
LV sits firmly on the blade, a tightly fitting combination...
...
as is the LN combination ...
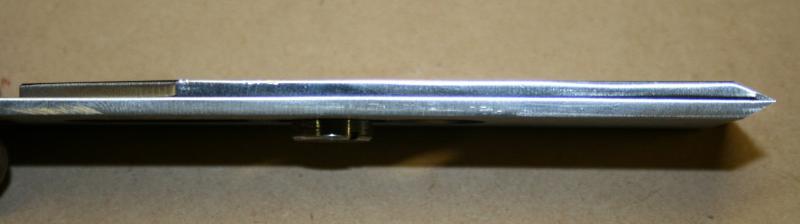
Both
have just enough flex to pull down firmly onto the blade. For both
the LV and the LN this means that there is no additional movement
once the lever cap is tigtened.
The Stanley ...

...
needed a little extra bend in the body to create a tight bond. The
thin steel is very flexible, perhaps too much so. What happens is
that when it is set close to the edge of the blade, and then
tightened, the chipbreaker will "stretch" over the position
desired (and, if not careful, over the edge of the blade
itself).
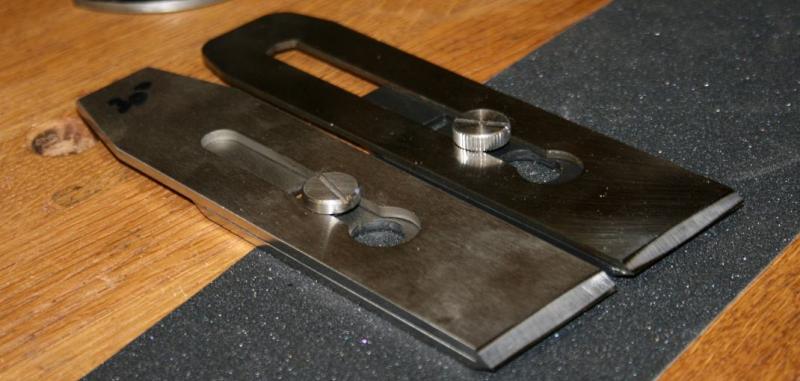
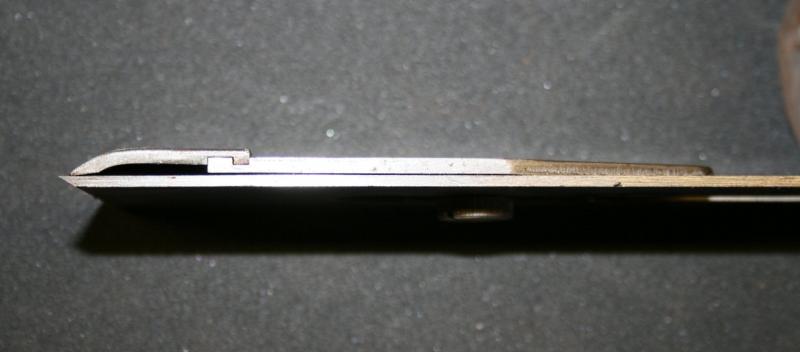
The similar designs of the LV and LN are also evident
on the reverse side ..
There
is a little more support at the front of the LV. This is significant
when the leading edge is honed at a higher angle (typically 45-50
degrees) and this process removes some of the area of this ledge. The
LN ledge can be reduced significantly if the added secondary bevel is
much larger than 1/16”. Since this process may be repeated at a
later date (if there is a chip), the LN is vulnerable to running out
of support.
Lapping underneath the leading
edge is always indicated with all new chipbreakers. It must lie flat
with the back of the blade otherwise wood shavings will find a way
between the chipbreaker and blade.
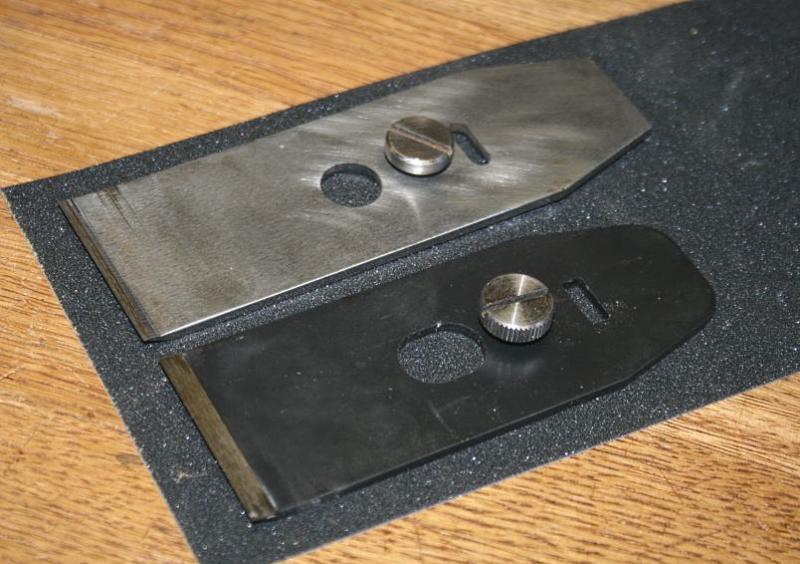
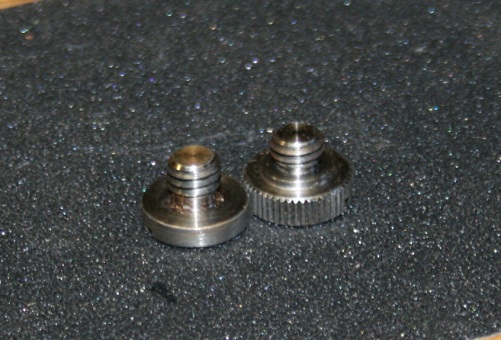
Now the important side I
want to show is the other side - the chipbreaker screw ...

What
you will notice is that the LV screw is knurled and the LN is flat.
The LV screw is also significantly thicker. The Stanley screw is also
knurled, but it is the same thickness as the LN and it knurling is
much finer – less grippy – than the LV.
Why
is this so relevant?
Because the LV screw can be more easily
tightened with fingertips. With the LN and Stanley this is not done
as easily. Finger tightening enables the chipbreaker to be set much
more easily at the edge of the blade - set it, finger tighten it, and
use a screwdriver to finish when happy.
I
start with the blade and chipbreaker held against one another on the
bench top. The bevel of the blade is rarely exactly square to the
side, and some twisting/positioning is needed that required to centre
it over the edge. The side reference from the bench is no longer
there at this point. It is helpful having the chipbreaker tight
enough to move by hand but not move on its own accord. A decent grip
on the screw helps in this regard.
This
is of particular relevance when setting the chipbreaker ultra close
to the edge of the blade.
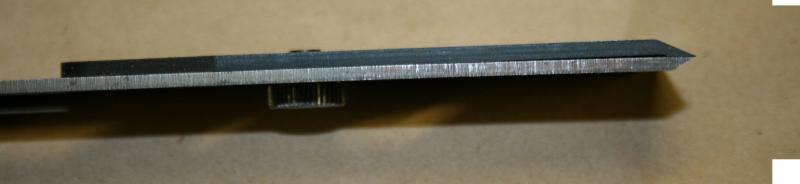
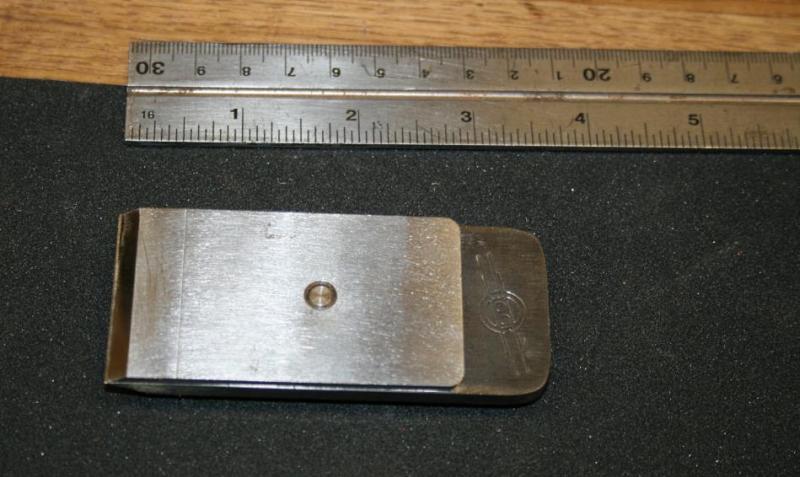
Here
is the LV being adjusted ..
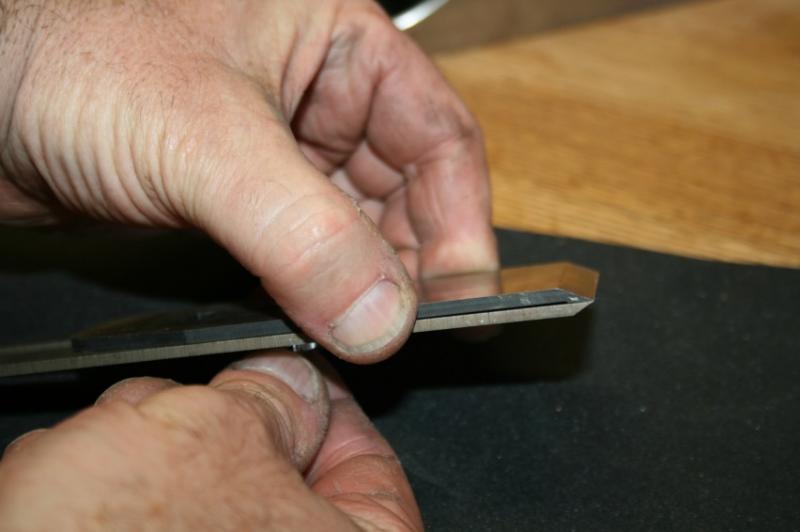
The
shorter LV and Stanley chipbreakers expose more or the blade slot at
the rear, and the screwdriver blade again can be used as a hammer to
tap the chipbreaker forward. The longer LN chipbreaker leaves open
none of the blade slot open, and cannot be used to adjust in the same
way (refer to the initial photo for illustration).
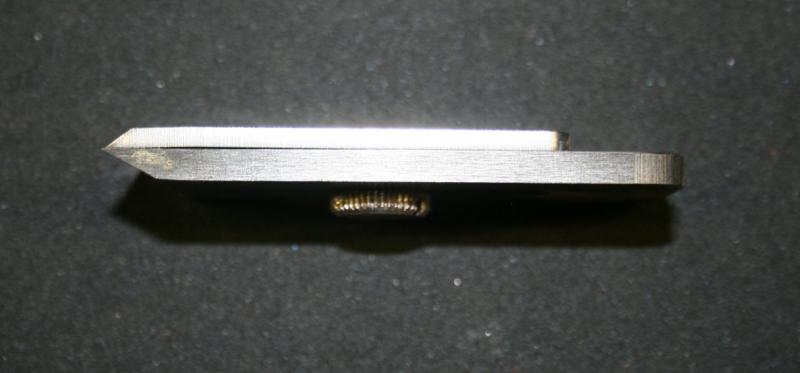
It is
relevant to note that the front edge of the LV and LN chipbreakers
both angle at 25 degrees. This is too low for Bailey-type planes with
a 45 degree bed. A secondary microbevel of about 45 - 50 degrees
needs to be honed (although the Kato video did suggest 80 degrees as
achieving best results). This is easily and quickly done freehand or
with a honing guide.
Relevance
of the angle at the leading edge
The
degree of the angle at the leading edge of the chipbreaker has been
the subject of a great deal of recent scrutiny. The Kato video
suggested 80 degrees, however their bed was, as I recall, 40 degrees.
Some suggest the 45 degrees of the (45 degree bed) Stanley is all
that is needed to plane interlocked wood. I have experimented with
frogs from 45 to 55 degrees, which indicated that each chipbreaker on
a different bed angle is ideally suited to a different angle at the
leading edge of the chipbreaker. Once the angle is established, the
next important factor is the distance of the leading edge of the
chipbreaker to the edge of the blade. Too far back and the
chipbreaker has no influence on the way the shaving bends. Too far
forward and the chipbreaker can prevent a shaving being made. Between
these two points is a position where the chipbreaker converts a Type
I shaving into a Type II shaving. This is where the shaving bends
before it can tear the surface of the wood. Steve Elliott has a
terrific pictorial and description in his website.
A
few more chipbreakers to add to the mix.
I
had originally posted this information on a couple of forums. I ask
asked to add a few more chipbreakers for comparison.
First
the Clifton.
This comes out of my Stanley #51 (shooting plane) where it is paired
with a Smoothcut laminated blade. The Clifton uses the Record Stay
Set design, which has a removable toe (to facilitate easier
sharpening). Frankly this design is a royal pain in the youknowwhat
since the toe is not securely attached and tends to fall off. It is
held securely by the lever cap. However this arrangement does make it
more difficult to adjust close to the blade edge. After the umpteenth
time that the toe fell off, I epoxied the two parts together!
The
chipbreaker is a similar thickness to the LN and
LV.
This Hock chipbreaker
comes from a smoother I received from Jim Krenov, where it is paired
with a Hock blade. Of interest, when the plane arrived the
chipbreaker was set 1/16” from the edge of the blade. The mouth is
tight. The plane had been used. From this I would conclude that Jim
did not set up his planes with the chipbreaker.
Here
are Clifton and Hock chipbreaker screws flanking the Lee Valley
…

The
Clifton screw is identical to the Stanley – having stated this, it
may very well be a Stanley as it has been so long. However, in the
deep recesses of what is left of my brain is the memory that the
Clifton screws used a different thread to Stanley.
The
Hock screw is slightly thinner but does not feel so. It is second to
the LV to grip. The reason for this is that it, as with the LV, have
coarse knurling. The knurling on the Stanley and Clifton is very
fine, giving some but not as much grip as the LV and Hock. The LN has
no knurling, and the smooth circumference makes it the hardest to
grip.
Here
is a summary of screws dimensions:
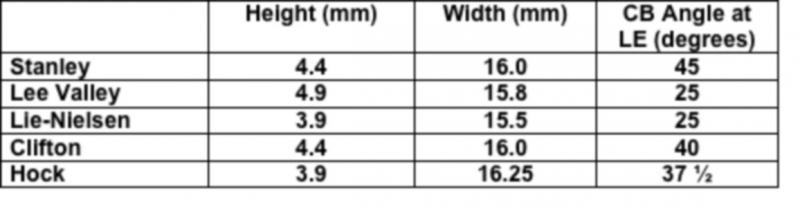
The
differences in screw size do not look much on paper. However, add in
the coarse knurling and the little extra height of the LV is very
noticeable and makes it stand out. The coarse knurling on the Hock
brings it in second. The Clifton and Stanley come in equal third,
with the LN bringing up the rear.
And
here is the answer to the question that will be asked: the LV screw
fits the LN chipbreaker.
With
regard the leading edge angles of these chipbreakers, that is an
article for another time.
Regards
from Perth
Derek
December
2013