The Veritas Small BU Smoother
I’m fortunate to have been in the position of using the new Veritas Small Bevel Up Smoother quite extensively over the past month or so, which has provided the opportunity to put it through its paces.
I do have a preference for small smoothers as much of the furniture I build utilise recycled local hardwoods, such as Jarrah, Karri and She-oak, and these have considerable interlocked grain. This means that smoothers with high cutting angles work best, generally around the half pitch range (60 degrees and up). High angles create greater resistance when pushing, and narrower planes are less affected in this regard.
Most by now are familiar with the main feature of BU planes, namely that the blade is used “bevel up” – more commonly contrasted with the Bailey pattern planes, where the blade is used “bevel down”. With bevel down (BD) planes the cutting angle is determined by the angle of the frog or bed, which is fixed. Altering the cutting angle is possible still, but requires extra work, which makes the process more complicated. By contrast, bevel up (BU) planes obtain the cutting angle from a combination of the angle of the bed and the bevel angle.
The bed angle of the Small BU Smoother (SBUS) is 12 degrees. This angle is used by all BU planes currently and is a throwback to the Stanley #164 and #62, which served as models for the current generation of BU planes. There are advantages and disadvantages in this, and I shall return to mention a few shortly. Of immediate relevance for this review, I used a cambered 50 degree secondary bevel here, which created a 62 degree cutting angle. Part of the review will include the process of setting up this plane to achieve this.
What other choices are there in the Veritas stable?
Well there are two other dedicated BU smoothers made by Veritas, the LA Smoother (LAS) and the BU Smoother (BUS), each slightly larger than the other. The SBUS fits in as the smallest of the trio.
To this group we may include the Veritas LA Block Plane as it is available with an optional rear handle, which turns it into a #2 sized plane (when measuring the length of the sole).
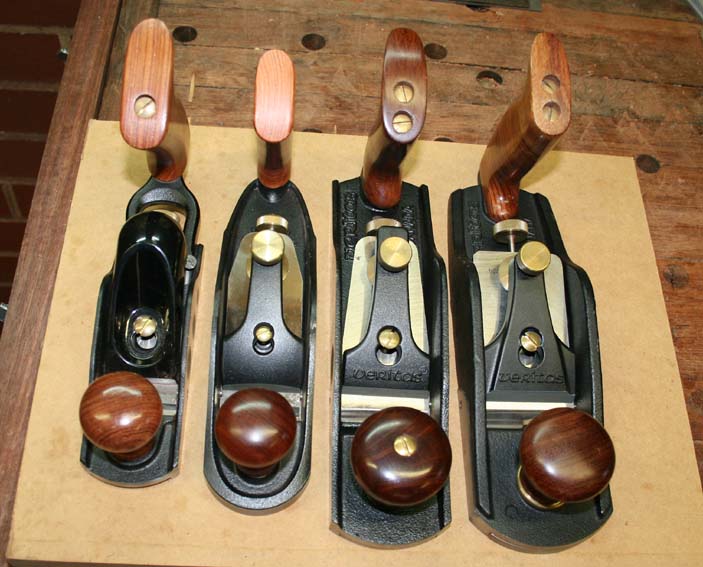
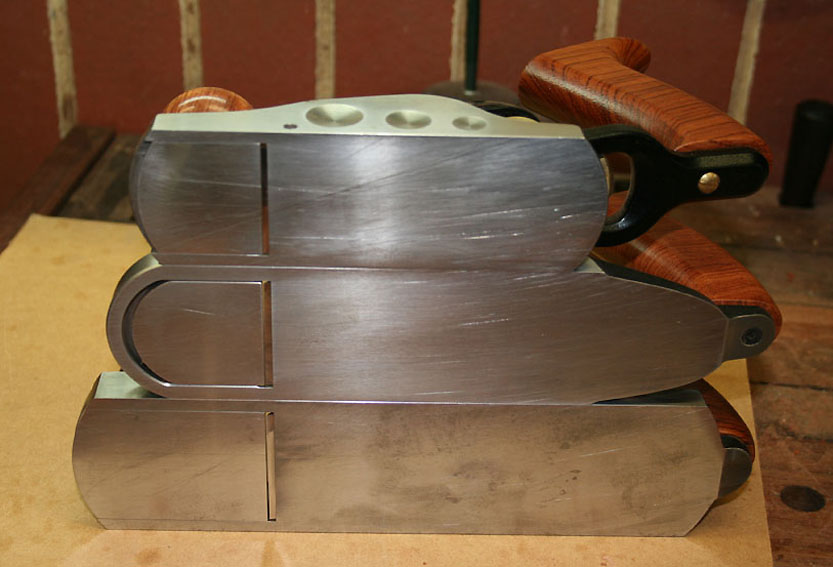
Here are the four in order of size …
|
|
Weight |
Body length |
Blade Width |
Blade Thickness |
|
LA Block |
37oz |
6 ½ “ |
1 5/8” |
1/8” |
|
SBUS |
41oz |
8 7/8” |
1 ¾” |
1/8” |
|
LAS |
60oz |
9 7/8” |
2” |
1/8” |
|
BUS |
78oz |
10” |
2 ¼” |
3/16” |
Below are the three smaller planes, with the LA Block plane on top, followed by the SBU and LAS.
A notable feature of all the BU smoothers is an adjustable mouth. All also utilise a depth stop, which is unique to Veritas. This sets the mouth opening. It is extremely useful for two reasons. Firstly, the mouth may be set to a specific size, which is repeatable even if the mouth is opened wider (for talking a thicker cut or expelling jammed shavings). Secondly, the mouth may be opened out of the way when removing and replacing a blade for sharpening, thus protecting its edge.
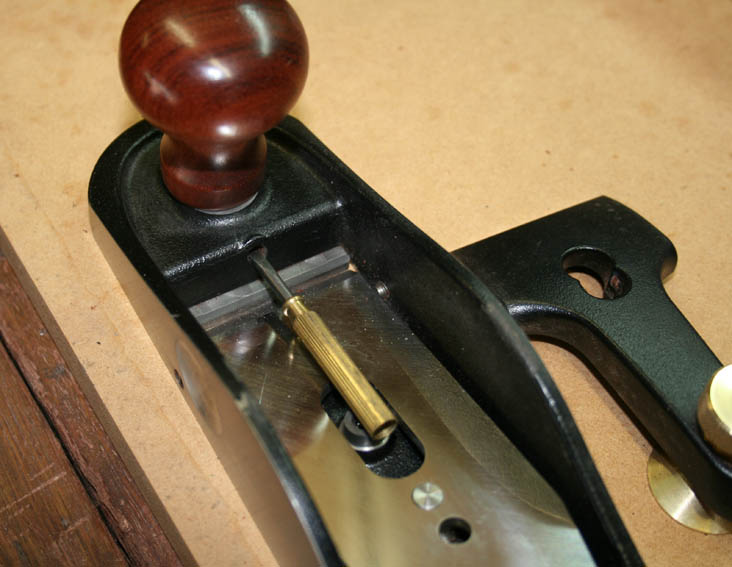
Below is the depth stop screw for the SBU.
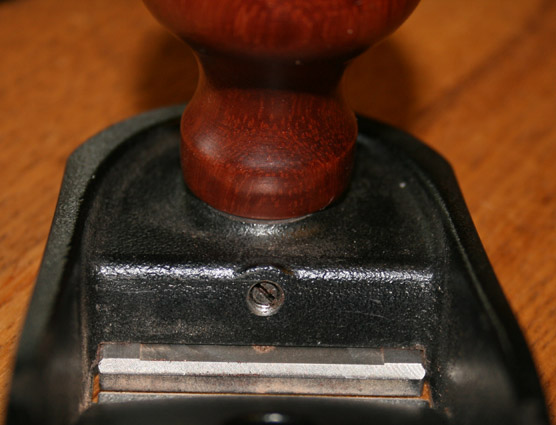
Although this feature is excellent, it is tarnished slightly by the design used, which comes from the Premium Block Planes. In the latter planes it is understandable – they are small and there is little room to spare. One does not adjust the mouth size other than full open or full closed. In a smoother, however, the size of the mouth may be re-assessed more often. Using the screw set up here makes it impossible to adjust the depth stop without dissembling the plane.
A screwdriver will only fit after the lever cap and lever screw are first removed …
By contrast, the design used by both the LAS and BUS is significantly better, allowing adjustment without disturbing any parts …
Perhaps Lee Valley will consider an upgrade here as the screw used in the LAS fits (although not a direct transplant as the length is too short for the SBUS) . This is what the SBUS would look like with the alternate screw …
As if to make up for using the mouth depth stop, Veritas have also included the lock for the Norris-type adjuster from the Premium Block Plane. Now this is a desirable addition!

Without this screw the Norris adjuster has the habit of lifting out with a blade when one is removed for honing – not a deal breaker, but an irritation. The screw ends all that.
Below is the LAS with removable Norris adjuster …

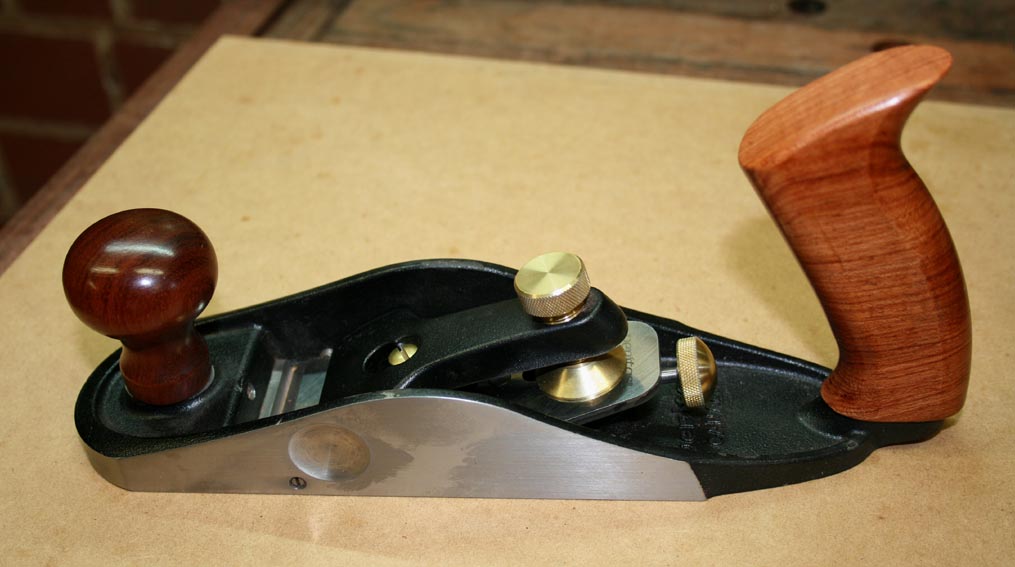
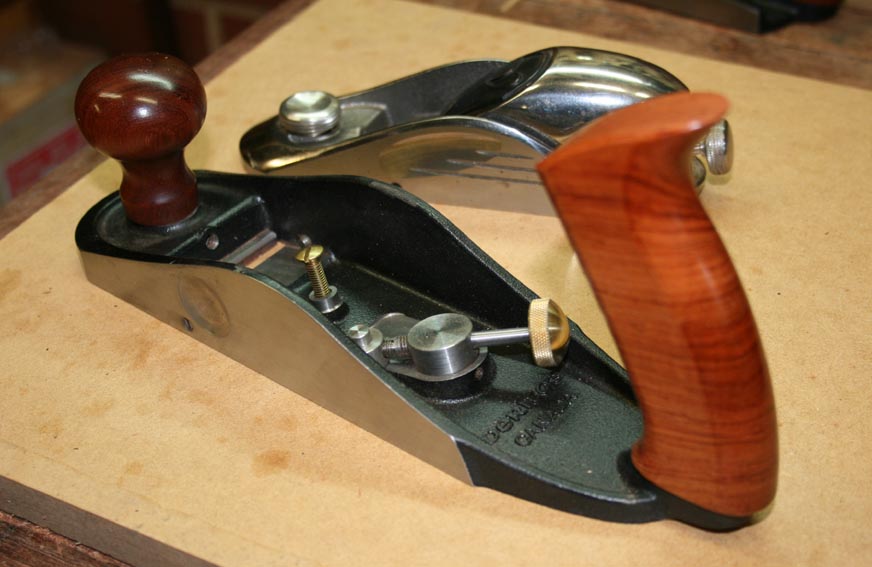
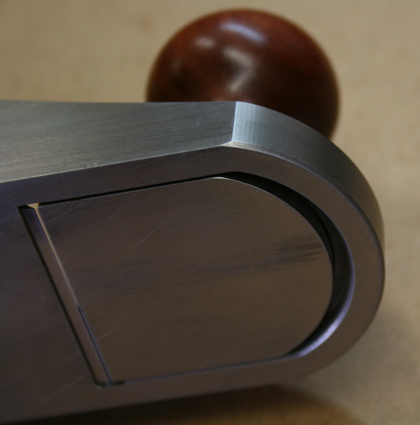
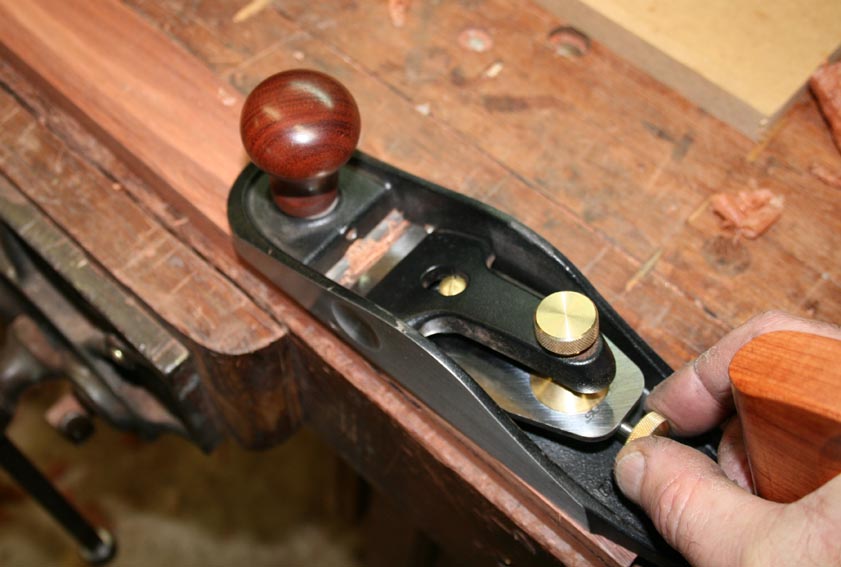
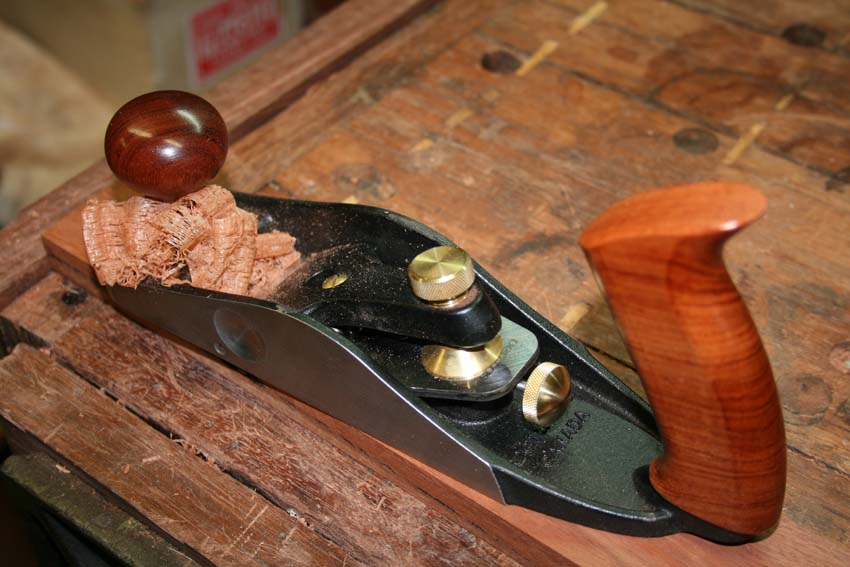
I like the new shape of this new-look Veritas smoother. In addition to the clean lines of the Bailey side profile, there is the coffin-shaped heel to reduce drag.
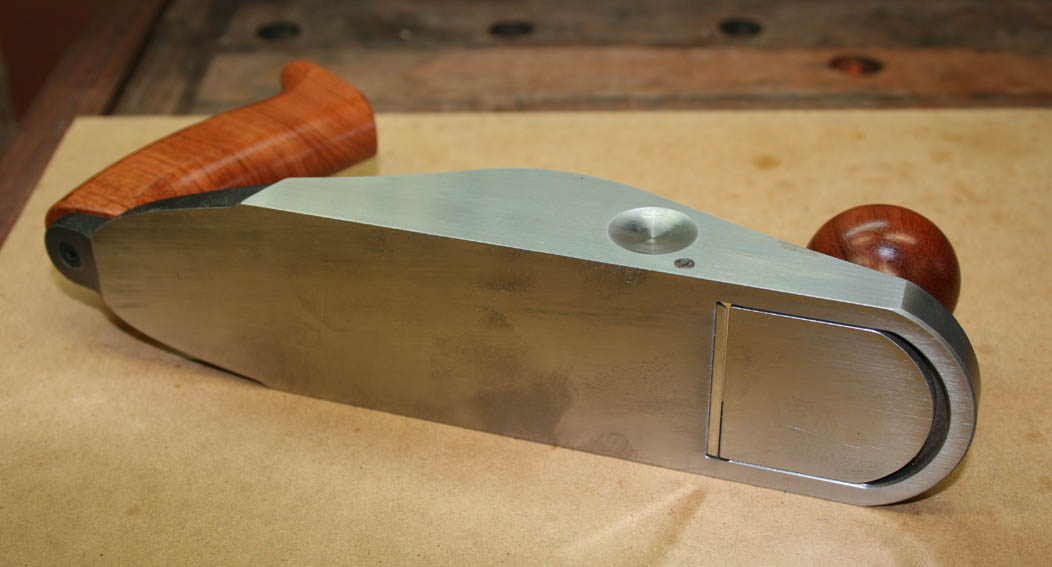
There is attention to small details, such as the bevels at the leading edge of the toe …
Handles .. totes .. whatever you want to call them, Veritas has come in for a great deal of criticism over the years. The handles on the LAS and the BUS are not the prettiest. Actually that is an understatement. In a world more comfortable with the familiar lines of the Stanley totes, they are ugly. Nevertheless, they are damn well designed.
Veritas could easily have just bowed to public opinion and produced another Stanley-lookalike. They chose to stick to their guns and use handles that were more vertical. Like others, I changed handles on some of my BU planes. With the exception of one, all have returned to the original handle. Why? Because they offer a greater degree of comfort and control when pushing these planes, all of which have a lower centre of effort than the BD planes for which the Stanley totes were designed. A vertical handle directs the force vector low, and this translates into less effort than the totes on the higher-centre-of-effort Stanley types – all of which becomes more apparent when the cutting angle increases.
Having written this, the SBUS has a tote that is different from the LAS and BUS. It is more aesthetically shaped, but continues the vertical preference. Its heritage is clearly from the Skew Rabbet Plane and the Small Plow Plane (pictured)…
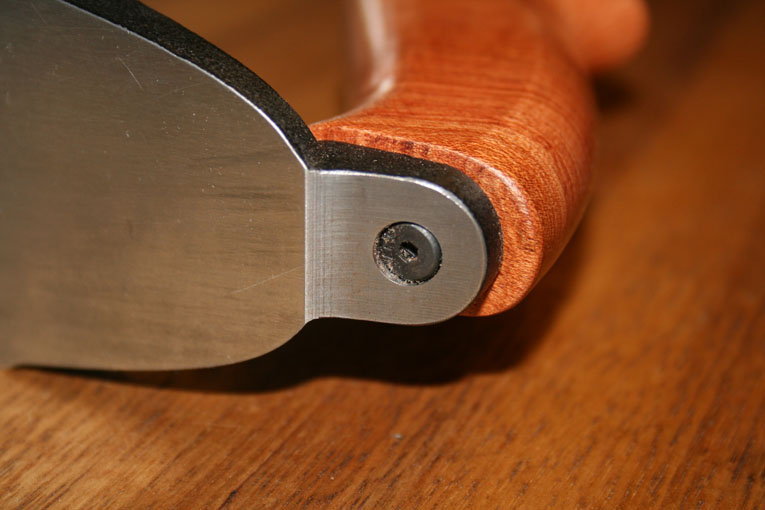
The handle is also fitted differently. Where the other BU smoothers use a double screw through the handle, the SBUS is bolted from below.
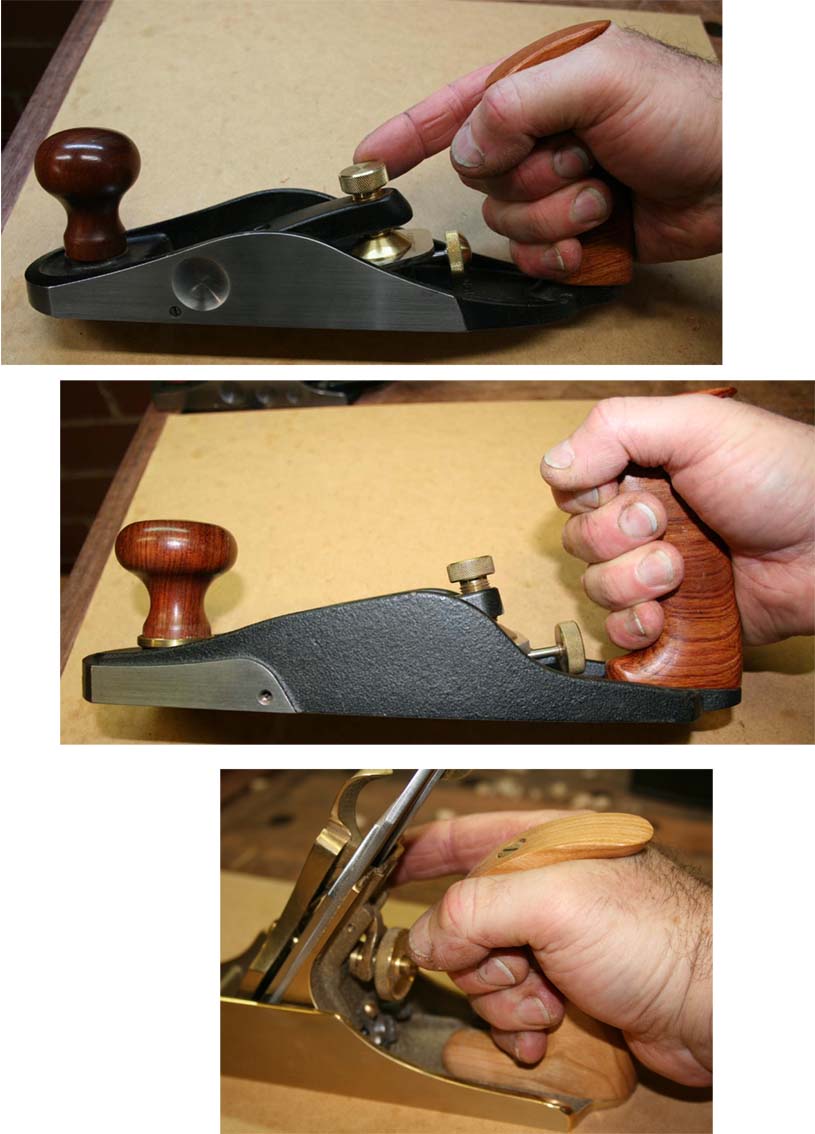
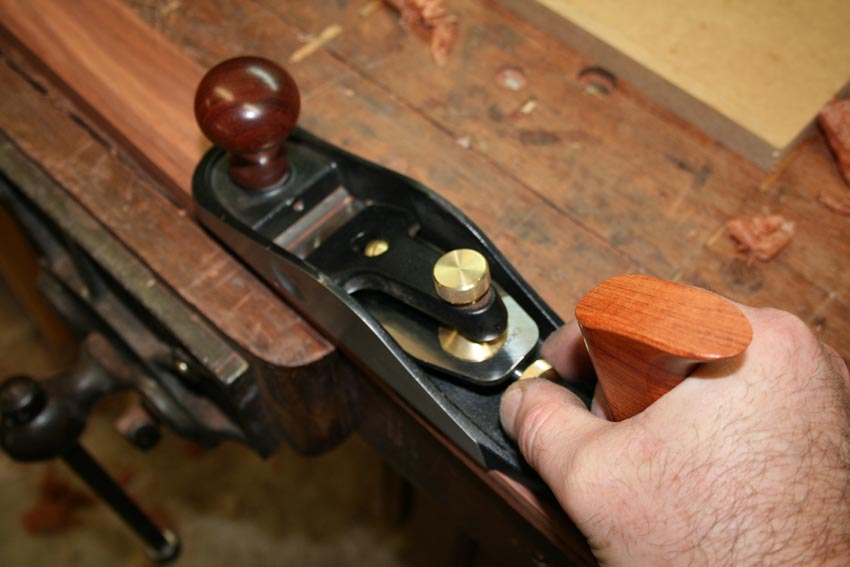
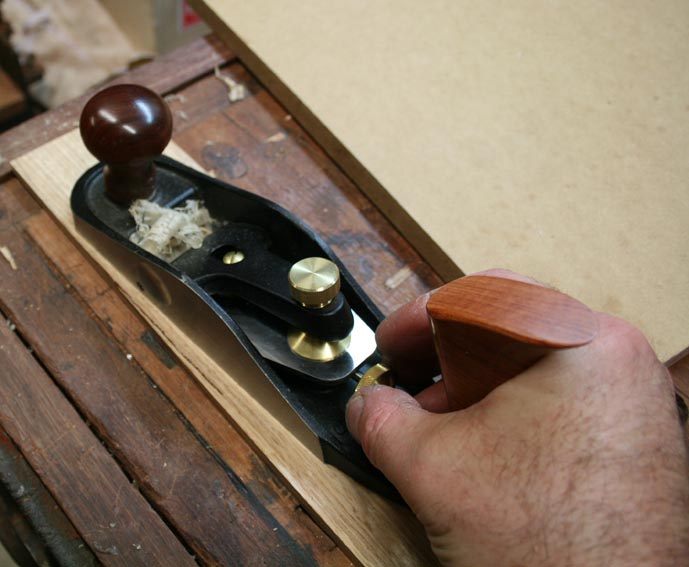
So what is it like in the hand?
In a few words, surprisingly spacious for a small handle. Because the handle is closer to the blade than on the other planes, I preferred here to use it with a three-finger grip. However there is sufficient room for a four-fingered grip (and I have a broad palm at 4” across from the thumb). You have a choice.
The BUS is a larger, heavier plane. The large handle is made for a four-finger grip.
The Lie-Nielsen #3 and Stanley #3, although similar in size, have less room than the SBUS (because of the addition of a toe), and must be used with a three-finger grip. Note that the LN #3 pictured below has a 55 degree frog, which increases the space available for the hand) …
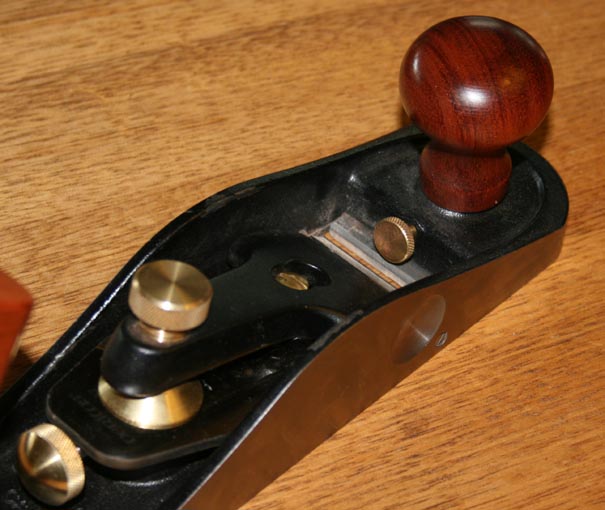
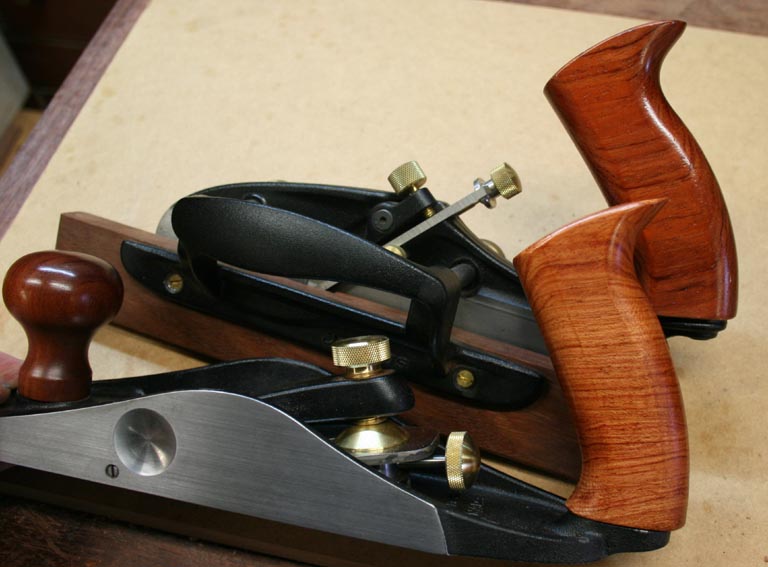
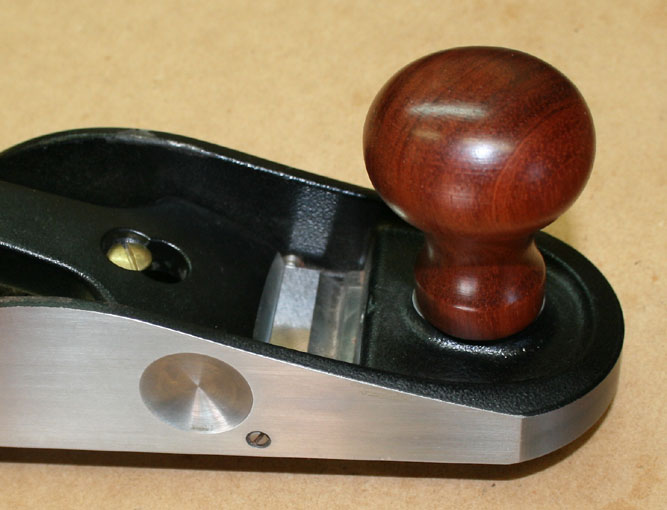
Now, on to the other end of the plane. What of the knob? Below are the knobs on the BUS (left) and SBUS (right) …
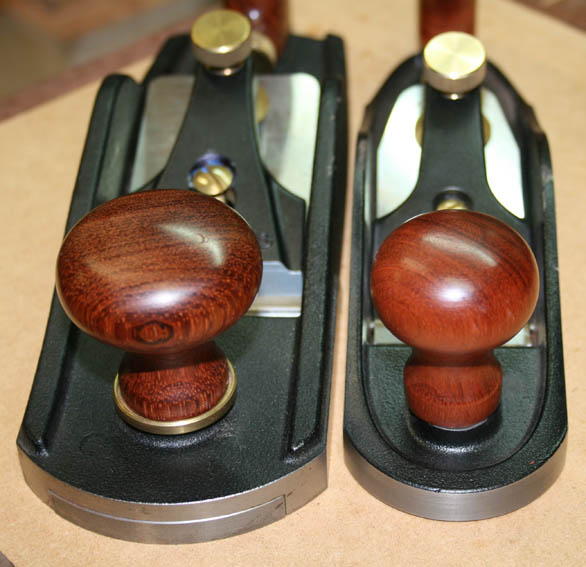
There were a couple of points here.
Firstly, I wondered why the BUS comes with a brass ring and the SBUS does not? The SBUS looks a little unfinished without it.
Secondly, I like the shape of the SBUS’ knob. However it is designed for a paw much smaller than mine.
The SBUS is on the left. I am only able to get one finger under the top of the knob (thumb lifted out of the way for the photo). The BUS is in the centre, and I can get two fingers below the top. On the right is the LN #3 and, similarly, the higher knob is a more secure fit.

Perhaps I will turn a new knob for the SBUS – a sensible solution, after all we are woodworkers (I do not own a tool that has not been modified in one way or another).
Setting up the Small BU Smoother
The plane came with an A2 blade. An O1 option is available. Indeed, I was using the plane to test a new steel for Lee Valley, so there will be another option available at some time. Rob Lee has mentioned this on a few forums. Interesting times ahead!
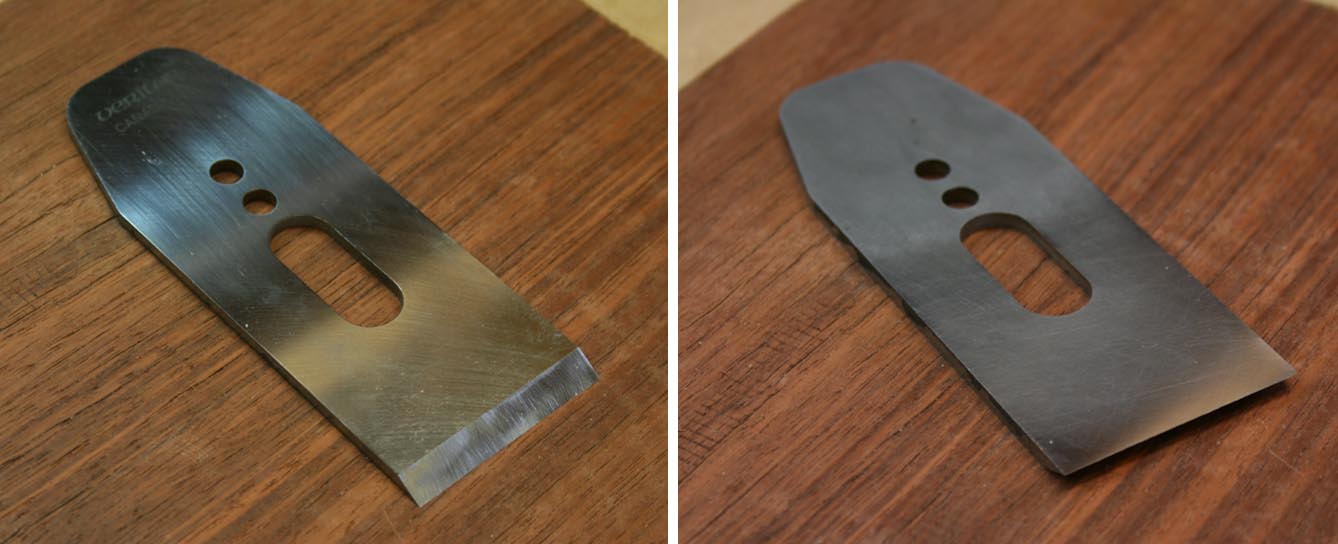
Lee Valley (in Veritas guise) must produce the best blades on the market. Truly second-to-none! There are ground flat to ridiculous levels. Below is a blade I have used (not out-of-the-box), but the blade back was capable of going directly onto a 12000 grit Shapton ceramic stone.
Below is the A2 blade with a fresh Tormek-created 25 degree hollow grind …
The aim here is to create a cambered 50 degree secondary micro bevel. “Secondary” refers to a bevel that is at a greater angle than the primary bevel. “Micro” refers to its size, that is, a small bevel, one that does not extend across the face of the primary bevel.
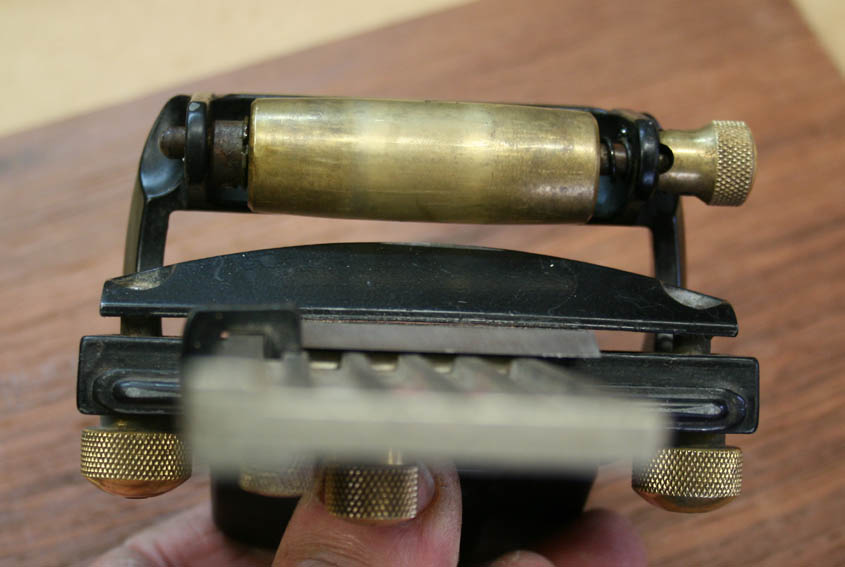
To complete this, the optimum method is with a honing guide. Below is the Veritas Honing Guide MkII set for a 50 degree angle.
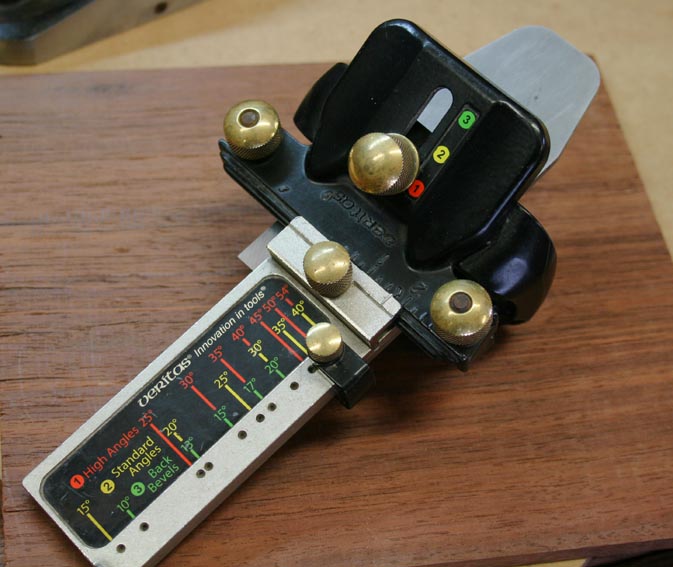
The roller used has a cambered profile, and this will help create pressure at the corners of the blade to form a camber on the face of the bevel. Why a camber on the blade? This helps to prevent the sharp edges of the blade digging into the work piece and creating “tracks”. The aim is to plane a smooth and track-free surface.
When setting up the blade in the honing guide ensure that it is flat. After the few couple of strokes check the scratch pattern for even wear. If one side is wearing more than the other, this can be re-balanced by adding or reducing the downforce exerted by the side bolts.
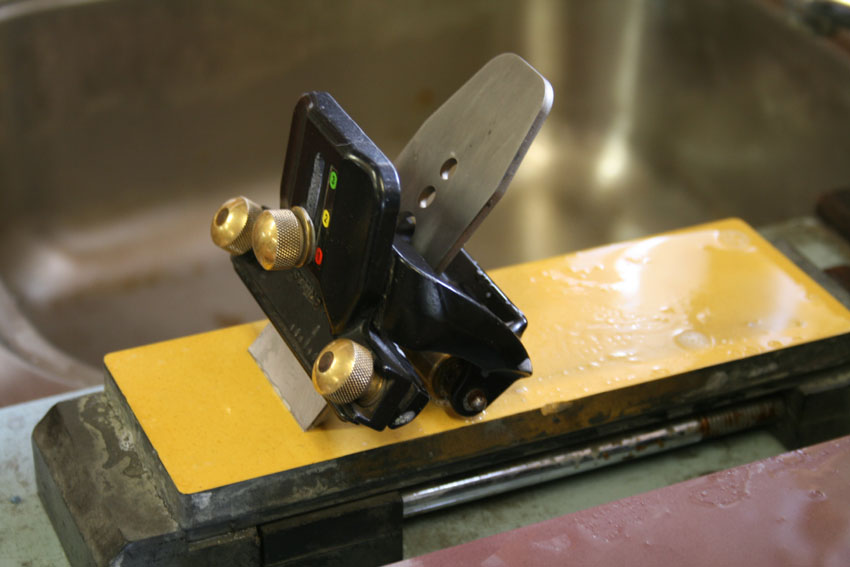
This is what a 50 degree set up looks like. Note that the blade projection is quite small compared to a 25 degree angle. What this means is that forward movements on the stones must be avoided as the blade is tippy and can very easily dig into the surface. Only pull or push the guide towards its rear side.
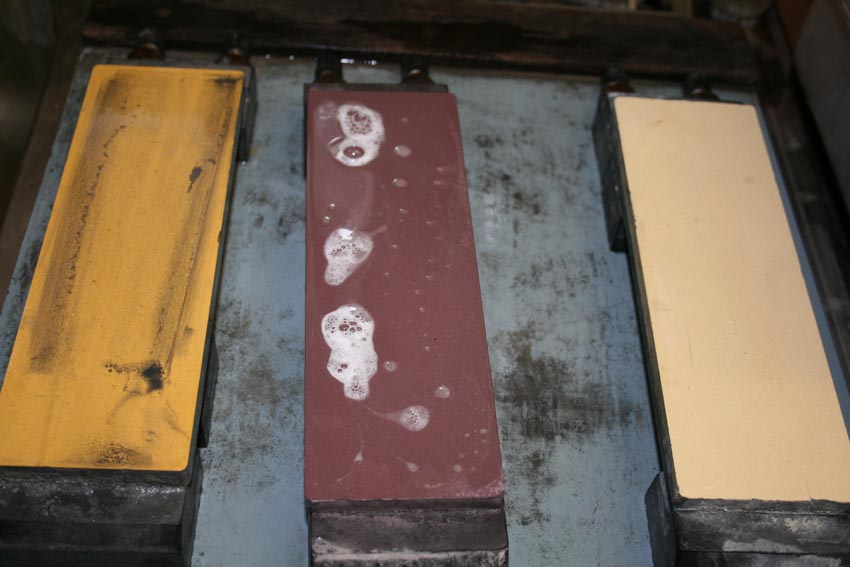
I used three (ceramic) waterstones, all Pro Shaptons: 1000, 5000 and 12000 grit.
The shaping of the camber is completed on the 1000. The 5000 and 12000 are polishing stones and remove very little metal.
Step 1: On the 1000 place finger pressure evenly across the blade and pull it back along the stone. It takes me 2-3 strokes to create a wire edge, which is evidence that a secondary bevel have been created. This is a micro bevel, probably about 1/10th of a millimetre wide.
Step 2: Take 12 strokes on one extreme edge of the blade (I did the left side first), by placing finger pressure on that area of the blade, and using firm downforce. You should be able to feel a significant difference in the size of the wire edge in this area compared to the wire edge at the other side at the end of this step.
Step 3: Now take 12 strokes on the other side of the blade in the same way. Be careful to keep the pressure at the extreme end of the blade only. At the end you should feel the wire edge is thicker at the extreme ends compared to the centre section. If it does not feel this way, then use a magnifying glass to confirm that more honing is required before moving to the next step.
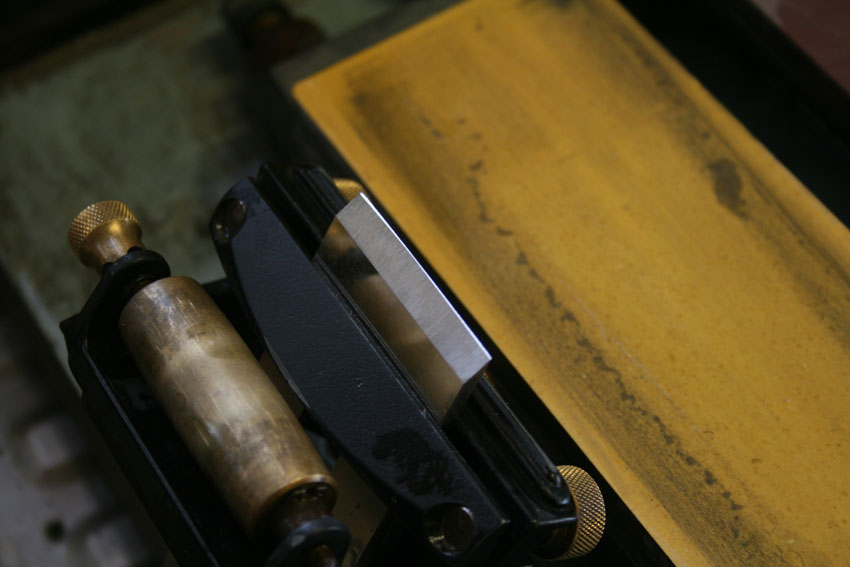
Below is the cambered bevel after the 1000 stone. In the background can be seen the bilateral metal wear on the stone.
Step 4: The hard work is done. The rest is easy. Beginning with the 5000 stone (or your equivalent – in fact it is possible to miss out this step altogether), begin the polishing of the edge. It is not critical how many strokes you use. Do more rather than less if you feel unsure. Polishing stones remove a minimal amount of steel, so you will not affect the blade shape. What is important is that you polish the edge evenly.
I did 10 strokes in the centre, then 10 strokes to the left and 10 to the right of the blade.
Step 5: Move on to the 12000 (or your equivalent). The procedure is exactly the same as Step 4.
Step 6: Remove the blade from the honing guide. Time to do the back of the blade. Time for the Ruler Trick.
For years I avoided the Ruler Trick on BU blades. Now I use it each time I prepare a blade. This is not, as David Charlesworth originally intended when he published this strategy, to ensure that the back of the blade is flat, or a short-cut to honing the back of the blade. It is, instead, insurance against the incursion of a wear bevel.
When planing all blades wear on both sides of the bevel. With BD planes one hones or grinds away this "wear". On the bevel up blade it cannot simply be ground away as it lies behind the bevel. Grinding back here increases the relief angle, to which you referred.
Now the good news is (a) the Ruler Trick removes 2/3 of one degree, so does not affect the relief at all. Let me repeat that - not at all. And (b), this micro back bevel is just where the wear bevel forms, and so makes this threat go away.
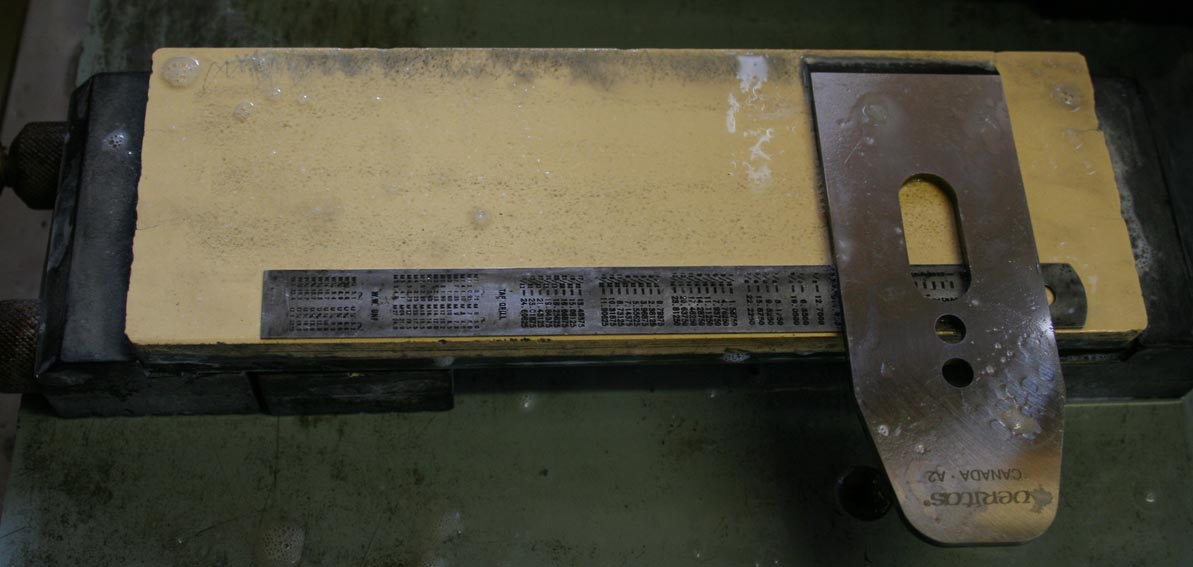
How to do? Place a common stainless steel 6” ruler across the one side of the stone. This will raise the end of the blade about 1mm when it is place across the width of the stone. Hone the back of the bevel over a length of about 3/8” – ½” by pulling it back-and-forth.
You are now done.
One further tip – use soapy water in place of plain water. The soap reduces surface tension. I add a little liquid dishwasher detergent.
When you replace the blade in the plane you should see something that resembles this …
The camber is difficult to see if done correctly. You are only removing about a fine shaving’s worth at each end of the blade. There is no real harm done if your camber is greater – just that you will not achieve a full width shaving. Sort it out next time, or hone a little more in the centre of the blade.
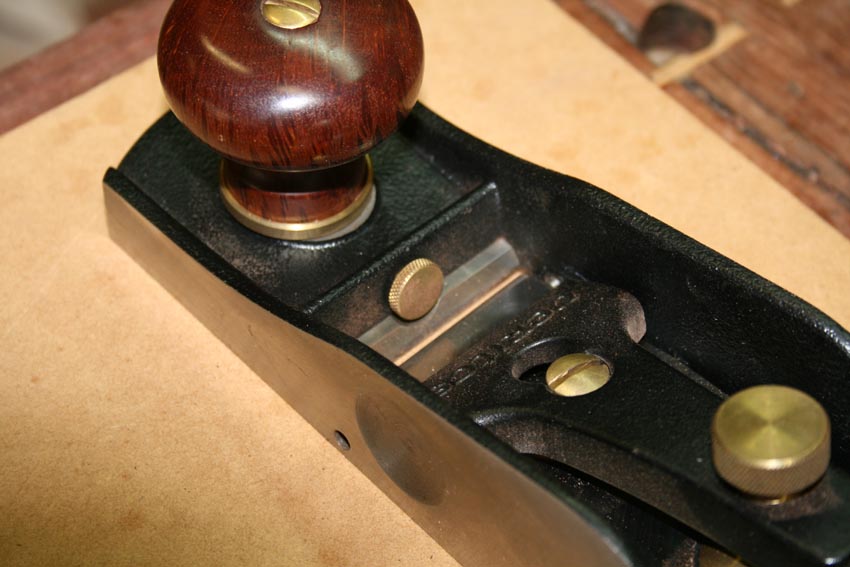
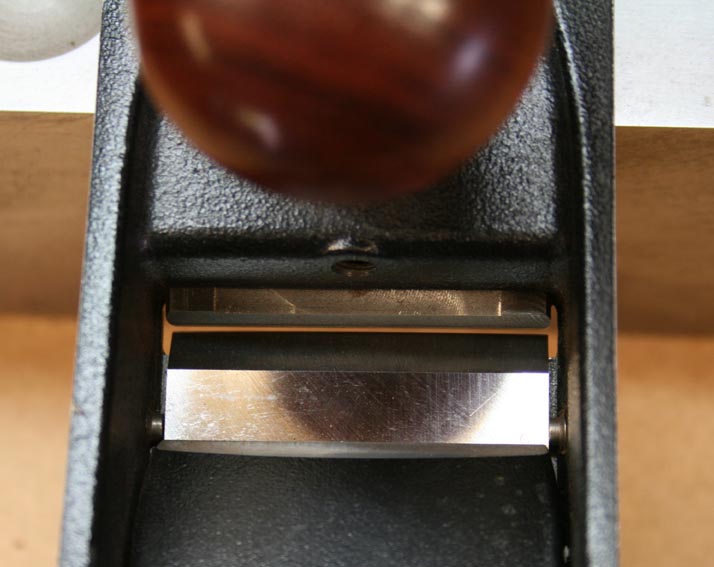
Note that the blade is centred on the set screws at each side of the blade ..
Below is a picture of the set screws from the outside and inside of the plane …
These set screws are very helpful. Not only can they act as a fine adjuster for tuning the angle of the blade as well as stabilising the blade against movement, but (more importantly for me) they ensure repeatability of settings when the blade is removed and replaced after sharpening.
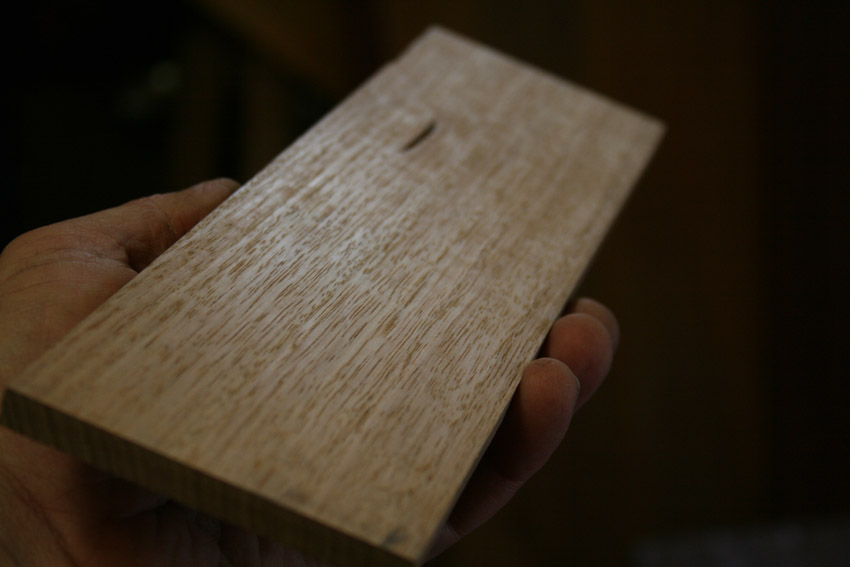
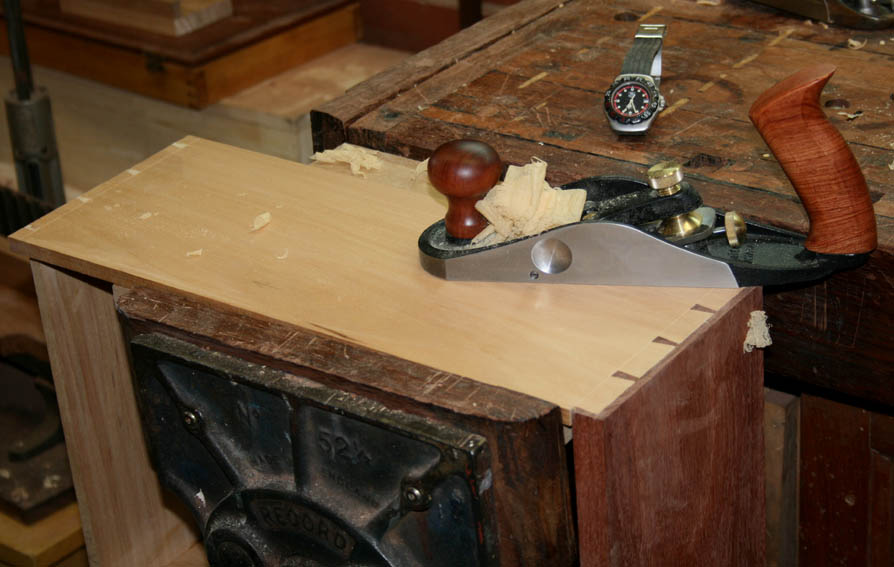
Finally, when all is set up, you are able to easily achieve a performance that can rival the best. Below is a shaving in Tasmanian Oak, a local eucalypt that shares many characteristics with US White Oak.
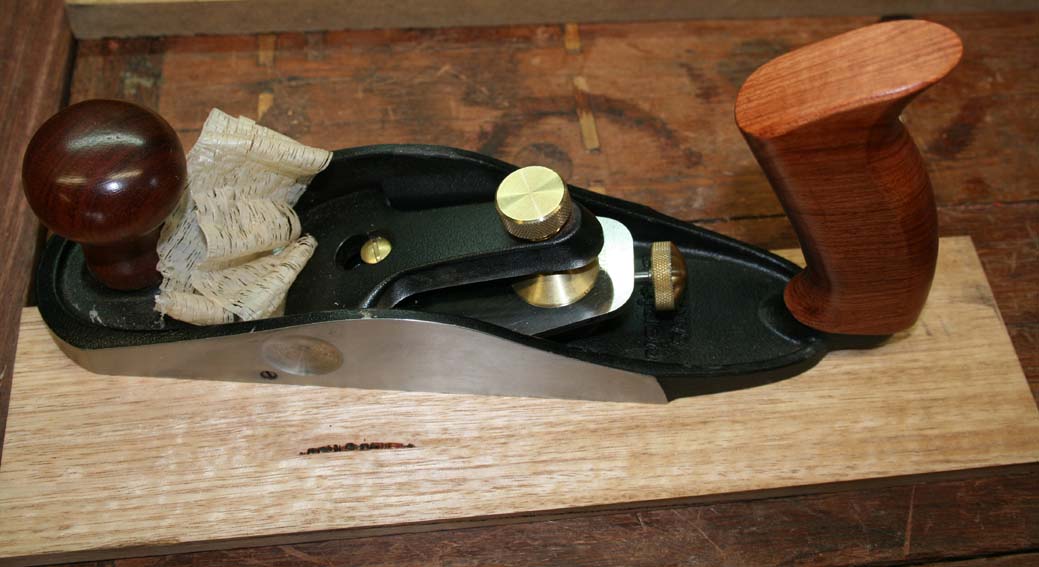
Taking the board to raking light I cannot find any tracks and only a shine that looks like the board has been waxed.
Adjustments
One of the advantages of BD planes, such as Bailey types, is that they may be adjusted “on the run”. BU planes come in for criticism that they cannot be adjusted in this way.
Well that is not entirely correct.
If you crank down the lever cap on a Veritas BU plane you indeed will not move the blade in any direction. However this is not the correct way to set up a BU plane. What you need is just enough pressure to prevent the lever cap moving. Moderate firmness, no more, no less.
It is possible (as I do this regularly) to adjust the blade projection on the run. This is shown in the following set of pictures. Having stated this, I must also add that it is easier with a Bailey plane …
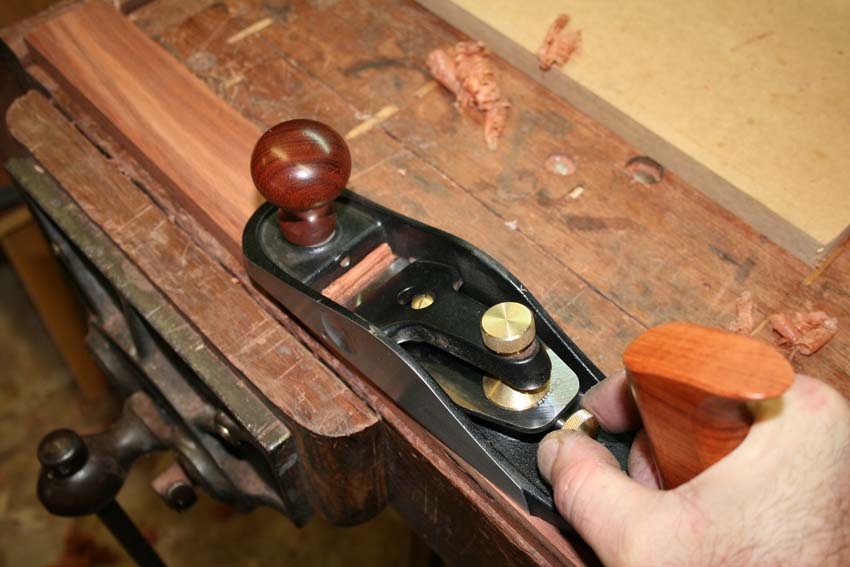
… in addition, while it is also possible to use the lateral adjuster while moving the plane forward, this requires a firm hand and a finely set blade. I doubt that many would bother. It is easier to take a practice test shaving beforehand. It is not a deal breaker.
So … how do the BU planes compare?
The SBUS is ideal for smaller boards, smaller hand and moderately hard woods. While I have had excellent performances in a wide range of wood types, this is a light plane and for the type of wood I call hard it is better to use something that creates greater momentum.
When I reviewed the BUS some years ago I included a comparison with the LAS. The conclusion reached was that extra mass created more control, but at the expense of feedback (feel). This is taken a step further with the SBUS – it is a delightful plane to use. Light. Balanced. It is like wielding a rapier.
For hardwood I would prefer to use the LAS. It has significantly greater mass, and of the three smoothers, is the one with the best balance of control, power and feedback. Where the SBUS struggled on some pieces of Jarrah, the LAS sailed through.
Of course, where the grain is seriously oppositional and the wood is re-named concrete, only the BUS will do. A phenomenal plane but it is a totally dedicated smoother and, unlike both the SBUS and LAS, is only for smoothing. If the LAS is a sabre, the BUS is a broadsword.
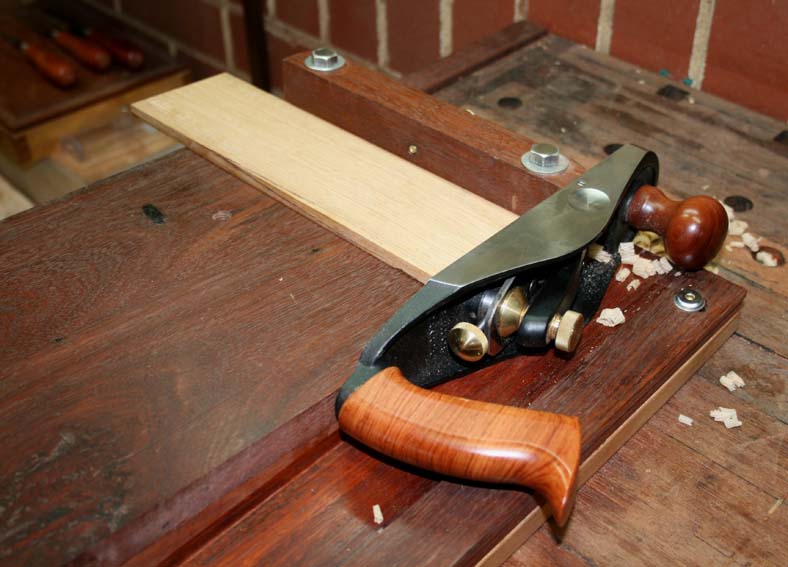
Both the SBUS and the LAS may also be used in other ways, such as the shooting board …
… while some will find the SBUS pretty handy in low angle mode as a large block plane – a sort of Reverse LA Block Plane.
Do I see the LA Block Plane plus handle as a serious rival for the SBUS? No. The block plane is flawed as a smoother, in my opinion. It has a small toe area, which makes registration when starting more difficult. On the other hand, when I do demonstrations at woodshows and need a one-plane-for-all-occasions I take the LA Block plane and handle with two blades.
In conclusion
The SBUS is a fine addition to the stable of Veritas. Within its envelope it is a wonderful plane to use, combining excellent performance with great looks. Form and function .. who can ask for more?
Regards from Perth
Derek
October 2011