
The Veritas Custom Bench Planes
Designing a Plane: Tips on Choosing and Tuning
In this section I would like to walk you through the design selections I made, and why. When I initially thought to do this it was with the expectation that it may help you with your own choices. However, the more I thought about this, the more I realised that this article was not really about the Veritas Custom Planes – although they feature prominently – instead it was about plane design, that is, the choices we all should be considering as we build, buy or use a handplane.
Of course I am referring primarily to metal bench planes here, although some of this does carry over to woodies.
I have two of the bench planes, a #7 jointer and a #4 smoother (above). Lee Valley also offer a #4 ½ smoother, a #5 jack, and a #5 ½ jack/panel plane in the line up.
The jointer was a gift from Rob Lee. Ownership of planes is not my thing. However I enjoy learning and writing about them, and it occurred to me that a comparison with the Veritas jointers would be interesting. I really like the BU Jointer. Despite having built a number of wooden jointers over the years, the BU Jointer is the one I use much of the time. Rick Blaiklock, Director of Research and Development at Lee Valley, anticipated much of my thinking and sent over an assortment of handles and totes, as well as a second frog. Without Rob and Rick this article could not have been written.
Note: through the articles you may notice that the handles and frogs change. That is simply because they were in use at the time a photograph was taken and, unless stated, this does not necessarily imply a preference.
The Frog
The first selection choice one may make is the angle of the frog. Essentially, the frog angle determines the effective pitch of the plane. Higher angles have been a common choice of those planing wood prone to tearout. We shall return to this area shortly.
The frog attaches with two screws. The Norris-type adjuster clips in-and-out.

This makes it a fairly straightforward matter if you wish to swap frogs.

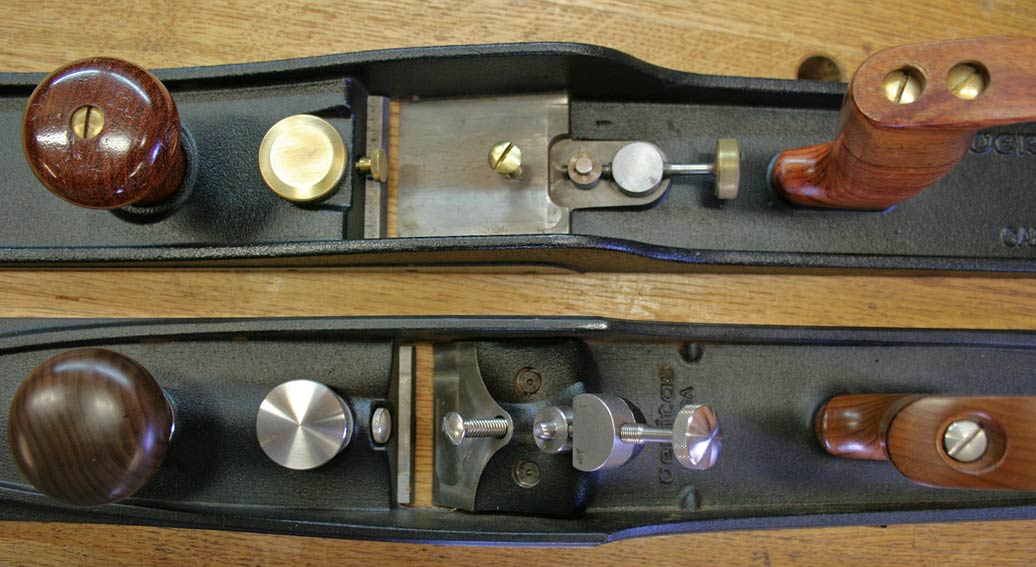
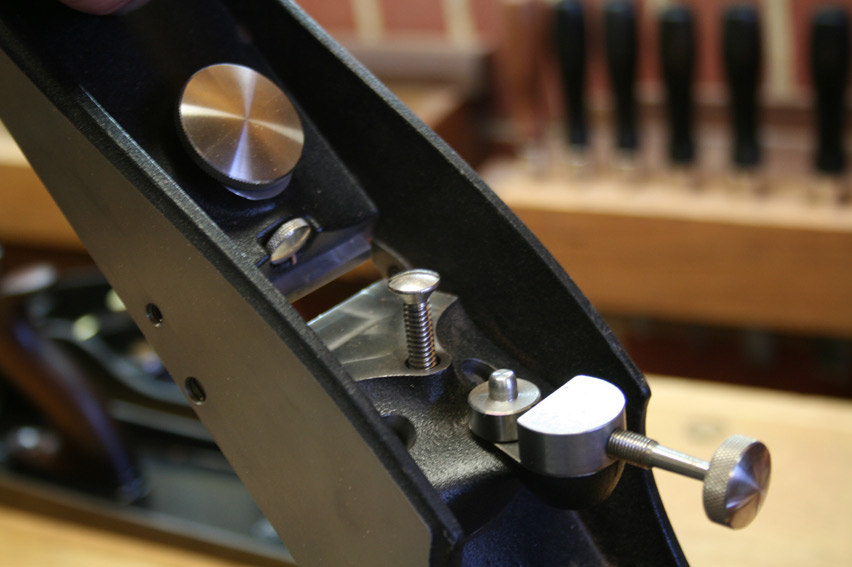
In contrast to the Bailey design, where the frog moves back-and-forth to open-or-close the mouth, in the Veritas planes the mouth is adjusted via a sliding plate in the sole. In the photo above are the controls (tightening and depth stop knobs), while below is the sliding plate for the jointer …

The choices of frogs from the factory are 40-, 45- and 55 degrees – low angle, common angle, and middle pitch, respectively. Buyers may have anything between 40 and 65 degrees, with a $10 fee for a custom size. I did wonder why a 50-degree frog (york pitch) was not among the standard frogs on offer – this had been the angle I voted for when I was asked which would likely be the most requested. My thought was that this would provide a wider range of uses. It may be used with- or without the chipbreaker. There is no appreciable difference when pushing a 45- as opposed a 50-degree BD plane on straight-grained wood (especially when the sole is waxed). The chipbreaker could be used when the grain became squirrely.
I felt I needed to stick with my earlier recommendation, and ordered the jointer with a custom 50-degree frog.
(Note: Interestingly, Chris Schwarz made the same comments in his review of the Custom Smoother in a recent Popular Woodworking magazine, #216. In the end Chris also choice the 50-degree frog angle for his smoother).
Rick also sent along a 40-degree frog. This proved to be an inspirational choice. I imagine that most will immediately think along the lines of a shooting board, however I was also thinking about a comparison of the 50-degree frog with a 40-degree frog, both with- and sans chipbreaker on interlocked wood. A lower cutting angle should create a smoother finish, but could it do this without tearout?
Shortly after receiving the jointer, I decided to purchase the #4 smoother. The frog angle once again 50-degrees, for the same reasons as before. Later I ordered a second frog, at 42 degrees, as it is expected that a lower cutting angle would produce a smoother finish (and, by the same reasoning, the higher the cutting angle the more the cut resembles the result of a scraper. One question I wished to answer is whether this argument holds up?
The Adjuster
The frog and blade adjuster together form the heart of the plane. Veritas planes use a Norris-type adjuster (which differs from those on the Stanley-Bailey planes). This combines the depth and lateral adjuster.
Below: LA Jointer (upper) and #7 Jointer (lower) …
It is relevant to comment here about the Veritas Norris system and the Stanley system of blade adjustment.
The second point of departure is that the Veritas handle sits further back from the frog on the body than does the Stanley handle.

The other issue is that one cannot “point the finger” as one does with a Stanley plane as it becomes tiring without a blade upon which to rest it. Pointing the finger is important, according to Jim Kingshott, who sees this as a method for judging the vertical orientation of a plane, wooden or metal. Garrett Hack and David Charlesworth both appear to be comfortable using a full-fist grip. Here is Vic Tesolin (from Lee Valley) demonstrating ..

Adjusting fine (as opposed to coarse) lateral amounts with a Norris adjuster is difficult. In this regard, I suggest treating the plane as if it was a woodie or an non-adjuster plane, and use a hammer. My preference is a small jeweler’s hammer that weighs a few oz.

Similarly, adjusting for depth of cut is made with one hand on the handle and the other adjusting the Norris knob. This way one can make adjustments to depth of cut “on the fly”. The Norris adjuster is very precise with minimal backlash. Lateral adjustments are different from the Stanley, where the lateral adjustment lever can be reached from the handle. I do prefer the Stanley lever for gross lateral adjustments, however fine adjustments still made with a small hammer as with the Veritas.
The Blade
Veritas offer a choice of O1 and PM-V11 steel. You can choose O1 if you wish, but I think that you would be short-changing yourself. The PM-V11 is just light years ahead with regard sharpness and edge holding. Anyway, with the high silica content of the local Aussie woods, O1 steel is a non-runner for me. My experience with PM-V11 has been good. It hones possibly a little easier than A2 steel (in that the wire edge is not as “chewy and tenacious to remove), and the powdered metal technology results in a fine grain structure, about the same as good O1 steel.
Some have commented that the blades for the Custom Planes look short and, as a result, will not last long. The fact is that it is only the rear end that is shortened, and below the hole they are the same length as all the other Veritas blades (1 ½”).
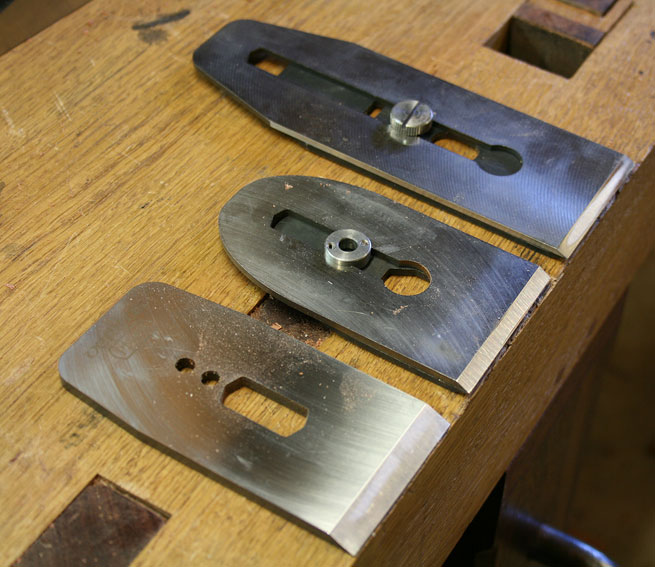
Left to right: BU, Custom Bench Plane, and Stanley Replacement Bench Plane.
Do not forget to hone the underside of leading edge of the chipbreaker. No plane manufacturer does this for you (in my opinion they should as a perfect mating between blade and chipbreaker is essential to performance).
The Jointer required a few strokes on a fine diamond stone to get flat, while the Smoother required no work at all ..

The second area of preparation for the chipbreaker is in honing its leading edge. Chipbreakers (from both Lee Valley and Lie-Nielsen) come standard with a 30-degree leading edge. This is too low for the “chipbreaker effect”. The Kato research suggested a leading edge of between 50-80 degrees. The research by Kees Heiden indicated that 45 degrees is acceptable – and that is what I recommend here.
Just a heads up on the hex key that is included with the plane to adjust the chipbreaker and frog. It is a pesky little item and is possible to do better.
The pattern for hex keys is essentially the same as a torx head. I am sure that you could find a 3/32 torx screwdriver, or screwdriver insert (as I did).


Now why did Veritas not also make the side set screws the same, reducing the number of screw types to just one? (Well, at least you only need to set these once) ...
Removing the chipbreaker …

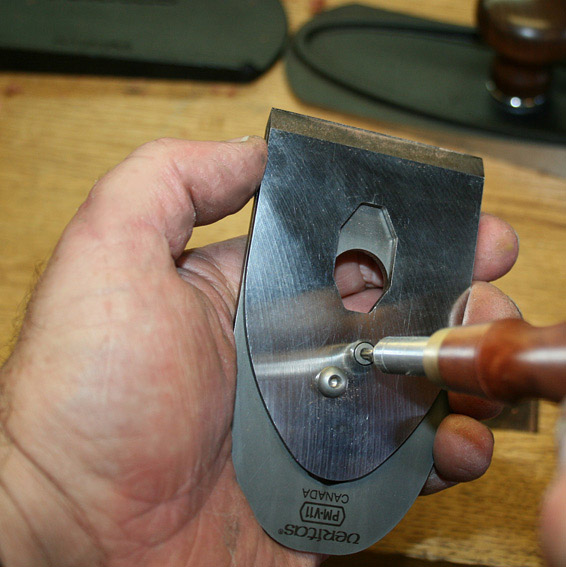
Incidentally, it does not matter which way around the blade carrier is positioned. What is important is that the small, embedded screw locks the blade carrier to the blade, and the button-head screw locks the chipbreaker to the blade carrier/blade. The embedded screw also prevents the chipbreaker swiveling.
Do not remove the screws – just loosen them. Contrary to advice, you will remove the blade carrier. Why? Because setting the chipbreaker requires minute amounts of placement, and it is something one must do by eye.
Once the blade has been sharpened, and the chipbreaker is to be replaced, you are going to reverse the process. However, an observation by Chris Schwarz. Chris suggested first securing the blade carrier screw, and then the chipbreaker screw. Doing so the other way around will cause a tiny bit of movement of the chipbreaker, which is relevant when one is talking in fractions of a millimeter at the leading edge of the blade.
Below, loosening the screws ..
Now, if you hold the blade and chipbreaker apart with your fingers …
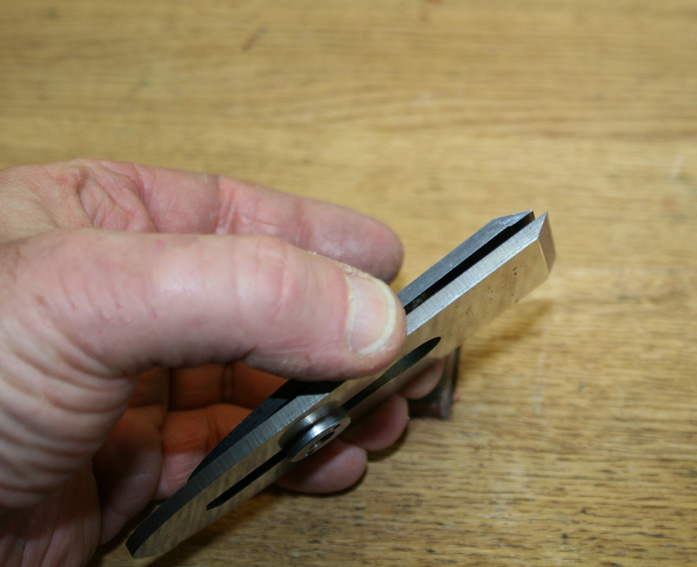
… there is sufficient space to slide the chipbreaker forward and over the end of the blade without touching the edge.
Of course, you will reverse this process when bringing them together. Just ensure that the slots in the blade carrier align with the slot in the blade.
Last point when removing or replacing a blade, tilt the body until the bed of the frog is horizontal for increased control …
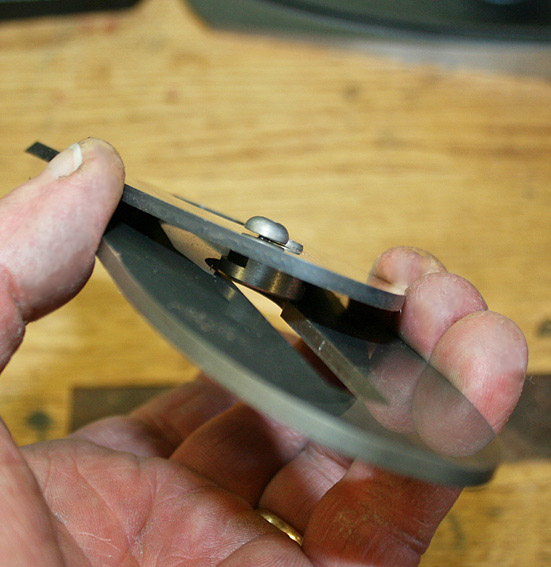
Setting the chipbreaker for ultimate performance

Above is a typical setting for a closed up chipbreaker. This is in the range of 0.4mm – 0.5mm. After a little practice you will be able to do this by eye.
If you inadvertently set the chipbreaker too close, all that will happen is that the plane will struggle to cut. You will find the shavings are excessively crinkly. When the chipbreaker is working, that is, bending the shavings into a Type 1 formation (i.e. straight up), most woods will create shavings that straighten (where before they may have been curly).
It is important to recognize that the use of a chipbreaker is a choice. The Veritas planes may be set up without a chipbreaker, that is, as single-iron planes.
As mentioned in the introduction, the Custom Planes began life as a single iron configuration. There are many bevel down planes that work this way, and do so exceptionally well: Lie-Nielsen offer high angle frogs, HNT Gordon offer planes in either 55-degree or 60-degree format, Brese, Old Street, and Konrad Sauer, amongst others, all prefer at least 50 degree beds for their planes, all of which sport single-irons. Among bevel up planes, it has been one of their attractions that they can be used with a high-included angle simply by using a bevel with a high angle, such as 50 degrees, which will create an included angle of 62 degrees.
The attraction of a single iron plane is that it has fewer parts, and is less complex and much easier to set up. Setting a chipbreaker has a learning curve, and having a plane that performs as well sans chipbreaker will make for less frustration for some. The question is whether the chipbreaker is worth the extra effort? Or is choosing a single iron plane short sighted?
Handles and Knobs
Are you aware that the new Veritas handles for the new bevel down planes fit the “old” bevel up planes? Yep, they do.
I imagine that this is not immediately apparent since the new handles appear to require a single bolt, where the old handles required two bolts.

This thought is but skin deep. Below the handle are two bolts – just that one is a stub bolt used to align the handle, and the other holds it secure …
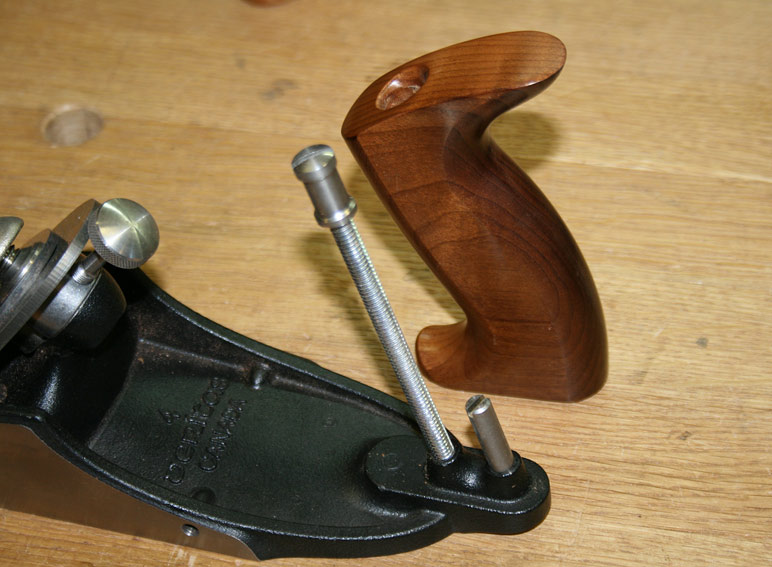
I decided to replace the handle on my BUS.

This required shortening one of the rods (for the stub), and cutting a short length of brass pipe as a spacer for the other rod (since the new handles use a longer screw top – above, the new steel vs the old brass screw tops).

Below is the handle on my BUS (which may not look familiar as I modified it by machining the sides).

A Fence for Jointing
Lee Valley has supplied all the Custom Planes with threaded inserts on both sides of the plane bodies. These will accept the fence, as first used on their Rabbet (rebate) plane. Add a parallel subfence and it will plane square edges. Add a tapered subfence and it will plane tapers, such as raised panels.

Shooting
You would think by now that we have enough choices for shooting planes! Well, here is another one.
Unlike the Veritas BU Jointer, which has a raised and reinforced toe, the sides of the BD plane are flat and square.
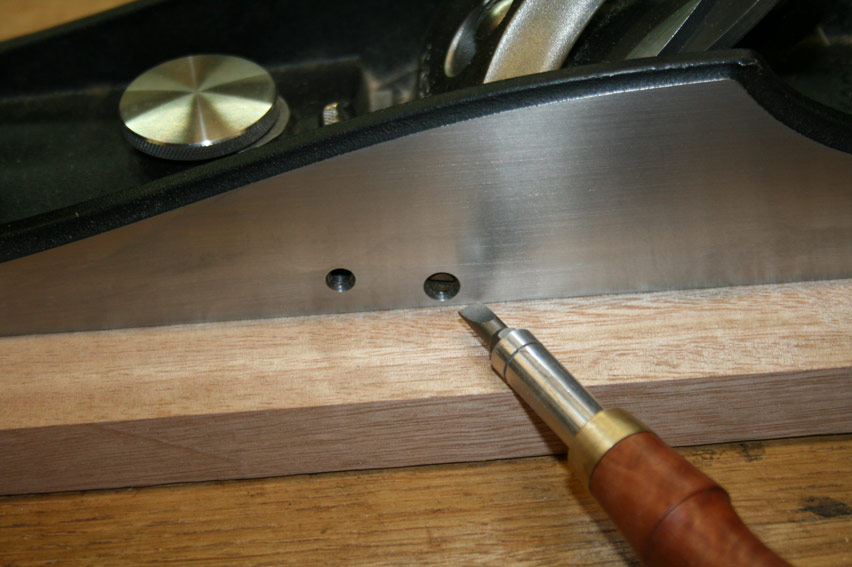
Step 1: While you can use any angle bed, this is where the 40-degree frog will perform better on end grain. For the purposes of experimenting, this was added.
Step 2: The bad news is that the BD plane is uncomfortable to hold and push on a shooting board. The good news is that there are two threaded inserts where one may add a knob against which to push.
If you want to do this, the threads to obtain are 10-32.
Here is the knob I turned (don’t ask me for dimensions – but do not make the lower end extend over the edge of the sole).

I found that the forward insert places the handle too far forward, which unbalances the plane. The rear insert is just right.

And it works rather well …

Part 3 will deal with the selection of handles and knobs.
Regards from Perth
Derek
January 2015