Chris' Moxon vise ...
Link: http://blog.woodworking-magazine.com/blog/Declaring+Victory+With+The+Doublescrew+Vise.aspx
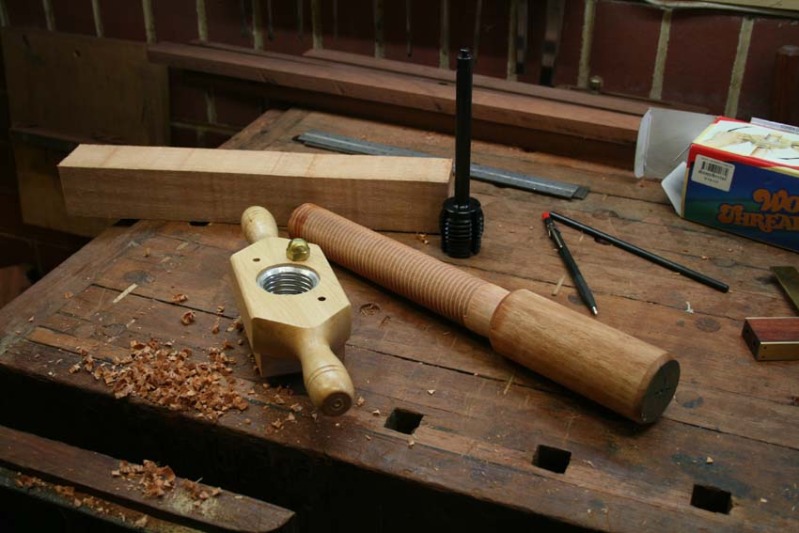
I kept putting aside, partly because it required making wooden screws, which I had not done before. I went so far as ordering a kit to make 1 1/2" diameter screws, and then it languished in a drawer for several months. Incidentally, I bought this from my local Carba-tec store. It looks the generic Chinese tap-and-die set.
It is not as though I could not use a vise such as this. In fact I needed this weeks ago when I began building a couple of military chests with many dovetails (carcases and drawers).
Inspiration came a few days ago I received an email from LN (Australia) asking me to be a co-presenter at their first workshop in Perth. This will involve dovetailing, so I decided to get off my butt and make a Moxon dovetail vise. At least I would have flash equipment ...
My thanks to Chris for his recent (December) article in Pop Wood.
What I have come up with has a little variation, not much, but enough to make this an exceptionally useful tool.
I built the screws out of some nondescript hardwood that I have no name for (but looks like a gum). It was all I had that was thick enough. Fortunately it all went well - it turned well, and did not chip when making the threads.
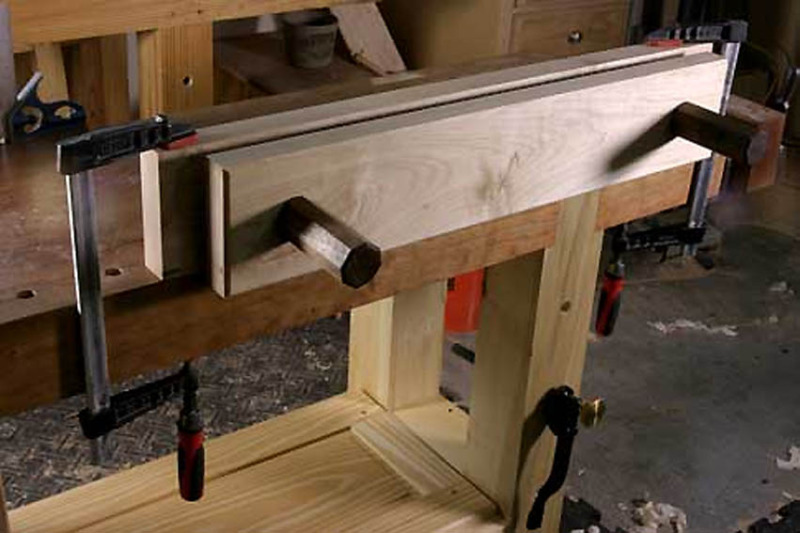
The screws are set 520mm (20 1/2") apart, but the total base is 840mm (33") long and 105mm (4 1/8") deep. The face is 110mm (4 1/4") high.
What's different?
The first item is that I have added "ears" to the sides of the base.


These make it easier to clamp to the bench top (than attaching it at the upper side of the vise, per se).

There is also a wider 75mm (3") wide rear support, which could be used with a hold down.
Of course the vise is simply to hold a board at a comfortable height for sawing. It does this very well. I was surprised how well the bare wooden faces hold the board. I was planning to add chamois leather, but thiis does not appear necessary.

Now in the background you can see what looks like a wooden "I-beam". It is ..

This was also just scrap, but turned out 370mm (14 1/2") long and 90mm (3 1/2") deep. It is sized to be 1/2" taller than the vise.
320 grit beltsander belt is attached on both sides. This provides anti-slip.

Stop using that handplan to rest the boards when transferring tails to pins! Use this rest instead ...
Raise the Pin Board 1/2" higher that the edge of the vise.

... and add the Tail Board.

But wait ... there is more!
I need to transfer the tails on a board that is too long to fit across my bench, and the bench is too narrow to clamp the board at the end (without resorting, as I usually need, to some Heath Robinson creation).
The Moxon vise has the length and the rigidity to provide a stable and secure hold on the boards while you transfer marks.
Clamped at one end ..


... and clamped at the front ...

You can also see the rest clamped to the edge of the bench, in line with the vise.

Now place the Tail Board on top ..

I was again surprised at the stability of the Tail Board which was only held down by its own weight. However, I recommend that one add clamps at each end.

Now you can tap it into perfect alignment, ready for knifing the lines.
Another view ...


