

Introduction
Handplanes are often described as being “a holder for a chisel”. No where else does this appear more true than in the case of the router plane since the blade is so visible and unsupported. These planes lack a throat or a mouth and rely on the rigidity of the holding mechanism for a stable cut.
The job done by the router plane is essentially to chisel a groove (with the grain) or dado (across the grain), and to a specific depth so that the floor is even throughout.
Before the advent of cast iron, router planes were constructed of wood.
These were called an Old Woman’s Tooth (sometimes Old Hag’s Tooth), since they resembled the single-tooth grin of an old hag. Below is an illustration of a typical classic OWT.
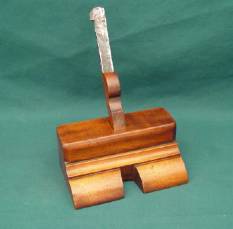

Vintage and shop made OWTs
According to Patrick Leach, Stanley introduced their #71 in 1885 (manufactured until 1973) and the #71 ½ in 1896 (manufactured until 1949). These differed from the OWT in having an angled bevel end to the blade. The blades lock into position by a clamping collar, which is tightened by a thumbscrew. This serves to raise or lower the blade.

Stanley
#71
The #71 ½ differs in having a closed throat, that is, it lacks the arched front of the sole forward of the cutter. The #71 provided an adjustable shoe to close the mouth.

Below is a picture of my #71 ½ router plane, which is a patternmaker’s copy in brass (lacking the height adjustment mechanism). Such copies were quite common about 50 or so years ago.
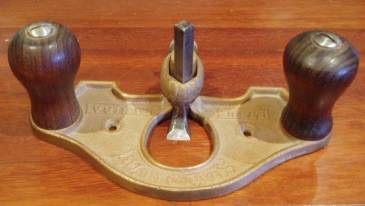
Patternmaker’s
brass copy of the Stanley #71 ½
An
adjustable fence was added to the #71 in 1939 (pictured above). There
is no provision for this on my copy #71 ½, which is based on
an early model, or any models earlier than this date.
One
other router plane worthy of mention is the Stanley #271. This dinky
little router plane is extremely useful in small areas.

Stanley
#271 router plane (alongside #71 for perspective)
All the
router planes, #271, #71 and #71 ½ included, are capable of
being used as well in a bullnose position, that is, by rotating the
clamp to the other side.
Features of the Veritas Router Plane
Veritas describe their router plane as “the Stanley #71 reborn with radical improvements”.
There
are a number of special features for comparison with the Stanley
version.
The plane is made from very durable ductile cast iron (compared to the fragile grey iron of the Stanley planes).
The blade-clamping collar is spring-loaded, which holds the blade in position while the collar is loosened (as it must when raising and lowering the blade). The Stanley lacks this feature, and blades will drop out of position as soon as the collar is adjusted.
Blade adjustment on the Veritas travels 1/32” per turn. The blade may be adjusted for a depth of 1”.
Below the height adjustment knob are two brass locking rings that are the Depth Stop Knobs. Stanley does not provide a similar arrangement. Use of the depth stop is illustrated further on in “Hinge Mortising”.
The fence, which is an optional extra, is significantly easier and more precise to adjust than the Stanley fence. Like the Stanley, the fence is reversible, with one side for straight planing and the other side for curved planing.
Both planes come with three blades – ¼” and ½” straight cutters, and the ½” pointed cutter (or V, as termed by Stanley). The original Stanley blades were one-piece constructions, while the two ½” Veritas blades have removable cutters to facilitate honing.
Both planes have countersunk holes for the attachment of a shop-made (wooden) auxiliary base to increase the width of support or act as a fence. Note that the depth-of-cut will be reduced by the thickness of this base.
The Stanley base is 7 5/8” wide, while the Veritas is 5 5/8” wide (my measurements). The Stanley weighs 2 5/8 lbs. The hardwood knobs on my English-made #71 ½ measure 7 7/8”. The Bubinga-handled Veritas has a wider positioning at 8 7/16”. Weight is 2 lbs.
Veritas Router Plane
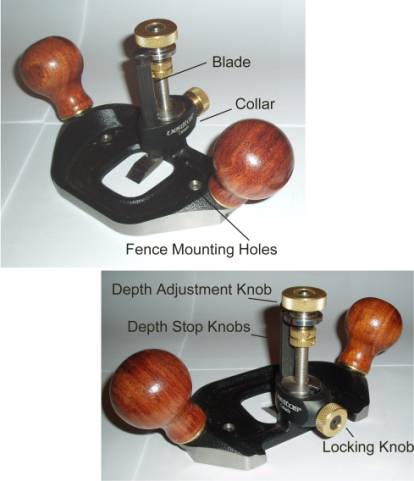
…
and fence

My first thought on unpacking the router plane was just how jewel-like it was. The blend of shiny iron, bright stainless steel, black paint and brass knobs together with a compact, yet heavy body was quite striking.
The finish was faultless. All edges had been chamfered. I like the look of Bubinga, although I was not mad about the shiny finish. I would remove the lacquer and finish with oil and wax.
The Blades
The plane
comes with three blades, identical to the Stanley. They comprise a ¼”
and ½” straight cutter and a ½” Pointed (I
prefer the Stanley “V”) cutter.
They are slightly
tapered in thickness, increasing towards the rear of the cutter. All
blades were sharp enough out of the box to be used – but of
course no sensible handtooler would do that, and all blades were
honed to 8000 waterstone prior to use.
Both the straight ½”
and the V blades have removable cutters. These attach to the shaft
with a hex-headed bolt that sits flush within a recess. A hex key is
supplied with each blade.
The ¼” cutter is not
removable and, while I am unsure whether there are plans afoot for
this blade, I cannot see any reason why it should not be constructed
any differently to the other blades, that is, that the bladed section
be removable from the shaft (perhaps with a smaller hex-headed bolt
with a similar sized hex insert?).
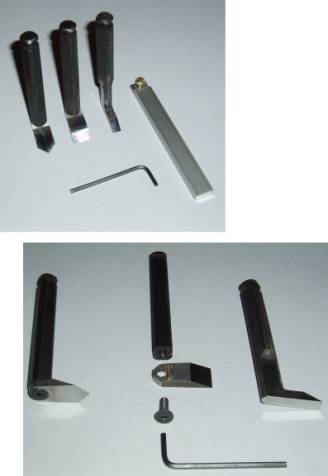
The shaft-cutter join is orientated by a series of serrated-like grooves, which may just be made out in the picture.
Do the LV blades fit the Stanley router planes?
This is the question that all owners of vintage Stanley and Record router planes are asking! The answer is yes - they do fit. There is a qualification, however. The LV blades are ¾” longer than the Stanley blades I have (Note: mine were made by St James Bay, although I expect them to be faithful reproductions).

LV at top and Stanley below
… producing this difference …

Notice how the depth adjustment knob is maxed out on the Veritas blade. It just fits!
Honing the blades
I have mixed emotions about the solutions Veritas have arrived at here. There is clearly some innovative thought here, but there are also a few missed opportunities.
Freehand honing:
It
appears that honing is expected to be done freehand. A Blade Holder
is provided onto which the removable ½” and Pointed (V)
cutters are attached for better handling. This is reasonably
satisfactory for those that are comfortable with their handskills,
but there are a few points that could be improved.
The Pointed
(V) cutter is bevelled at 45 degrees at each rear corner to enable it
to be attached at the same angle as the forward (V-ed) bevel, and
enable it to be honed in a forward direction.
|
|
||
|
Straight cutter |
|
V Cutter |
The ¼” cutter is at an awkward angle to hone, and the only solution is to raise the waterstone to a height such that the blade may be held underneath to achieve the desired bevel angle.
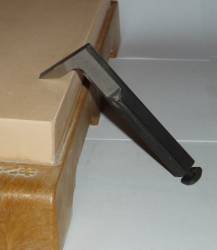
¼”
cutter
Using a honing guide:
Bearing in mind that LV manufactures a
terrific honing jig (the LV Honing Guide Mk II), it is reasonable to
expect that LV might have developed a link between the Router Plane
and the Mk II.
When I attempted to use the Mk II I
encountered a few minor (but nevertheless significant)
difficulties.
When either the ½” or the pointed
(V) cutter was screwed into the blade holder, the blade holder would
not sit flat in on the Registration Jig of the Mk II. The problem is
that the screw provided was too long and projected beyond the base of
the Blade Holder. This was an easy fix – just file it down.

Complicating matters is the fact that both cutters are not parallel and flare slightly wider at the business end. Consequently, the Blade Holder cannot be used to register the blade for squareness. A line could be scribed across the Registration Jig at the point where the Registration Stop is positioned for a 25° bevel, and the edge of the bevel aligned with this (or one can do this by eye).
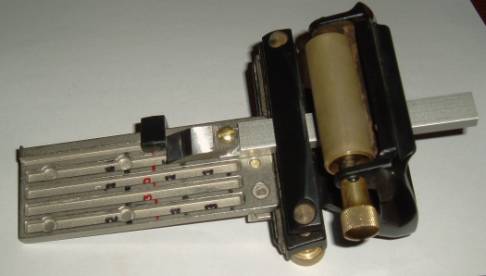
Aligning
the ½” cutter by eye
Since the back of the cutter now sits on the projecting lip of the Blade Holder, which places it above the Registration Jig, the angle that it hones at is not the 25 degrees on the Jig. I estimate that it is probably closer to 27 degrees.

Aligning
the V cutter by eye
The Pointed (V) cutter can also be
honed in the Mk II but, again, with similar compromises. With the
front of the bevel against the stop (or scribed line), and at the 25
degrees setting, the bevel is honed at about 23 degrees.
The
following picture illustrated honing the ½” straight
cutter on a waterstone using the Mk II.
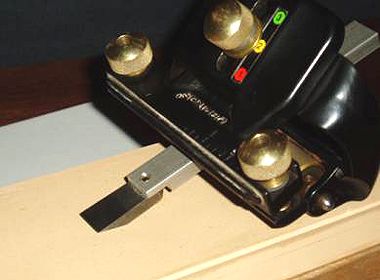
LV
Honing Guide Mk II and ½” cutter
In my
view the sharpening system has not been thought through sufficiently.
There is a promise of some really creative thinking in the form of
removable cutters, but it just falls a little flat when the issues
are broadened out.
Note: The V cutter does not fit into the LV
Honing Guide Mk I blade angle setting jig (the cutter and Blade
Holder are too short), but otherwise may be used in the Mk I honing
guide as long as you build a blade projection jig (to re-set the
bevel angle).
So the
questions remain, “what is the Veritas Router Plane like to
use”? And “Is this a necessary tool for the workshop, in
other words, why should I own one”?
I have included
below a selection of projects or joints that use the router plane,
and will discuss my experience as we progress through these.
The
router plane should be seen to be a specialist handplane. It will not
be used in isolation, but together as part of a team of tools –
I almost wrote “handplanes” for “tools” but
the fact is that the router plane fits in well with power tools as
well, such as cleaning or fine tuning up the floor of a dado that has
been trenched with either a dado blade on the tablesaw or a power
router.
There are also other handplanes that overlap in
function, such as a plough plane when grooving (e.g. Record #044) and
dadoing (e.g. Stanley #46). However, these planes are unable to work
into stopped ends, such as a stopped groove for the bottom of a box
or a drawer. One does not generally associate a router plane with
cutting tenons – and it is true, it cannot cut a tenon –
but it can do a fine job of planing the tenon face parallel to the
face of a stretcher.
A Simple Mortise – a good first project
This first joint I made with the LV Router plane was a simple mortise for a saw tang. I had been thinking about replacing the handle on my Z-saw Dozuki for a while. This seemed like a good opportunity and I had a piece of Camphor that appeared ideal. Here are the components and tools used.
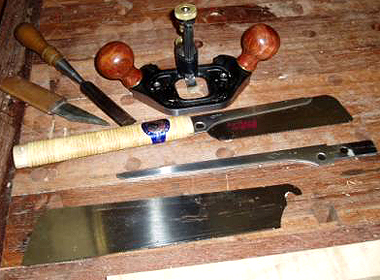
The
lower saw components are for illustration.
The Dozuki for
remodelling is above these.
The first step was to mark out the mortise for the tang and then score the waste with a chisel. Note the very slightly wavy outline, which is caused by the knife blade following the grain. Still, this will be hidden when the two sides are sandwiched together.

Then it is time to use the LV Router Plane to remove the waste. The ½” straight cutter is used here – preferred for planing with the grain.
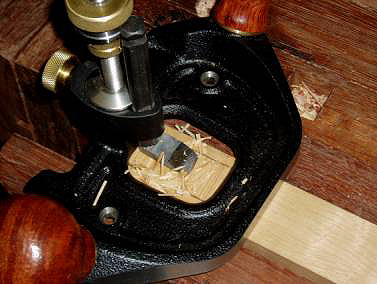
This side should end up looking like this.
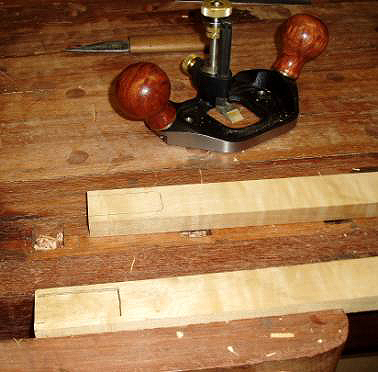
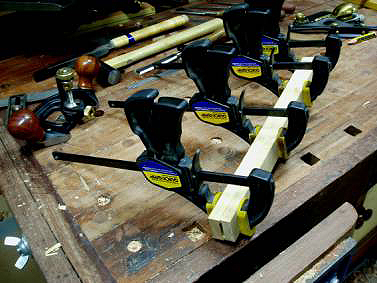
Do the same on other side, and then glue the two sides together.
Finally, slide in the tang, fix in place with a little epoxy, and shape the handle with a spokeshave and a scraper. A bit of oil and wax for the finish, and the final result is…

A Stopped Groove in a Dovetailed Box
One of
the greatest challenges in building a box made with through dovetails
are not the dovetails themselves (yes, I know they are supposed to be
the be-all to end-it-all). The greatest challenge is really the
stopped groove that holds the box’s tray bottom.
In a
box made with half-blind dovetails it is possible to hide the open
ends of a complete groove in the dovetail itself. But one cannot do
this with a through dovetail since a full groove will leave gaps in
the box ends. The router plane is the ideal tool to create a stopped
groove.
First mark the groove sides with a cutting gauge.
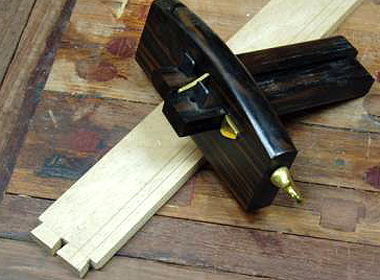
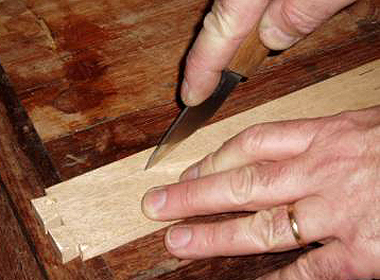
Knife the lines about a 1/16” deep
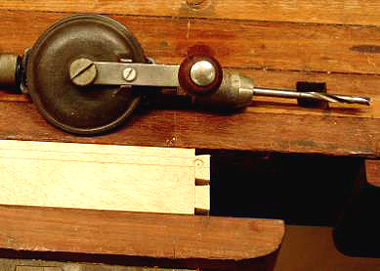
Drill the stopped end (an alternative is to chisel a small mortise).
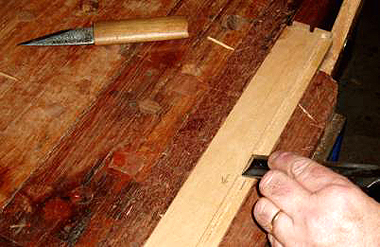
Then chisel out the groove.
Now it is time for the router plane to remove the remainder of the waste. The straight ¼” cutter is used.

Although the router plane is capable of removing the waste without the aid of a guide, it is advisable to use the fence as well. The end piece on the left, below, shows how I gouged the sidewall. With the fence in place, the router plane will make shavings to rival those of a plough plane.
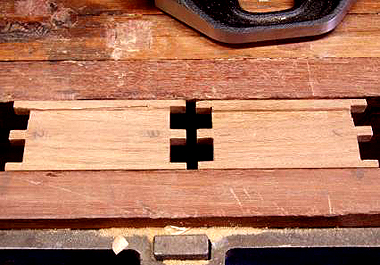
In spite of the slip above, the groove proves to be a nice fit for the bottom piece.
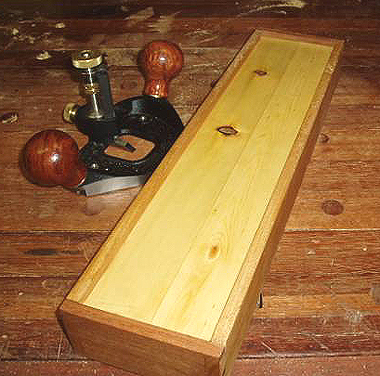
And here is the finished box (and no groove holes!)…
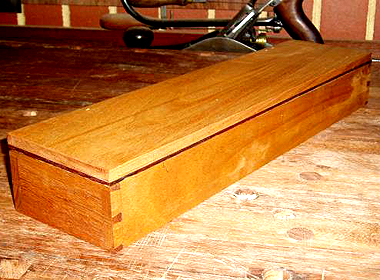
We have not finished here yet, and will be back a little later.
Sliding Dovetails
Cutting a sliding dovetail is basically just a variation of a dado. A more complex dado, oh yes!
Basic plan of action - The tail (male) section is made with a saw and chisel, then cleaned up with either a #140 skew block plane (or shoulder plane) or a specialist dovetail plane (which has a sole angled to match the tail profile).
|
|
|
|
|
1. Mark the outline |
|
2. Cut the shoulder |
|
|
|
|
|
3. Chisel out the waste |
|
4. Clean up with a #140 skew block plane against an angled fence |
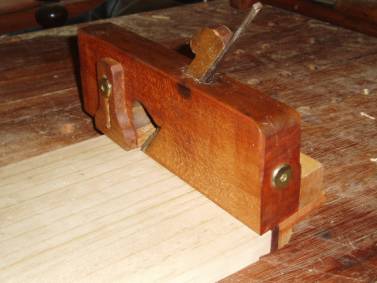
...or
use a dovetail plane
… and now on to the pin (female) section of the joint.
First mark out the pin from the outline of the tail.
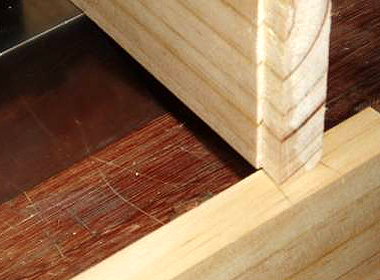
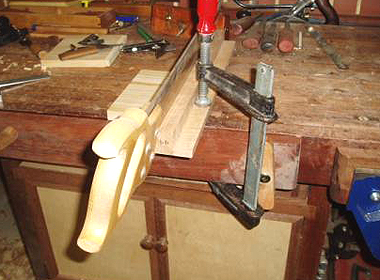
Then cut the shoulders to depth with a backsaw against to a guide angled at 1:6
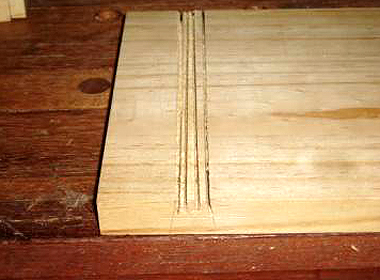
Cut through the centre to make it easier to the waste.
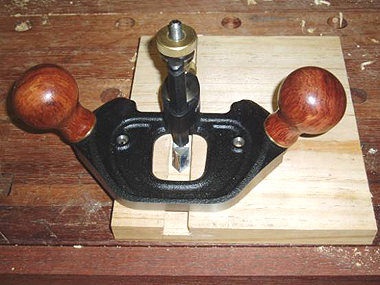
And now remove the waste with the router plane. You are going across the grain, so use the V blade.
If the pin section needs to be widened slightly, use a Stanley #79 side rabbet plane.

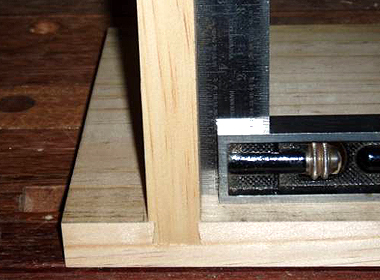
Finally fit the tail into the pin…
Straight dado
After the sliding dovetail, a straight dado is rather easy.
Again, mark the lines first and score them as deeply as you can with a sharp knife.
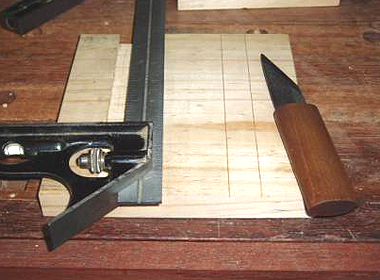
Create a fence to saw the shoulder.
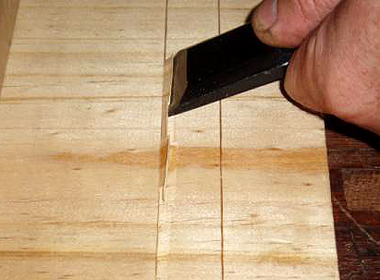
Saw the shoulders to depth, then saw the waste section for easy removal.
|
|
|
|
Knock out the waste …
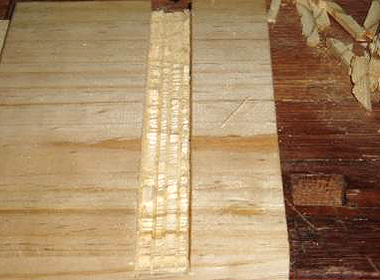
…and, finally, it is the turn of the router plane to smooth out the bottom of the dado.
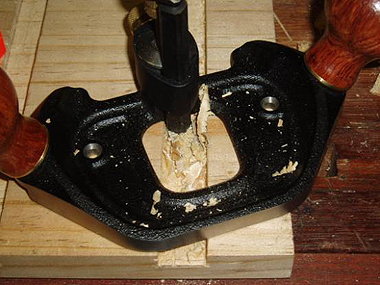
You can take quite large and clean chips with the V blade.
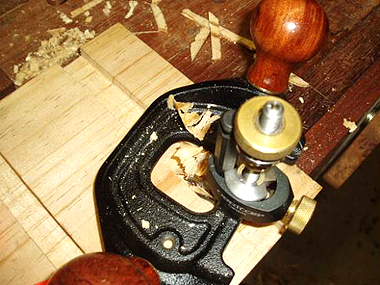
To avoid breakout at the ends of the dado, always enter from the outside. Never complete a cut from the inside of the dado.
An additional strategy is to chamfer
the end of the dado to the final desired depth.
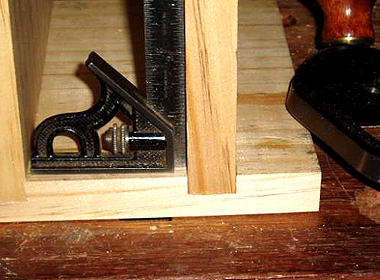
Now for the
final fit …
Mortise and Tenon joints
The mortise and tenon joint is probably one of the most commonly used in furniture. It is not one that I immediately think of using a router plane to create but David Charlesworth does write about this, so I have included it here as well.
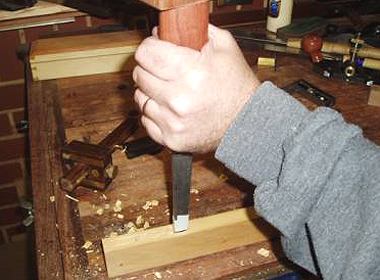
The router plane is used on the tenon, but we have to have a mortise first (one always forms this before the tenon), so here I am mortise chisel in hand...
Making the tenon begins with marking out...
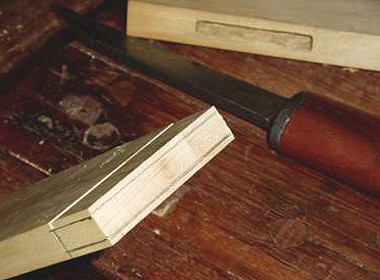
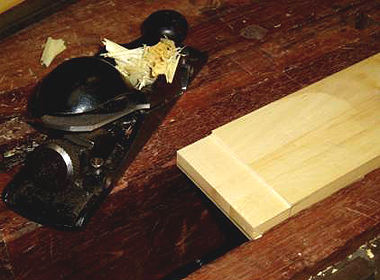
The shoulders are too shallow to saw off, so I plane them off with a Stanley #140...
The router plane has sufficient registration that additional support is not required.
But if it were, then screw on an outrigger of the same thickness as the tenon.
The #140 is my preferred way of cleaning up sawn tenons, but I discover that the router plane has an advantage of producing perfectly parallel faces. The router planes faces are not as smooth as those finished by a #140 and the tenon slides in with gentle persuasion.
|
|
|
|
|
|
|
|
|
|
|
Be
careful here – tighten the
rings too much and they will be extremely difficult to loosen
with fingers alone. A few times I resorted to inserting the hex
keys into the holes in the circumference. It helps to back |
|
|
|
|
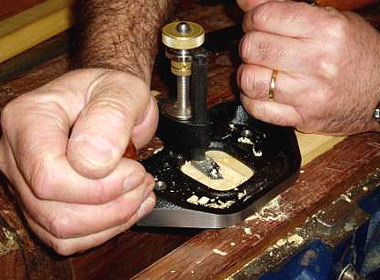
Large hinge mortises like this are relatively easy to make. It is much more difficult to do tiny hinge mortises, such as the ones on the box I made earlier in this article. It is tempting to just rely on a chisel (and often I do just that) because this is now a very fiddly job. Nevertheless, the router plane, even one the size of the Veritas Router Plane, can make for a better fit.
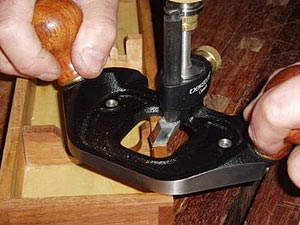
Use
the V blade as this makes it easier to manoeuvre
inside the mortise.
Note – as an alternative to the above, where manoeuvrability is difficult and more support is necessary, then the router plane may be used with the blade in a lateral position, as in the picture below. For our mortise, however, while could be a need for more support (the sides could be packed to achieve this), there is too little room to use the blade lengthwise. So the V blade used obliquely is still the best option.
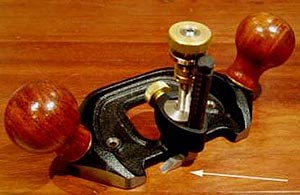
Blade
in the lateral position
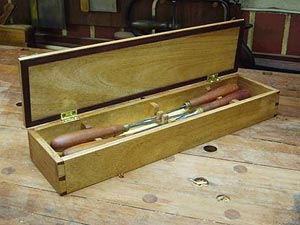
Finally … a box for my dovetail chisels.
I also cannot compare the blades of the two planes since I do not have original Stanleys in my collection. Nevertheless, there is a world of difference between the blades from St James Bay (with which I have been happy in the past) and those from Veritas. I am unsure whether the Veritas blades are A2 steel (since this is not mentioned anywhere) but they hold a keen edge and are beautifully machined.
I am less happy with the thought given to the blade sharpening methodology. As I indicated earlier, the ¼” blade should also have a removable bevel end, and all the blades should be configured for the LV Honing Guide Mk II.
That said, the blade adjustment system of the Veritas is a huge improvement over the Stanley. The spring-loaded collar is inspired. Clearly thought has been given to what happens when you need to insert a blade or alter blade height in the real world. There is both precision and reliability about this one. The ease of inserting blades and adjusting blade height is a Very Big issue when using a router plane. An Even Bigger issue is the ability to set a depth to an exact height. The Veritas router plane does this … well, precisely.
I could not say that the Veritas actually felt significantly different to the Stanley when held. The balance is much-of-a-muchness for the two. The slight extra width of the Stanley was not noticeable as the knobs are roughly the same distance apart.
The fence on the Veritas is a beauty. It adjusts easily and can be set precisely. But this is another area where I feel Veritas must receive a back-handled compliment. They have designed a terrific product in the fence, but it really should not be an “optional extra”. I cannot see how a serious router plane user could live without one.
A few small niggles about screws. Both the Blade Holder and the fence mount use a slotted screw to attach the fence mount. It makes more sense to me to use hex bolts here as well and so maintain uniformity. Overall, the niggles are few and the positives are many.
In summary, the word that keeps returning to me when I think of the Veritas Router Plane is “Precision”. This is a precision instrument that grew from a crude tool. It remains a basic tool at heart, and indeed one does not actually need such sophistication in a tool such as this. However, once used there is no turning back.
Postscript
Comparing the Veritas/LV and LN router planes

Thomas
LN loaned me both the LN router planes a few years back when I was
preparing an article for the Australian Wood Review (“The
router plane in the woodshop”). I got to use both the LN and
the LV alongside each other for some months. They are both
exceptionally well made and would make anyone thrilled to own either.
It is only when you use them together that differences begin to
emerge.
I
really liked the depth adjuster on the LN. This is a square ring that
slips around the blade and is adjusted with a screw.
The LV
uses a split ring ..
After
a time I found the LV depth stop now to be excessively fiddly. The LV
split ring is either too tight or too loose, and the upshot is that
setting is a bit more effort that needed. This does not affect the
use of the LV. Nevertheless, I replaced my LV depth stop with one
similar to the LN. You could do the same. It is very easy to
make.

The
article is here:
http://www.inthewoodshop.com/ShopMadeTools/DepthStopsForVeritasRouterPlanes.html
That
said, the LV scores over the LN in all other departments ....
1.
The LV has the better blade choice and the better blade design. At
the time I had the LN it came with only a single 1/2” blade for
the #71 and then uses the 1/4” and 3/8” blades for the
small version, which required a fiddly adapter. The LV has a full
size 1/4”, 1/2” and a pointed, V cutter.
Most of
the time I use the 1/2" blade The LV is easier to hone than the
LN as it can be removed from the shaft and, using an accessory, honed
as if a plane blade.
The blades of both LN and LV are very
stable once set up. The LN is square in plan while the LV is a
hexagon.
2. The LV's closed mouth affords better registration
and control when on narrow work.
3. The LV's fence is easier
to adjust, has better registration, and has a wider range of
adjustment. This fence is used to convert the router plane for plough
plane use. Keep in mind that LN follow the traditional lines of
Stanley, and the original Stanley fence design was never a strong
point.
4. The LV has better thought out blade holding (such as
the spring-loaded holders) to avoid blades dropping out when you
adjust or change them.
The other difference between the LV and
the LN is the positioning of the handles. This is not a statement of
better-or-worse. Some will prefer the inboard feel of the LN, while
others will prefer the wider stance of the LV.
In summary,
both are excellent tools, but my preference goes to the LV.
Regards
from Perth
Derek