
Building the Drawers
The drawers for this chest are a little different from the usual. A little bit more of a challenge. They are still essentially the same construction as other drawers I have built: handcut dovetails, half-blind at the front and through dovetails at the rear, and slips for the drawer bottoms. Where they differ is the drawer front is curved – not dramatically, but a subtle curve to soften the front elevation. The sides of the cabinet also curve, again this is a gentle curve, but enough that all joinery involves compound curves.
The drawers must fit within the curves of the cabinet. The drawer fronts include a taper to each side and a shallow bow at the front. I chose to make them from solid timber (figured Jarrah) rather than laminating (steam-bending was not an option as the boards were many years old and very dry). Why not laminate the curves? I was not confident in obtaining a consistent curve for all 8 drawers, and the lamination meant that it would not be possible to plane them uniform.
Solid timber is more work, and probably not the more cost-effective way of building bow drawer fronts.
I had these two great Jarrah boards. Book-matched. Well, that does not count much with drawers, although it should make it a little easier to match the figure and find a visual flow. The down side was that I just managed to squeeze out enough for the drawers. No second chances.
Some of the boards had a load of pitch holes, and these would need to be filled.
Jointed and four-squared (the reference sides are important), the blanks are 38mm thick. The drawer fronts will end up 22mm in thickness.

It is possible to make out the yellow boundary lines above. The inner line - that fits against the front drawer blade - comes from a template made for that specific drawer (#1). The outer line comes from the template for drawer #8. It will be used for all the drawers to ensure that the outer curve is consistent through the drawers.

The drawer sides have their own issues. The choice is to keep the sides thin, a nominal 3/8”, rather than cope thick boards to fit the curved cabinet sides. To do this, the sides are dovetailed at an angle. To fit, the sides are a parallelogram in shape, rather than a simple rectangle.

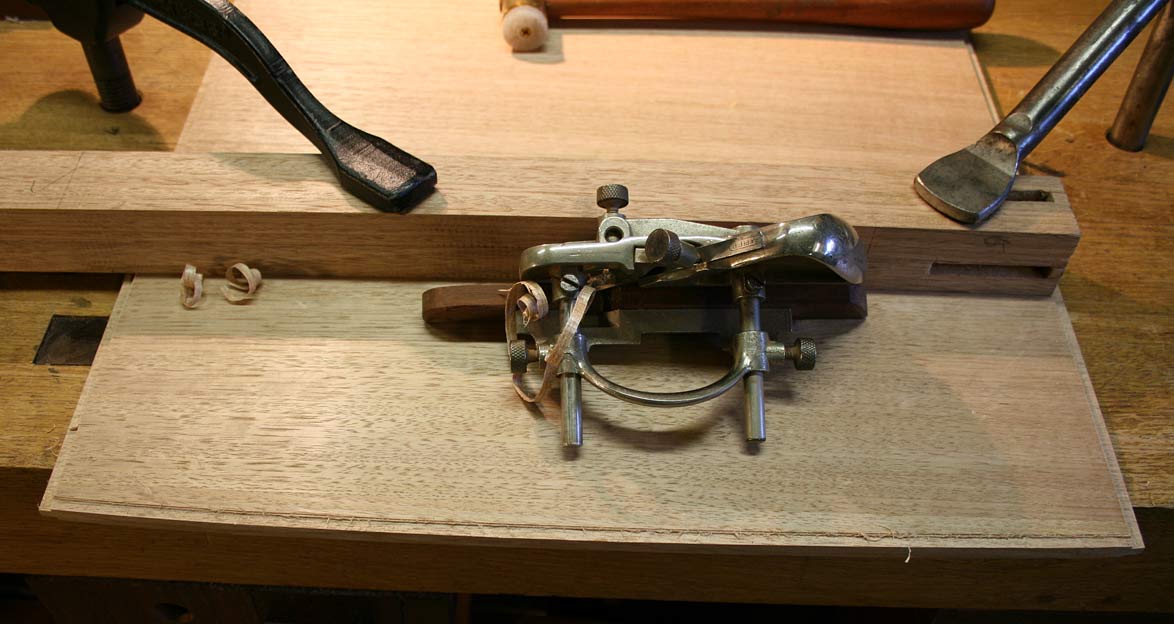
The inner curve was created with a bandsaw and then cleaning up with a shoulder plane (plane half way in from both sides to avoid any spelching) …

… and finish with a spokeshave.
The other side was left square, and will only be shaped at the very end. It is needed to retain a reference side to check all is square.

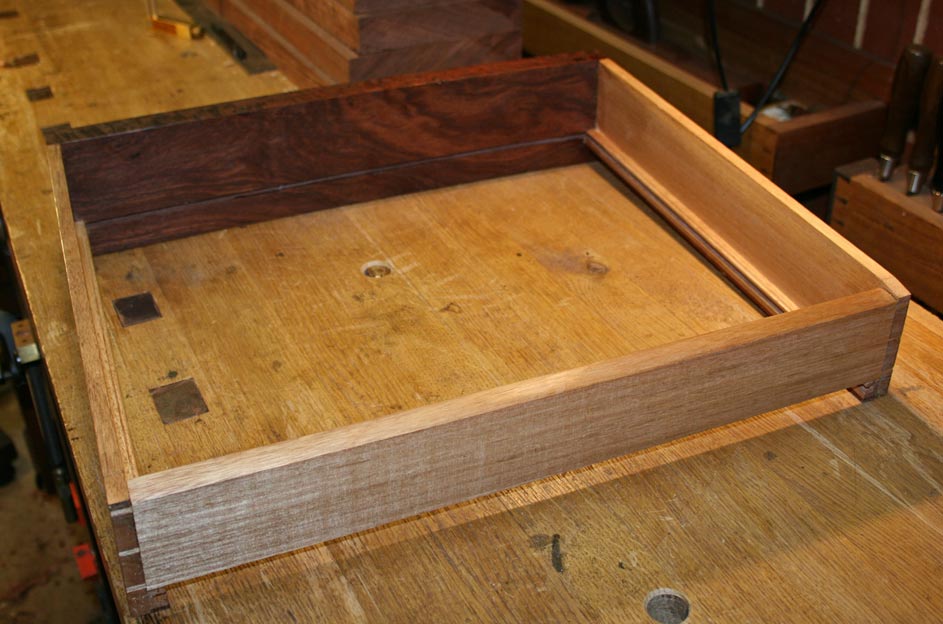
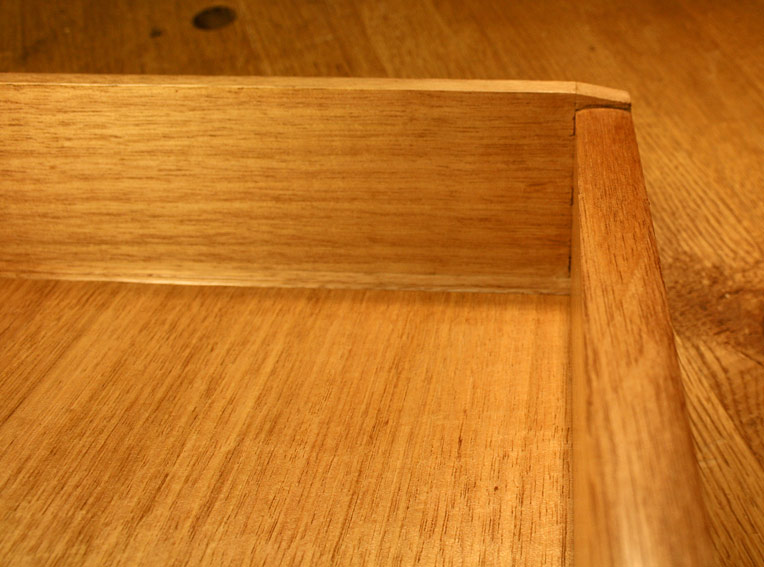
The drawer front is given a test fit. All is good so far.
The first couple of drawers are expected to fit with straight-ish sides, as the cabinet curves in this area are very slight. I have begun with these are they are easier.
Preparing the drawer fronts for dovetailing
The first step is to dovetail the drawer fronts. In the earlier design chapter, lower baseline was angled to create a flush fit with the curved drawer front.
I came up with a simpler method for achieving a flush fit: simply square the corner of the drawer front where the lower baseline will fit …

Step #1 is to mark the lower baseline. This is the thickness of the drawer side.

Step #2 is to square the edge to the baseline. I used an edge plane.

Square edge.

Step #3 is to replace the baseline, and the board is ready to dovetail without further complications.
Dovetails
Dovetails are a bit ho-hum for some and interesting for others. So you have a choice – read about them here, or just look at the two pictures below.
These dovetails are not really that different, just look a bit unusual as the drawer front waste for the bow is left on until the drawer parts are complete.
There are 8 drawers in all, and these graduate in height. The idea is to have the first pair of drawer fronts with a two tails, the next pair three tails, and the progression continuing this way. I am also considering that the last two – largest – drawers also have a muntin.

You may just make out the squared baseline here (as described above).

The shoulders of the tailboard now seat into the baseline.
Drawer fronts are figured Jarrah, and the drawer sides, drawer back, and drawer bottom are Tasmanian Oak. One important reason for choosing Tassie Oak is that it is available quarter sawn. This makes for a stable drawer.
Making the Drawer Slips
Drawer slips are an alternative to grooving the drawer sides, and the preferred option where the sides are thin. These drawer sides began at 3/8”, and end up a little thinner – the lower drawers more so as they will need to be coped into the curved carcase.

The dimension for the slip is a base of 4mm, followed by a 3/16” groove, and a 3” top. The width of the slip is 10mm. (yes, I mix metric and imperial – metric is easier in many cases, but all my tools are imperial. I am comfortable with both methods).

Because the drawer sides angle, this impacts on the design of the slips. They need to be given a complementary angle to enable them to be square for the drawer bottom. Above can be seen what the out-of-square amount is for the top drawer.
In addition, a Jarrah veneer is added to the slip for added durability. The drawer to run on Jarrah runners, and the Tasmanian Oak is not as hard as this (it is similar to European and USA White Oak, in my experience, however Tasmanian Oak is really a Eucalyptus – the early settlers to Australia named woods for those that resembled their familiar woods back home).
A bead is scratched into the top of the slip as a feature. It also disguises the join. The drawer bottom will lie flush with the top of the slip.

The slips are clamped to the drawer sides to calculate the position of the drawer groove.

The groove is marked.

The groove cannot be made with a plough plane, as is the usual case, since the drawer front is bowed. I contemplated using a rebating bit in power router, but chickened out. I prefer the control of a handtool, in this instance a router plane. Score the sides of the 3/16” groove deeply, and plough with a fenced router plane. Too easy.

The completed groove, 8mm deep.

The completed slips – with tenons. These fit in the groove to match/centre grooves.
The drawer parts, minus the slips, are glued up and fitted into the chest, where they will dry. This ensures that they match.

Another view.

The drawer bottom is now made. As mentioned earlier, the Tasmanian Oak is quarter sawn. The bottoms are 10mm thick. This will provide a 3/16” tongue, a 3mm upper rebate, and a 1mm lower rebate.

Look carefully behind the drawer front for the gap due to the bow. The bow is subtle – just enough to reduce a “slab” look of straight drawers.

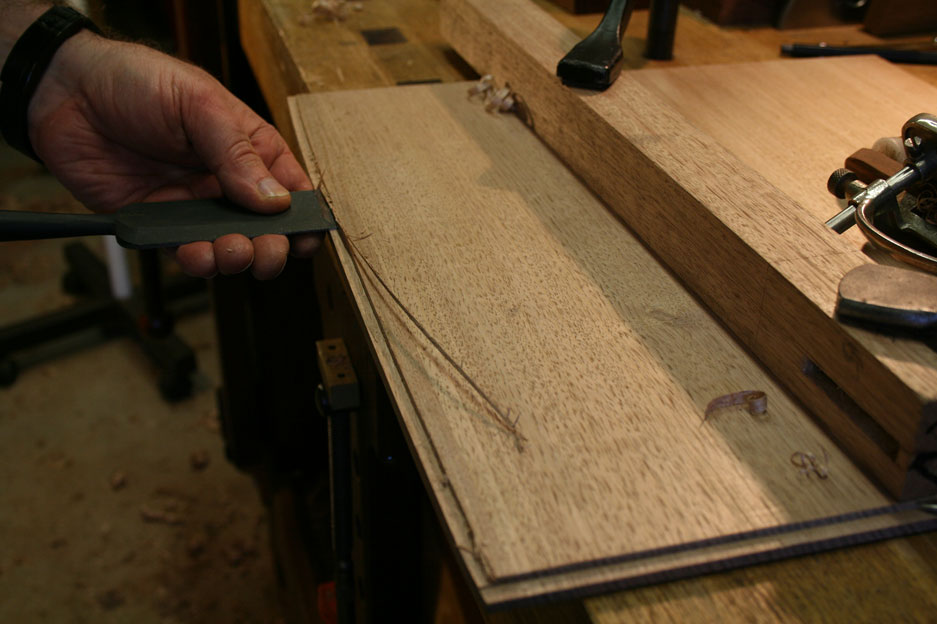
A washer is the tool of choice to scribe the front rebate – stick the pencil in the hole and run it along the drawer back.

A jackplane and spokeshave remove the waste to the scribed line.

Score the rebate. This is important also as to prevent any tearout.
I used a Rapier #043 (copy of the no-longer-available Record #043) to plane the rebate. This is a small plough and better able to work along a curve than a larger plough plane.
To avoid planing over the scribed line, I worked to within 1mm of it …
… pared back to the line …

… and then cleaned up with a small shoulder plane.

The completed job.

Above is the fitted drawer bottom.

Close up of the beaded slip and drawer bottom.
One more detail: the drawer back receives a rounded upper edge.

The insides of the drawer were given two coats of white, dewaxed Shellac. The outside of the drawer front was oiled with Livos. When all the drawers are completed, they will be sanded down across the grain to level them, and refinished. So this is just for now.
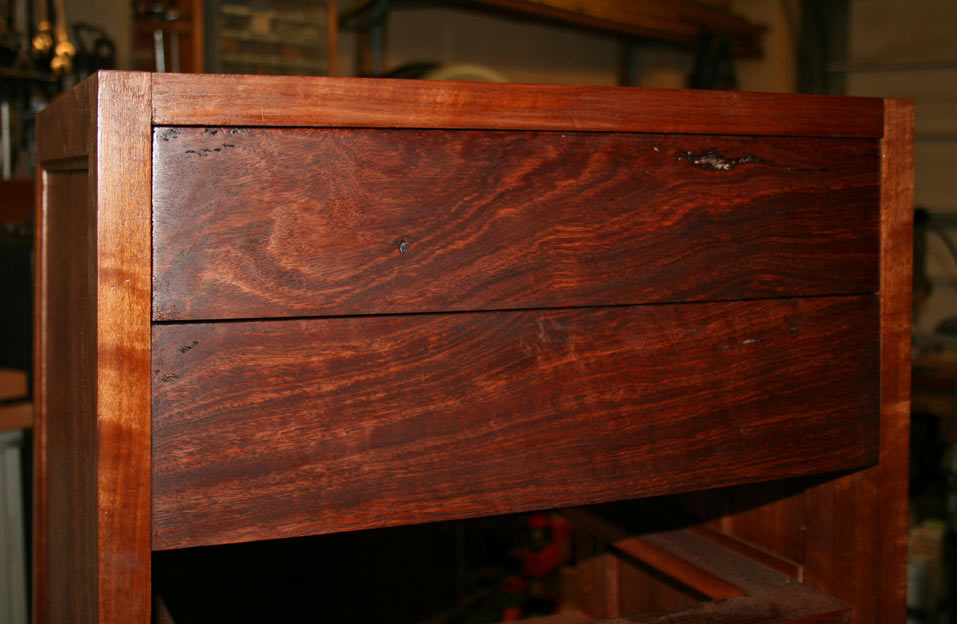
Two drawers done. I hope the grain matching for the others goes this well!

The obligatory dovetail look.
More once all the drawers are done.
Regards from Perth
Derek
December 2015