
Harlequin side table: fine dados/housings
The Harlequin side table will have 8 drawers. The drawer case sides and the central drawer blade are panels and run in dados or housings (depending on which side of the pond you live). Positioning of these dados is critical since any misalignment will affect the aesthetic. It goes without saying (but I shall) that the alignment also determines that the side panels will be square ... and drawers need to run against square sides. All this is done here with hand tools.
Some of the finer points in getting it precise ...
First of all, templates (or story sticks) are created to position the dados. There are two for each side panel: the second is 10mm longer than the first. Scoring each creates an exact 10mm dado. There is a series of templates to position all the dados. This ensures that the upper and the lower dado are position exactly the same distance from the reference wall …

A chisel wall is created for the marked outlines. This wall enables the fence to be lined up using a wide chisel …

The sidewalls are sawn with a azebiki saw. This have two curved sides, one with coarse rip teeth and the other with fine crosscut teeth. I begin with the fine teeth and use them to establish the kerf, and then switch to to the coarse teeth for speedier sawing.
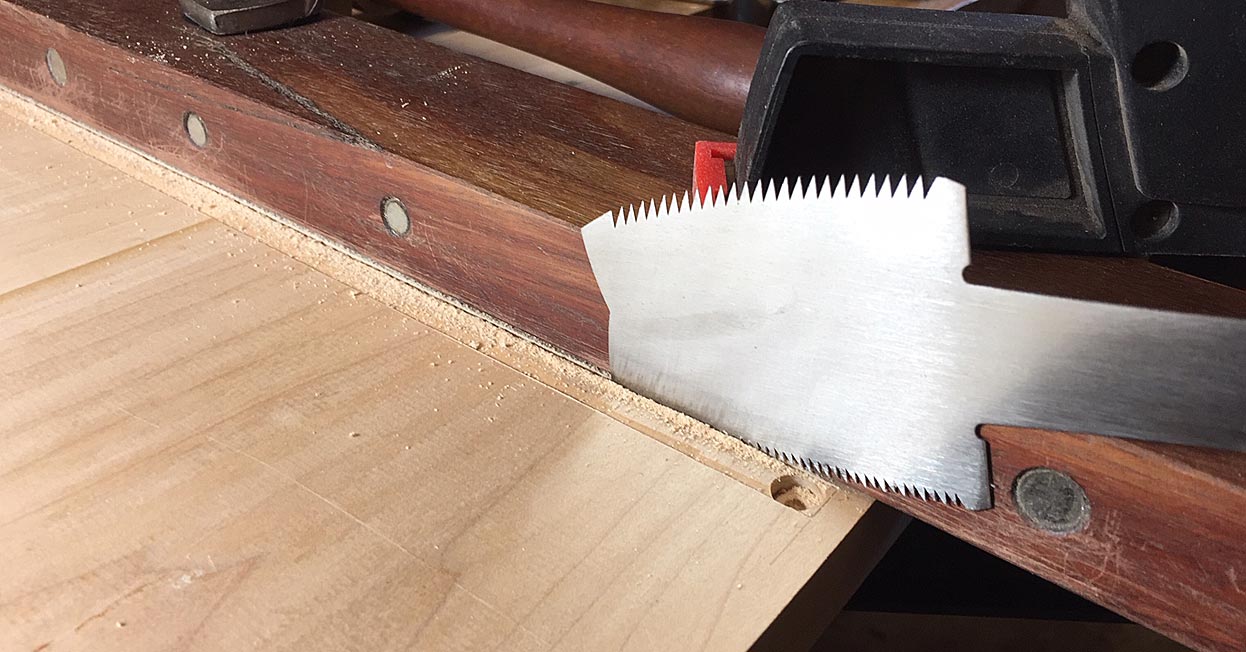
With a compass, I check that the kerf is parallel and to the desired width (10mm) …

The sawn side wall is now chopped away close to full depth …

This is done across the dados on one board at a time …

The waste in the centre of each dado is removed with a router plane. The dados are done at the same time to save have to reset the depth of cut (one stroke on dado #1, one on dado #2, and one on dado #3 ... then back to #1 ...) …

Keep an eye on the depth …

Fine tune the dado should theoretically be unnecessary if they were marked accurately. In practice, I find that there is usually some waste in the corners, or a slightly sloped wall. For this reason I run a side rebate plane (here a Veritas), the length of each wall. This is not held vertically, since that with remove some of the width. Instead it is run at an angle away from the side wall, as it it was undercutting the side wall …

The fit is now checked with an offcut from the side panel …

The side rebate plane can take a smidgeon off the sidewall if the fit is too tight. Some will argue that it is preferable to plane the panel instead. In this situation that is not advisable since the panel is to slide along the dado, and a tight point will impede all points of the panel.
The carcase is Hard Maple, with Merbau as the secondary wood. Locally, Merbau is used for decking. It is cheap and hard, both qualities valued. But is a really brittle wood, and awful to work with. The number of splinters I have had ... and they are sharp and lodge deeply. Ugh!
It can look like this …

... and then a section breaks away …

At least it will be far inside the carcase and not be seen.
A panel is made up for the interior dividers …


The pieces are fitted.
Will the careful planning and neurotic execution pay off?
I was holding my breath. This is a dry fit ....
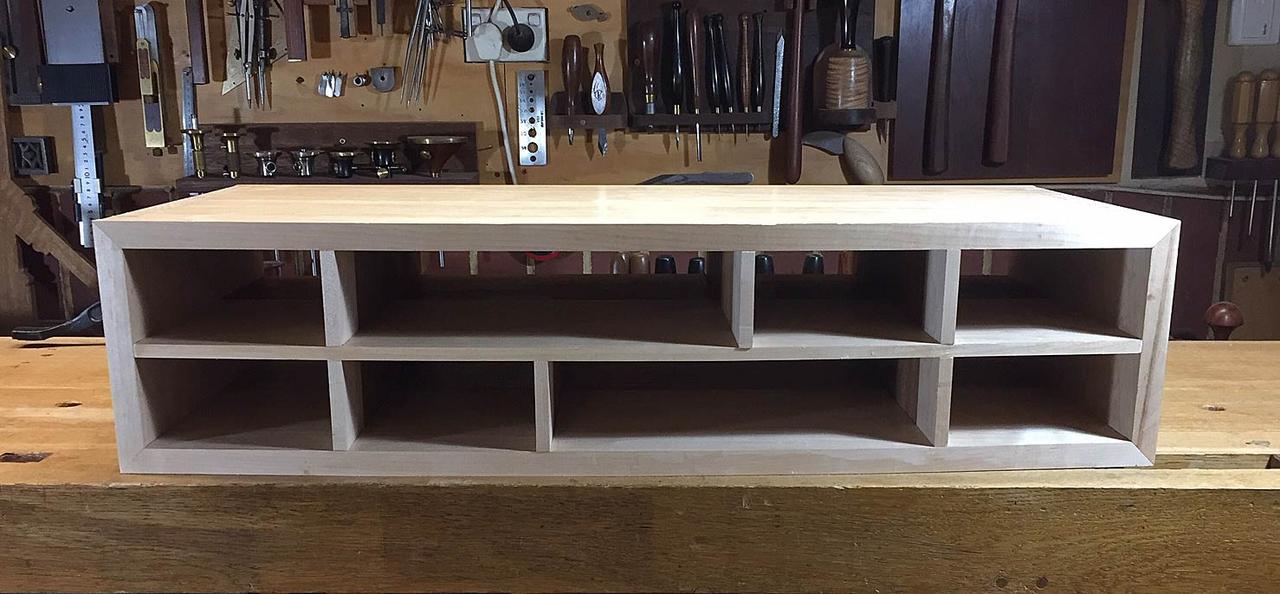


(sound of breathing again)
Then I pulled it apart and glued up the carcase …

More after the coming weekend.
Regards from Perth
Derek
June 2019