Back
to
Building Furniture
Images
of my woodshop
I
do not post much about my workshop, mainly because it is rubbish
compared with many examples I have seen on the forums. While I admire
and aspire to a shop with beautifully fitted cabinets, ones that
would not look out of place in my kitchen, the thought of all that
beautiful hardwood not being used on furniture .. well I just can't
do it.
Now I understand that some ... many ... consider
their shop as a place of private reflection, where one is free to
worship brass and iron idols and icons, or just chat with mates over
a beer. So I accept that shop furniture is high on the list of many.
It is important to me as well (that place of reflection thing) but
just not high enough on the priority list to warrant investing too
much time. I work with recycled woods, many of which are now
endangered ... like Jarrah. I bet you think that it grows on trees
 .
In fact, the Jarrah forests have been decimated, for railway
sleepers, fencing, firewood ... and the forests only grow in Western
Australia. And now they have almost disappeared. I'd rather use wood
like this for furniture in the house than in the shop.
.
In fact, the Jarrah forests have been decimated, for railway
sleepers, fencing, firewood ... and the forests only grow in Western
Australia. And now they have almost disappeared. I'd rather use wood
like this for furniture in the house than in the shop.
So I
built mine almost entirely from cheap, sustainable Pine, and used a
little Jarrah here-and-there to tart it up. Three years ago,
following an addition above the garage/workshop, I started from
scratch with four bare walls - well, actually three since the fourth
was a double garage door. I managed to get as far as a couple of
cabinets, one for spokeshaves and braces, and another for rasps and
files, and then added a saw till - none of which had doors or were
protected against dust. I also constructed a long - open - set of
shelves above the workbench for planes. The only cabinet that had a
door was the one for chisels.
Dust, dust, dust ... oh how I
hate dusty shelves!
This weekend past I decided to add doors
to the shelves. This was going to be a quick-and-dirty job, using
recycled cardboard (i.e. MDF) .. one morning tops, then I could get
back to building something important, like the two campaign chests
that were put aside about a month ago and sit there mocking me.
Well it got out of hand. The MDF doors got tarted up with
Jarrah edging (OK still cheap-and-nasty, but they will do until the
house is full of furniture), then I installed glass in the glassless
doors in the spokeshave/brace cabinet (which I had built as part of a
magazine article I wrote to illustrate joint making). And finally I
rebuild the chisel cabinet to make room for all the new Japanese
chisels (Kiyohisa slicks and Koyamaichi dovetail) that replaced a
bunch I sold. And after this (so not finally!) I redid part of my
hanging tools.
Enough with the words - where are the
pictures!?
Just keep in mind that this is not about showing
tools. More about tool storage. So if you want close-ups to see the
tools, then ask (I am happy to oblige) but the storage has priority.
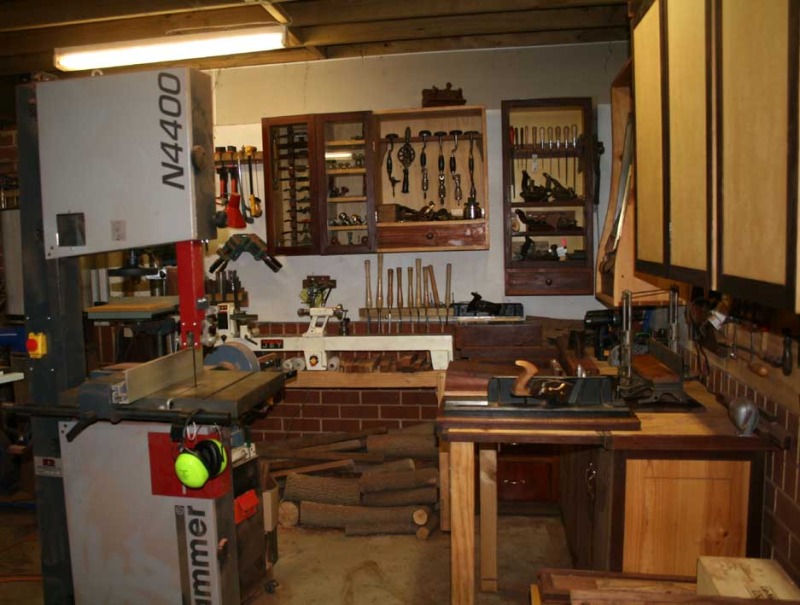
As I mentioned earlier, my shop is in a double garage and
must share space with one car (two others live outdoors). There are
power tools as well for the rough work ...


12”
sliding tablesaw with router table, 12 ½” thicknesser,
8” jointer, 18” bandsaw, floor standing drill press, mini
lathe, and belt/disk sander.
Turn
around and face the rear of the garage, and now you are in the
handtool shop. Facing you is my small workbench and above this are
the MDF-Jarrah doors that now seal the shelves from the dreaded dust
...


The
door on the far right is chisel cabinet. Inside it now looks like
this ...

The
only open section is where I keep the bench planes that are most
used, a combination of woodies and Veritas BUs. Since these tend to
be larger planes, it is easier to keep them out of the way if there
is somewhere convenient to rest them ..

As
you move left, doors #1 reveals ..
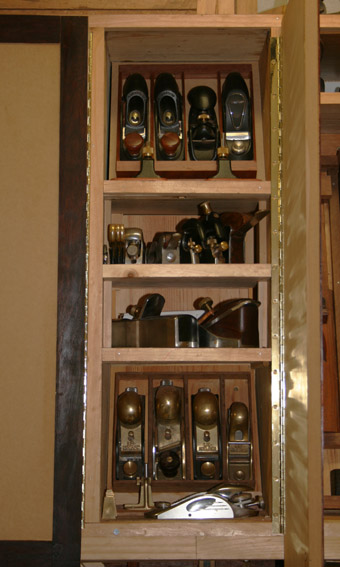 Mostly block and shoulder planes
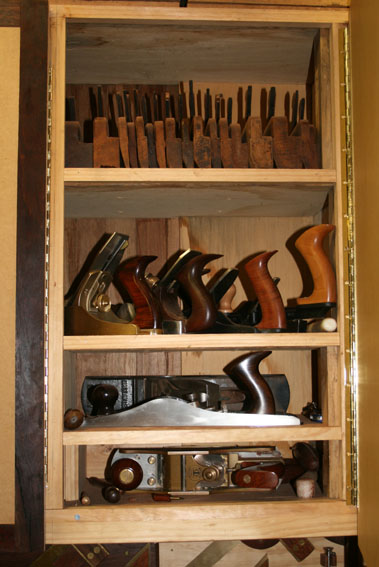 Door #2 has more planes
And
Door #3 has still more ...

 But door #4 has none!
If
you turn right, you will see my sharpening centre, with wet and dry
grinders and waterstones ..
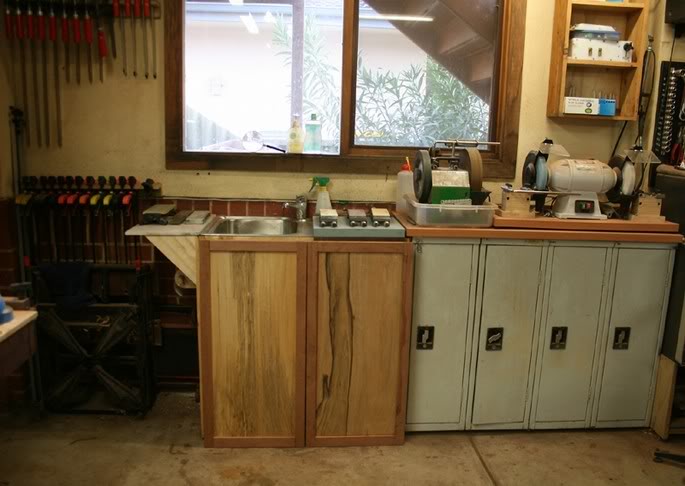

If
you now do an about turn and face the far wall, this is what you see
..
That
cabinet at the far left was the glassless glass doored offender. No
longer. It now has glass ...

...
and houses spokeshaves, router planes, edge-, side- and rebate
planes, and braces.

Alongside
is a cabinet for rasps, rifflers, files and plough and combination
planes ..

The
drawer contains files in a roll.
After this I realised that I really must fit
glass-fronted doors to the remaining cabinets. This will be done
another day ...
The lower cabinets were, in fact, kitchen
cabinets (which I thought that was fitting reversal) that I was given
by a neighbour who was upgrading. The tops for these are 1 1/2"
plywood.


The
hanging tools ... I find it easier to keep as many of the layout
tools close at hand this way. Sometimes I think of this also as Tool
Art …


The
inclusion of my hammers/mallets is new. Keeping them off the bench
top is a biggie. The bench is small (just 5 foot long) and clutter
makes it smaller (a new bench is on the drawing board ... one day).

And
lastly, I found a place for the screwdrivers …

I
could not resist taking this one of Aura, my son's Shih tzu cross
Maltese. Let sleeping benchdogs lie!

Hope
this provides some ideas for some. Feel free to ask for details.
Regards from Perth
Derek
April
2011