Who on Earth wants to see my mess and collection ... uh .. selection?
Images of my woodshop
Welcome to my woodshop! Much against my better judgement I am including these images because I am tired of being asked to do so.
The
problem is that a handtool-oriented woodshop does not have all those
flashy stationary machines. When you look at a powertool workshop it
looks business-like. Generally spick-and-span, and nary a speck of
dust anywhere. Surgery-clean, with silver pipes in the background.
When you look at a handtool workshop, it is messy, shavings
everywhere, and the million handtools make it look like someone has a
serious problem with impulse control (even though the power tools
cost several times as much).
![]()
Who
on Earth wants to see my mess and collection ... uh .. selection?
![]()
Now I do not have an organised set of pictures. It would probably have been easier to take them than put together the collection here, but everything is usually under a layer of shavings, and these were taken when I had tidied up!
The other problem is that my pictures do not look at the big picture – they were taken to illustrate specific things – so it may be difficult to understand where everything is and how I use the space.
My woodshop is based in a double garage. At night it is home to one car, and room has to be left for this. The car – a 1957 Porsche 356a - is one I have been restoring for 10 years, so I am not going to park it outdoors (where we already have two cars!).
About 12 months ago the garage was just four bare walls as it had been gutted in preparation for a second floor office addition. I did manage to save a huge pile of Jarrah rafters that were part of the old roof. These will end up as furniture.
My
choice of wood for shop furniture is ye olde basic Pine. Cheap and
plentiful. I try and save the hardwood for more important projects.
It is becoming increasingly more difficult and expensive to source.
Much of what I use is salvaged from house renovations or salvage
yards. I do both envy and aspire to a woodshop with the glorious
cabinetry that I see in the shops of others on the Net. So I have
plans to dress up the Pine cabinets with Jarrah-fronted doors.
Unfortunately this has not taken place as yet, and all you will see
are the plain pine shells. Come back in 6 months (I guess you get the
idea that it is not a high priority
![]() ).
).
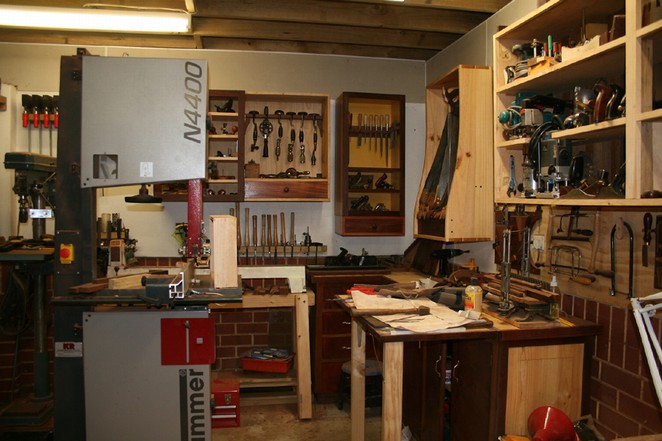
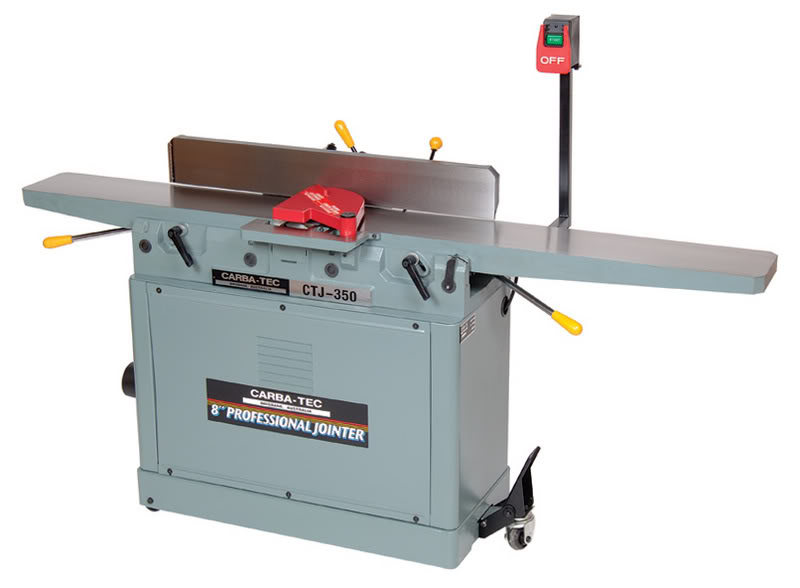
Now the other surprise for some is that I do have plenty of powered machinery. While I predominantly work with handtools, I am not averse to using power tools if this saves on labour. Of these the bandsaw is used frequently (for resawing), the tablesaw (for ripping), and the drill press (for buffing and .. yes .. drilling). The jointer and thicknesser-planer are fairly recent acquisitions, purchased with the intention of converting the hard, wavy, rough sawn roofing timber into furniture grade wood more efficiently than I usually do it by hand. I have a pretty good router table, which I cannot recall when it was last used. The disk/belt sander is essentially a metal-shaping tool. And, of course, there is a little mini lathe for tool handles – this one has an extension bed for long spindles.
Pride of place goes to my handtools. I have arranged these so that they are close to hand.
In spite of the excessive number of planes, saws and, especially, chisels, I don’t really think of myself as a collector. More as a librarian. Many are used as a reference for tools that I review. At one time I sold off a number of handtools as I thought that they would not be used. Then I was forced to borrow them back when they were required for comparisons. In the end I just started to file them away. Nevertheless I do use just about every tool I own. Some are just used less frequently.
Here is a plan of the woodshop:
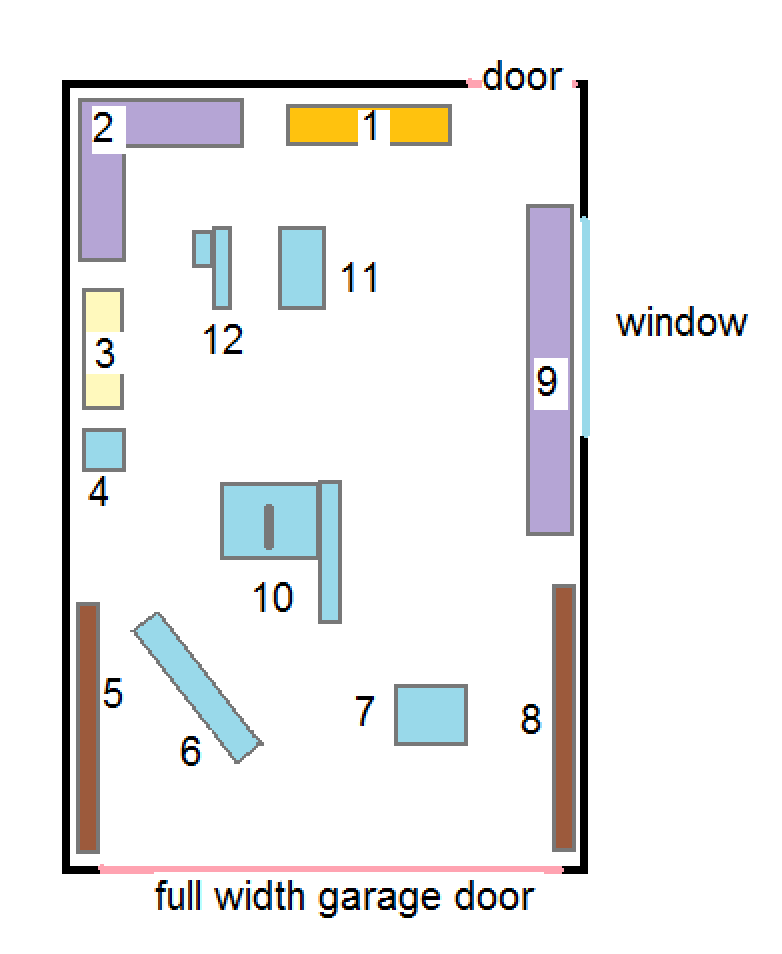
|
1 – Workbench |
7 – 12 ½” Delta thicknesser-planer |
|
2 – Storage with benchtop |
8 – Wood storage |
|
3 – Jet mini lathe with bed extention |
9 – Sharpening centre |
|
4 – Carba-tec floor standing drill |
10 – Carba-tec sliding tablesaw and GMC-based router table. |
|
5 – Wood storage |
11 – 18” Hammer bandsaw |
|
6 – 8” Carba-tec (Delta) jointer |
12 – Carba-tec 12”x9” belt/disc sander |
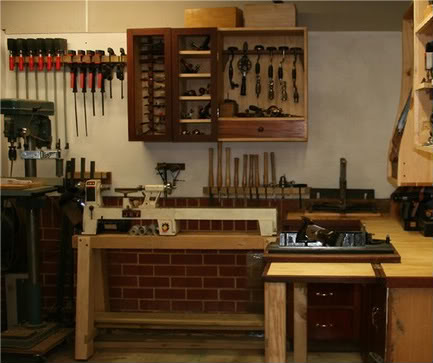
Situated above the workbench at #1: This is the main handtool cabinet. Yes, no doors as yet. I have planned raised panels for all but the two on the right, which will be glass fronted.
From right to left: Veritas bevel up planes, HNT Gordon/Blum/shopmade woodies, half set of H&R planes, block planes, and more.

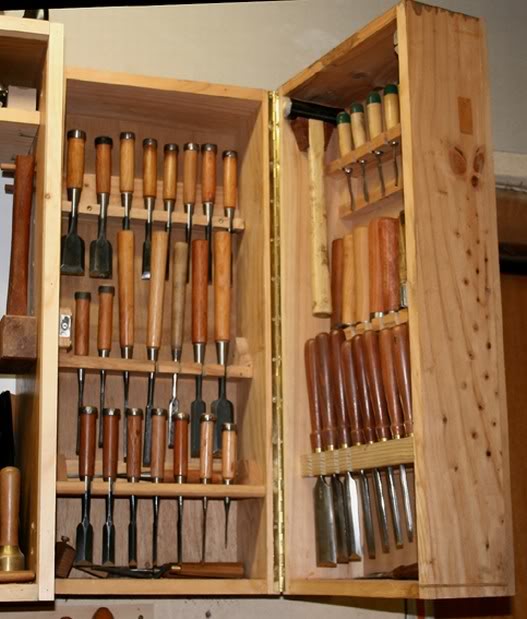
Attached at the right of the above cabinet is another for chisels (Japanese nomi on the left and Berg paring and Oval Bolstered mortice chisels to the right …
This is one of the few shots I have of my workbench. I built this from Karri roofing rafters about 15 years ago. It has survived much abuse, including modifications and rain. I do have plans for a new, longer one. This picture was taken to demonstrate my newly installed under cabinet lighting.
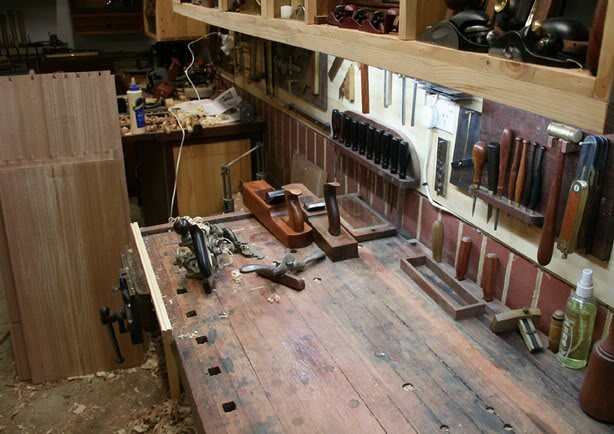
Another view of the bench, with my shopmade 30” jointer on show.

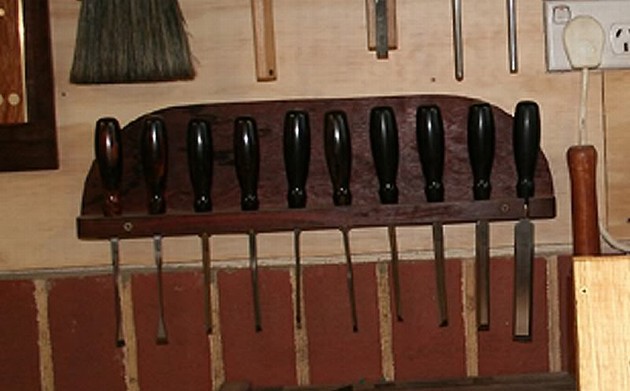
I like to keep marking gauges, square, marking knives, screw drives, and number of other tools close to hand. These have a place on the wall above the benches. Many are rather beautifully made and an inspiration to look at. Some are made by myself, others by artists such as Colen Clenton, Dave Jeske, Chris Vesper, amongst others .


Looking across the woodshop you get an icdea of the placement of a few completed tool cabinets. From right-to-left are the saw till; cabinet for rasps and files, as well as a few combination planes; cabinet for spokeshaves, router planes and braces.
In the foreground is the bandsaw. This Hammer is a relatively new purchase. What a fantastic machine! At 18” and 4 hp it replaced a basic 14” machine. It rips and resaws anything.
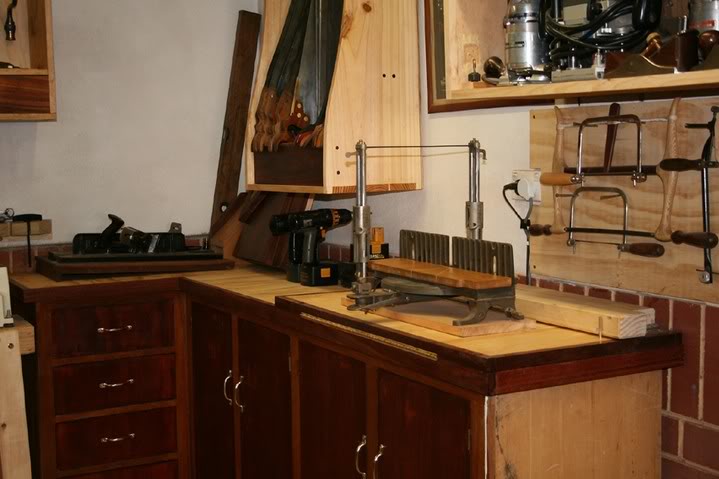
Another look at the cabinet for spokeshaves, router planes, beaders, braces and eggbeater drills. In front is the lathe bench (built from a huge pine roofing beam), with lathe chisel storage, and floor-standing drill to the left.
As you can see, I have not managed a consecutive sequence depicting the development of the cabinets. I think that you can work out what came first and what came later.
 Section 3


 Sections 3 and 4
I needed more work space, especially for the mitre saw and shooting board. I also wanted a place to keep the cordless drills, along with the battery charger, Drill Doctor and drill bits.
As it stands here (with unfinished end closest to the camera), I had just fitted a bench top to an ex-kitchen cabinet I was given by a neighbour who was remodelling.
What is special about this design is that the top folds down …
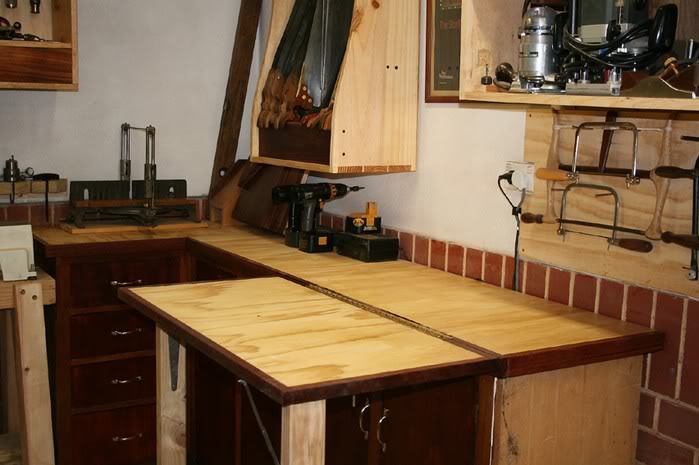
Here it is being used with a Stanley #51/52 shooting board.

We move past section 3 to 4, where you get another look at the drill press, some of the clamp racks, and wood storage. The steel cabinet alongside the drill press now houses a 2 hp dust collection system.
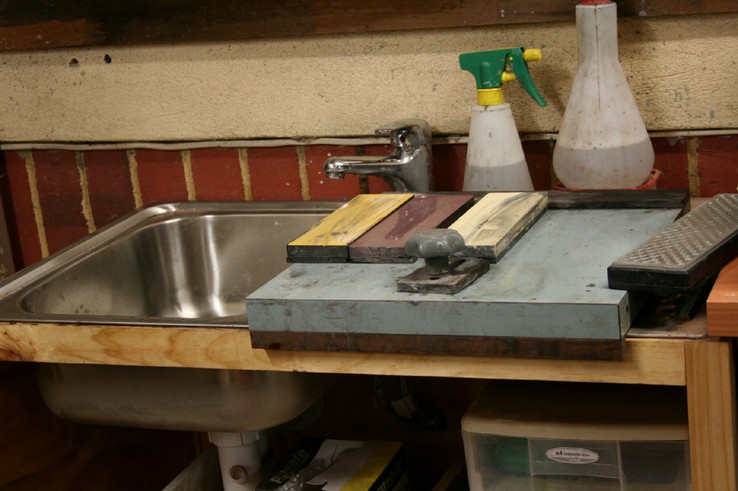
At the opposite side of the room, section 9, is the sharpening centre. This picture was taken at night, so you cannot judge the light that usually streams through the window.
When I completed the office addition, I took time to install a trough and running hot/cold water. This is a dream come true as it makes the use of waterstones so much easier.
There is room for a Tormek and a half-speed dry grinder. The cabinets below store mainly metal working supplies and tools.
 section 9
Oh yeah, no door on the cabinet as yet!
More storage of clamps. This has filled out some since this picture was taken. I try and store clams in “dead” spaces. They need to be easy to get to but not use up important real estate.

More wood storage (section 8)..

 Section 10
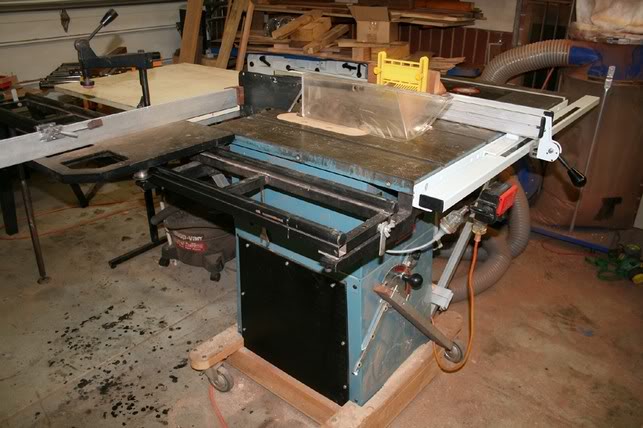
OK, power tools … 12” and 2 hp Carbatec contractor saw with sliding table.
The router table is built into the extension. This has a dedicated 2 hp GMC router with a shop made fence (that clamps to the tablesaw fence).

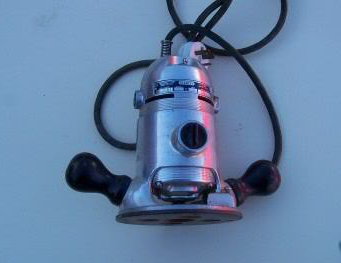
For a guy that hates routers, I have a few. These include a superb (and large) Elu 177e, the classic reference for routers, as well as a few smaller machines. The ones I love (to look at) are these 1950 Stanleys, of which I have two …
And two more power tools.

A few “real” pictures …
 Dovetailed carcase
 Mortice and tenoned lower runner for drawer
 Sizing door frames
These pictures will be updated as changes occur.
Regards from Perth
Derek
December 2009