The Completed Military Chests
Here are a few details that I have not shown previously.
Drawers
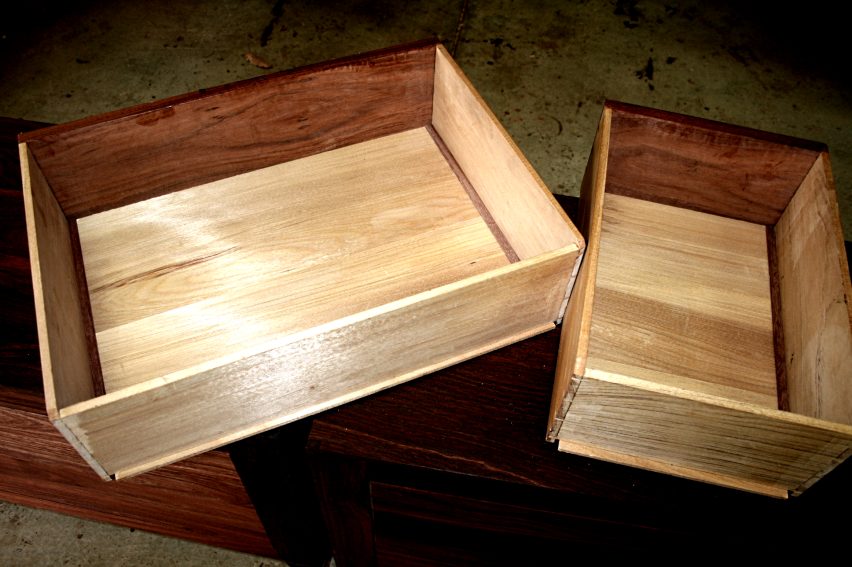
In the picture below the slips can be seen on the inside of each drawer.
The drawer bottoms are solid Kauri Pine (as are the drawer sides and backs), all ¼” thick. The drawer front is ¾” thick Jarrah. The drawer bottoms fit into a groove at the front, the slips at the sides, and then are screwed into the back.
Someone might notice that there is an absence of screw expansion slots at the rear of the drawer bottom. I simply chose to drill a hole for the screw, and then used a narrow rasp to extend the hole into a slot.
Each small drawer has a single screw, while the long drawers have two screws …


I would have preferred to have fitted the drawer stops at the front of the carcase (where there would be less movement). However there was too little room to do this, and consequently I had to build these at the rear of the chests.
We shall see how they fare – the rear panels are attached with a couple of fine nails at this point to permit later adjustments, if needed.

The Back Panels
Never having seen the rear panels on a vintage military chest (not even in photos), and not impressed with the ply backing on a modern version, I decided that I would build something with tongue-and-grooved boards. When the time came I changed my mind about frame-and-panel backings. I reasoned that the chests could one day be used in the middle of a room, and then the T&G would look too busy. Still, the idea of using a new LN #49 tongue-and-groove plane seemed like fun to me.
First came the panel. This was built with Jarrah from my local salvage merchant. He often has a bunch of seconds, which are rejects owing to their wild grain. Five of these made up each panel.
The LN #49 is based on the Stanley #49, and designed to work with ½” thick boards. The rear of the carcases received a ½” wide rebate when they were constructed. The boards for the panels were now thicknessed to ½”, jointed and joined. And then set aside until the frames were constructed.
The frames …
The frames were 2 ½” wide. The groove was first made with the #49 …

Below the markings are made for the stub tenons ..

Chopping out the mortices proved to be interesting. The groove is a non-standard one third of ½” … which is … well, it is more than a 1/8” and less than a ¼” chisel. Luckily the friendly salvage yard also had a bin of unused ¼” mortice chisels ($5 each). I grabbed one and ground the sides until it was a perfect fit for the #49 groove (the sides were also relieved to a slight trapezoid). These did a great job.

The two frames were glued up on three sides (one free short end to fit a panel) …

Back to the panels …
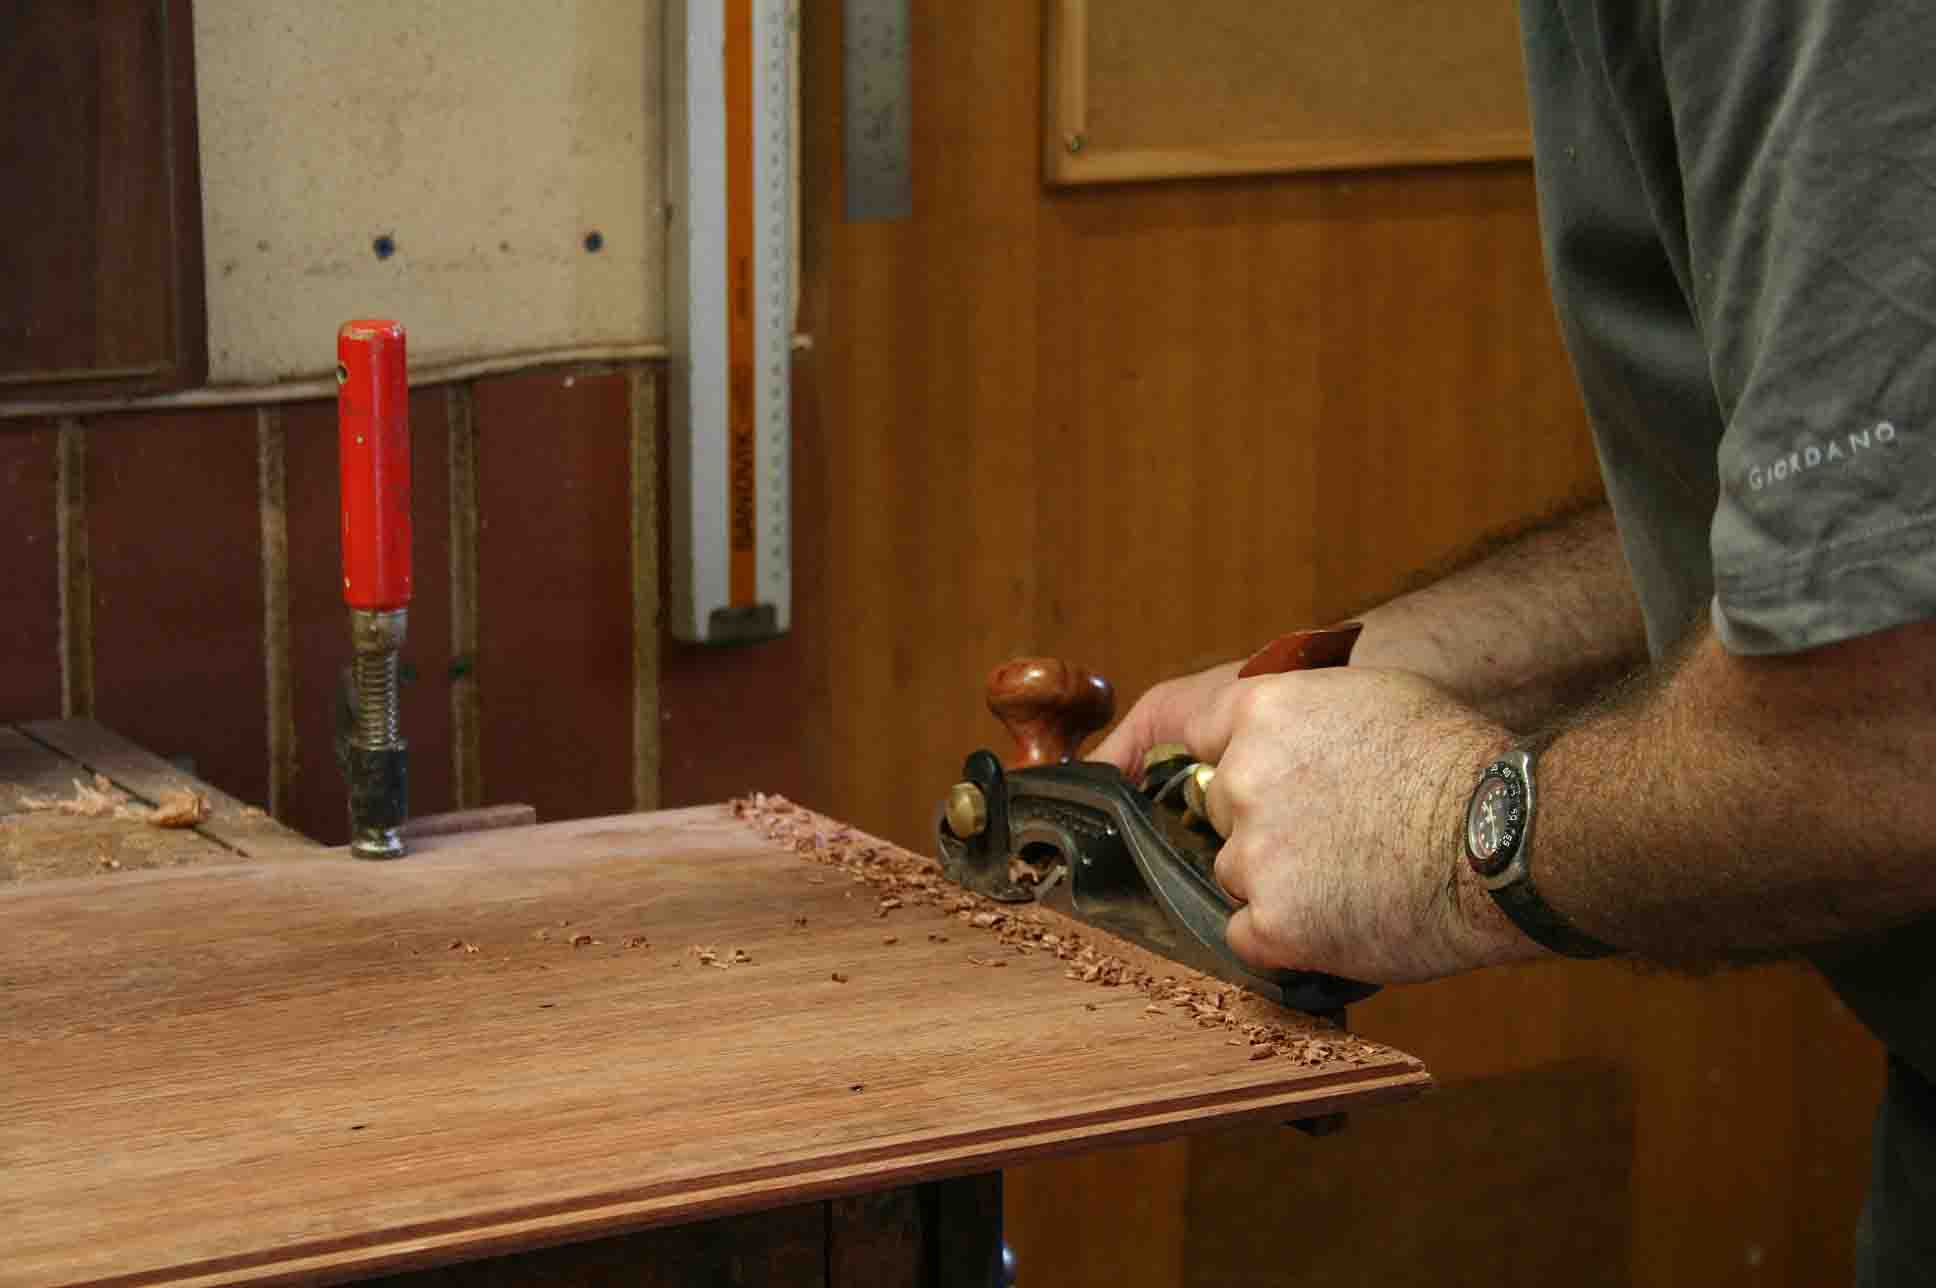
Now the panels could be sized, and the edges planed to tongues.

The #49 makes nice shavings … and an even, perfectly formed tongue …

The Veritas Skew Rabbet Plane was used on the end grain …
Here are the completed panels installed on the backs of the chests …
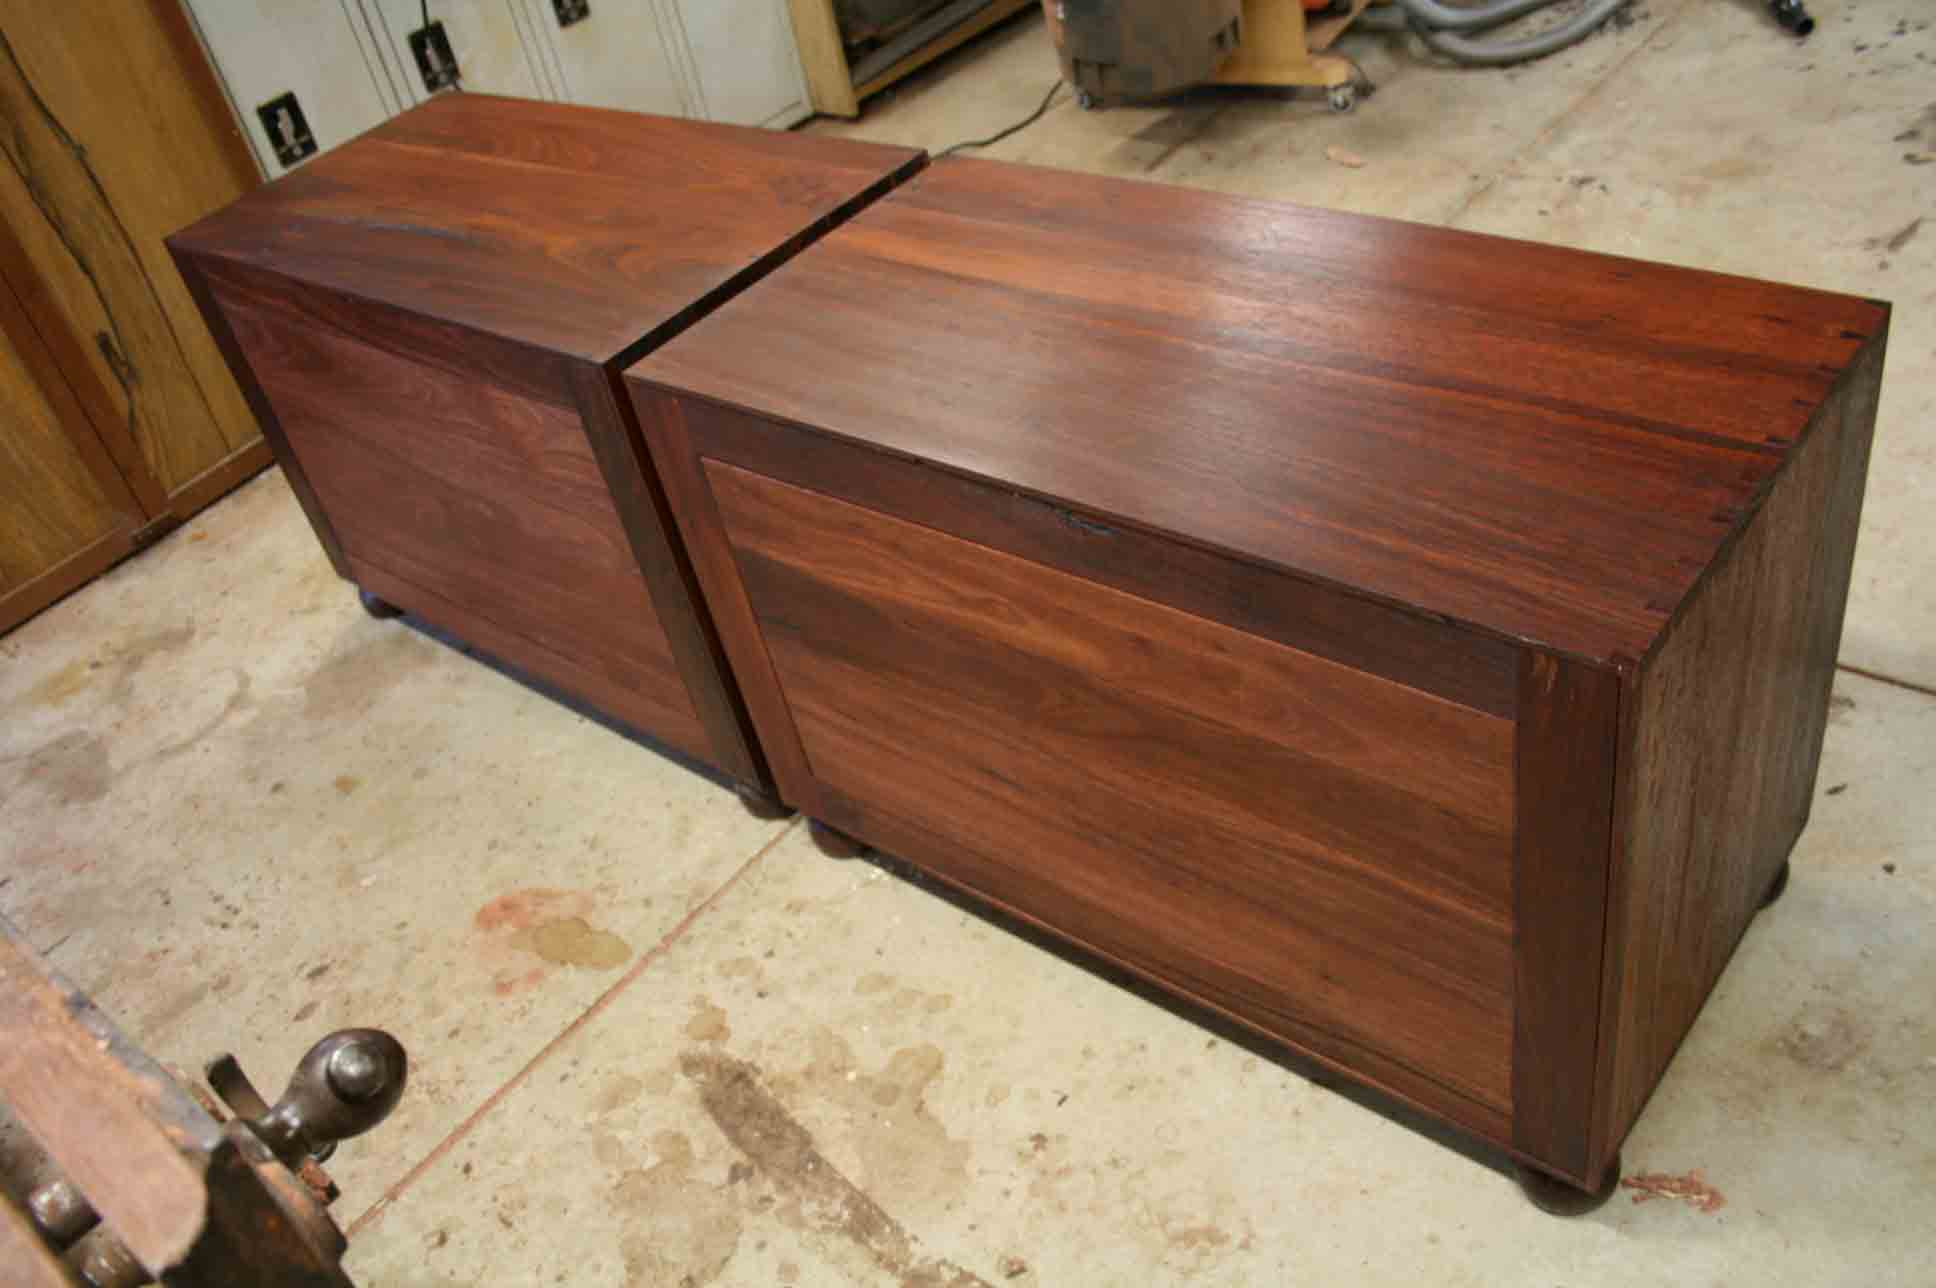
Finish and finished …
The interior and exterior of the carcases, and the drawer fronts, were finished in Danish Oil, then waxed. The Danish Oil has a durability that I suspect is needed when a visitor dares to rest a moist glass on the top of a chest.
The drawer sides were just waxed, while the interior of the drawers was left unfinished.
Oh, yes, I re-clocked the screws on the handles to lie in line with the grain.

I also fixed that rogue out-of-square handle. It is now indistinguishable from the others.
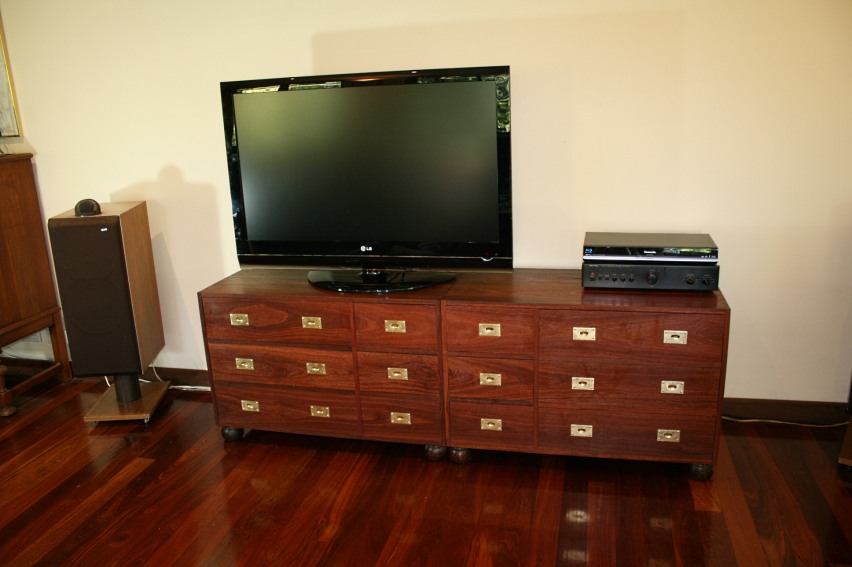
Here is a picture of the completed project.

I apologise for the poor detail of these pictures. They were taken in the livingroom where the chest will live. The day was overcast and, in spite of picture windows on flanking walls, the light was not good enough for photography.

Keep in mind that these chests began as an idea for an entertainment centre. It was intended that the right side cabinet have three drawers and three shelves, the latter for amplifier and DVD recorder. This changed … but the need for an entertainment centre remains.
The plan is to build a wall bracket for the TV and lift it off the chest, where it is presently in this picture …
With a TV and the minimum of boxes ...

Last picture … thanks for all the support through this build ..
Regards from Perth
Derek
December 2011