Back
to Building Furniture
Underbench
Cabinet: ripping with the slider
Time
to use the slider. THIS is what the parallel
guide on
the slider can do. It is like a Fritz & Franz jig on steroids
...
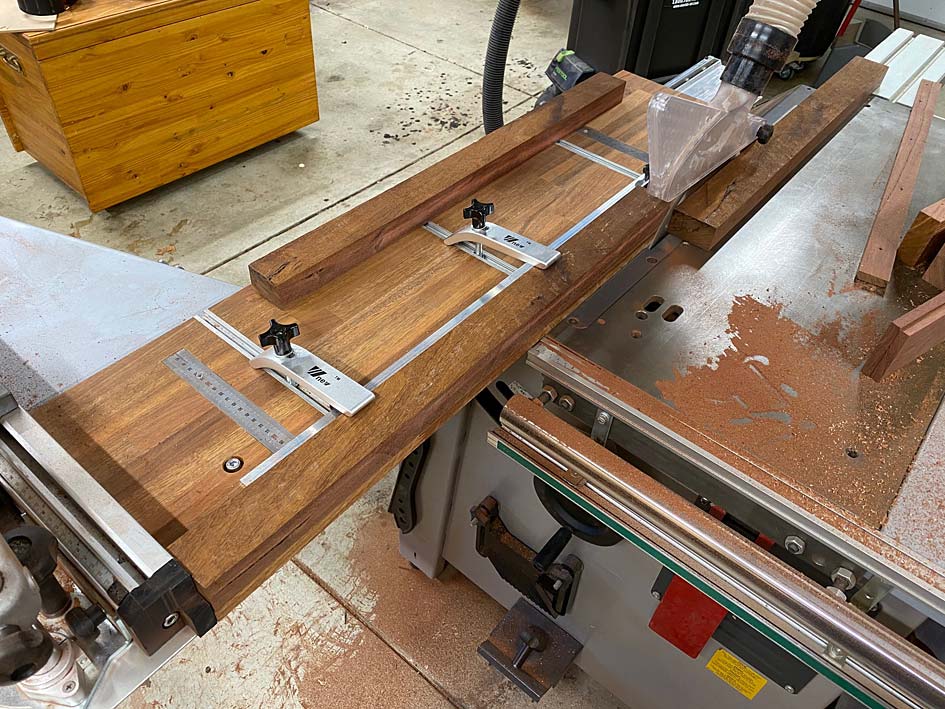
With the case done, the next step is to prepare the
boards for the drawer blades/frames. I have found a chunk of Jarrah,
about 50mm thick and 180mm wide and about 950mm long. This needs to
be sliced up into 50mm wide boards … which will be further reduced
to 12mm thick drawer blades.
Place the board against the
parallel guide ...

...
and rip one side to 50mm ...

Now
rip the second length ...

..
and the third. How safe is a slider? This is where one stands - well
away from any possible kickback (which does not occur on a slider,
anyway. And the hands are no where near the blade ...
The
importance of the clamps - how else does one hold a wide, thick and
heavy board just 50mm from the parallel guide?

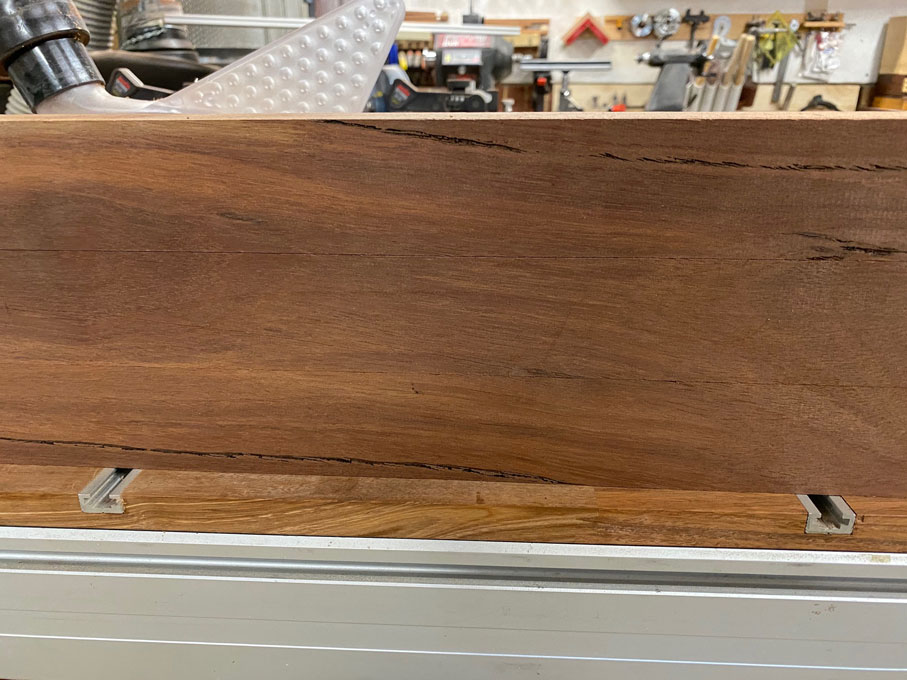
How
good are the saw cuts? Good enough to joint with, and not require a
jointer for the edges.
Here is the board ...

Close
up ...
But
...


Question
(asked on a forum):
How
do you register the fixture for parallel to the blade upon installing
it on the sliding table? It appears the fixture is secured to the
table by means of the two recessed bolts presumably connected to nuts
captured in the T slot of the K3 table extrusion, which is very
secure but normally allows slop side to side. Are there fixed
registration blocks on the underside that fit the slot precisely? Or
do you do register the business edge of the fixture against a known
parallel, like the rip fence, then tighten down? ...Very nice design,
BTW--the most appealing and practical I have seen. I particularly
like how you integrate the clamping function (using the sliding table
this way with unclamped workpieces always felt more than a little
unsafe to me and trying to clamp from the ends can be a hassle) and
how it lends itself to being a taper jig. Also great that it can live
on the saw without crippling the crosscut function (David Stone)
Hi
David
It is really simple, and quick.
The fixture (for
details, see here)
is bolted to the slider table or wagon via the T-slot, as you noted.
The holes for the bolt are a smidgeon oversize - enough for wiggle
room to align the side of the fixture with a saw tooth (at the front)
and the zero clearance on the crosscut fence (at the rear).
The
side of the fixture (facing the blade) is always a zero clearance.
Place the rough and skew edge of a wide rough sawn board against this
and rip it straight.
The parallel guide is set from two
T-tracks, each with an identical metric scale. (These scales are set
into a dado, attached with screws, each of which has a little
adjustability to fine tune perfect accuracy).
The idea that
this would be a better fixture for tapering came when I made this
simple aid several months ago to taper legs for a table. Clearly,
this was quite rudimentary, and a fence would have made set up (for
the other legs) so much easier ...

Regards
from Perth
Derek
December
2020