
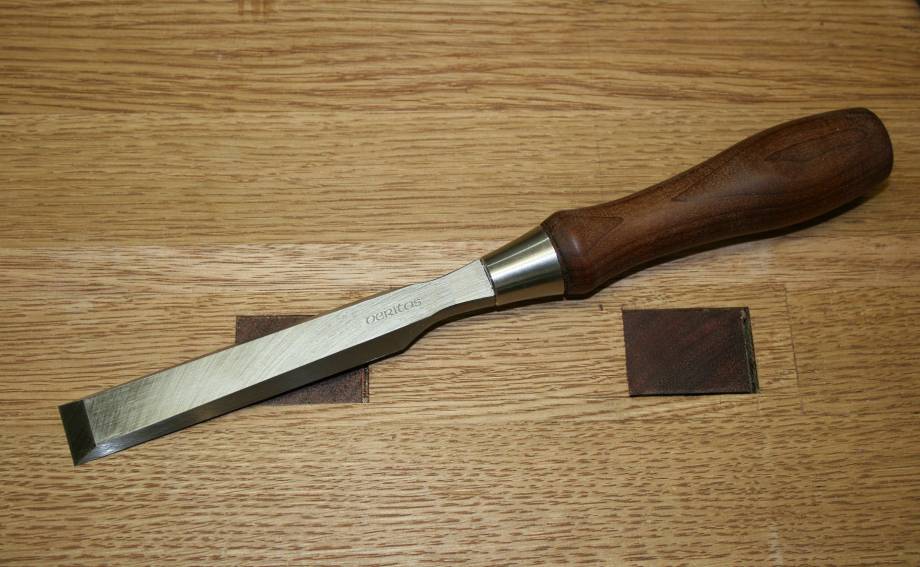
The Veritas O1 Bench Chisels
After what seems like a very long gestation, Lee Valley has released the first of the chisel sets that have been the focus of so many discussions on the woodwork forums. These are bench chisels made with O1 steel.
The packaging appears mundane but do not let that fool you since we all know Veritas tools tend to offer something novel and exciting in the way of design and construction.
I have been very fortunate to be involved with the development of these chisels from the outset. Not that I had much to do with the design other than offer opinion, and test different steels for the blades (there were 10 chisels with different steels on my bench at one time). Then there were pre-production versions to use and comment on … As one may imagine, these chisels feel a lot like family, and I have my work cut out to be objective about their pros and cons.
A little about chisels in general
Lee Valley plan to offer two lots of bench chisels, one in O1 steel (as reviewed here) and another in PM-VII (powdered metal), and later there will be paring chisels as well. I can imagine someone asking what are the differences?
Bench chisels are the all-rounders, and they should be capable of being struck, of delicate detail work (such as forming dovetails), and also paring tough endgrain. Bench chisels are generally on the shorter end of the chisel range, with blades about 4” long. These need to be strong enough to withstand moderate abuse. Handles may be hooped or not.
Below are two different types of bench chisels. Koyamaichi makes the one on the left. In typical Japanese style it features a steel hoop to reinforce the end of the handle as it is intended to be struck by a steel hammer (a gennou). The blade is fairly short, a little over 2”. Its construction is different from Western chisels, using both a tang and a socket to connect the handle to the blade.

The chisel in the middle is a vintage Stanley #750. I believe that it epitomizes bench chisel design in the eyes of many. It is desirable, but now costly, and purchase is only available on the Collector market. A vintage Stanley can easily cost you as much as one of these new Veritas chisels.
The Stanley has a socket connection for the handle, which is considered to be strong and ideal to take abuse. The downside of this design is that it is seen by some to be heavier than the more simply constructed tanged chisels.
The chisel on the right is a Stanley #750 with a custom handle I built. I include it here as it enters the discussion on handle design. The standard Stanley handle is short – too short for my taste. My preference is a longer handle, more in line with a Japanese paring chisel. This area is important to state as some will prefer the shorter handle, and some will prefer the longer handle. There is no right or wrong here – just what feels comfortable for the way you hold and use a bench chisel.
Below are three paring chisels. Each is different.

The Witherby in the centre is closest to the archetypal view of paring chisels. It has a long, thin blade of about 7”. In spite of its socketed construction, this chisel is not designed to be struck.
On the left is a Blue Spruce detail chisel, which is also termed a “dovetail” chisel as the shoulders end in minimal lands (more on this later), but is in fact a smaller paring chisel as the blade is thin. This has a purely tanged construction.
With a thinner and longer blade, the paring chisel is only intended to be pushed. Its length offers greater accuracy. For example, it is easier to detect vertical with a long chisel. Further, a longer chisel requires that the handle is lifted or dropped more, which translates to greater control when adjusting the chisel to pare at a specific angle.
The Kiyohisa slick on the right has a thin blade along with the socket-tang construction of Japanese chisels. The relatively short blade (4”) is balanced by an extra long handle.
The Veritas Bench Chisel
Lee valley came up with a design that combines Western and Eastern chisels. From the Western chisel there is a blade that is solid (rather than laminated, as Japanese blades tend to be). One advantage of this is the bevel may be hollow ground for easier sharpening. Having said this, the Veritas chisels come flat ground with a secondary bevel.
The Japanese influence in these chisels is seen in the combined tang-socket design. This should offer a combination of strength in a lighter construction. Below is one of the pre-production chisels I have been using over the past year. Pulling it apart we discover this …

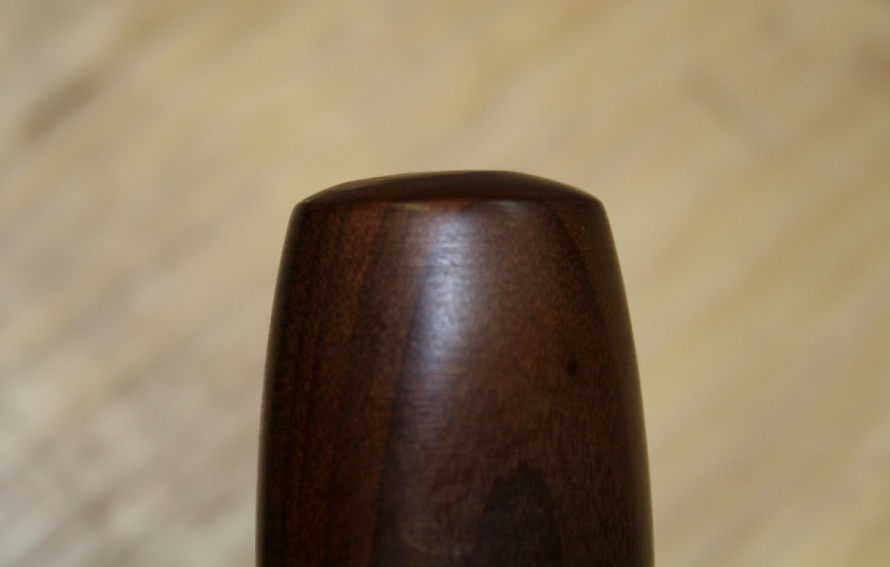
The handle also appears to live in both Western and Eastern worlds. It has the profile of a Western chisel with more of the length of its Eastern cousin …
The Blade
Veritas plane blades have a reputation for being flat. That is flat with a Capital Flat. They are lapped to 0.001”. The instructions state, “no lapping is required by the user”.

Believe this. It is true. Taking a new chisel out of the packing, I “lapped” it over a 12000 grit Pro Shapton. In less than 30 seconds the entire back had a mirror polish.
Below are three Veritas chisels. The one on the left is untouched, as it came from the packaging. The two on the right each required less than 30” to bring to this finished state.

OK, I know that some will argue that a flat back is not important. Well I believe it is very important. So take that!
I am not suggesting that we all go out and lap vintage chisel backs until they look like the Veritas chisels above. If this was an easy matter I would say so. But it is not easy to do, and indeed it is one of the special features of the Veritas, not to mention one of the costs built into the manufacture of each chisel. For vintage chisels, such as my beloved Stanley 750s, it is sufficient to have a coplanar back (that is, the start, middle and end of the blade must lie in the same plane), with the first ½” - 1” behind the bevel flat as can be.
So why is is so important? Firstly, it is possible to use a chisel that is shaped like a banana. It is even possible to sharpen it. However, a back that is curved will be difficult on both accounts. Secondly, flat makes registration easier. This is not just about sharpening the chisel back, it is about using reference surfaces to guide the chisels for increased accuracy.
Here are a few examples.
Paring a mitre for a door frame …


Paring the end of a mortice …

Blade sizes
The five blades in this set run from ¼” through to 1”. I checked the measurements to be the exact (or near to dammit) stated width. Each blade tapers along its length. Interestingly, the ¼” was slightly thicker than the 3/8”. No doubt to increase strength in this narrow width. Looking at the dimensions of each blade it is apparent that thought was given to the construction of each, individual size.
|
Chisel Size (inch) |
Bevel end (mm) |
Socket end (mm) |
Ruler Reading |
Actual (inches)* |
|
1/4 |
3.3 |
5.4 |
exact |
.246 |
|
3/8 |
2.9 |
5.1 |
exact |
.370 |
|
1/2 |
3.6 |
7.0 |
exact |
.496 |
|
3/4 |
3.9 |
7.0 |
exact |
.738 |
|
1 |
4.0 |
7.0 |
exact |
.993 |
*readings were taken after stoning of the lands.
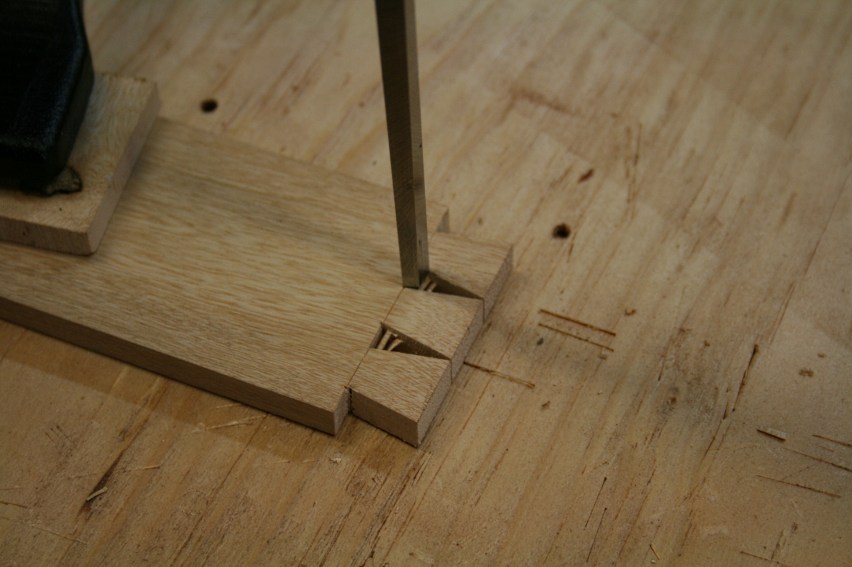
Cutting dovetails with these chisels highlighted an important factor about the chisel sizes included in the O1 set.
If you make narrow dovetails, or dovetails with tips the size of a saw kerf (as in the example below), then the likelihood is that you will need a chisel width less than ¼”. The base of the dovetails in this review (see later) were ¼”, but a ¼” width chisel only clears the the waste at the base – one still needs a narrower chisel to sneak up to this point. Of course, one solution is to make the base of the dovetail wider. However these were already wide at a 1:5 ratio. Consequently, a narrower chisel, either 1/8” or 3/16” would be a good addition to a set that is used for dovetails.
Preparing the blade
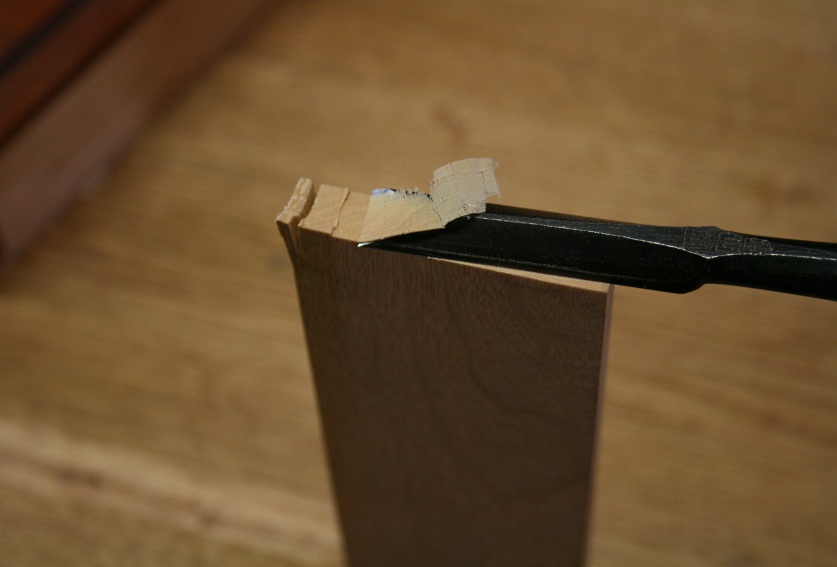
The first task I would recommend is to remove some of the carefully manufactured minimal lands. These extend the full length of the shoulder, which is unnecessary. Veritas have left them for the user to modify as preferred. No doubt others have discovered, as I did, that sharp lands cut fingers!
The minimal lands are exceptionally useful when dovetailing, to avoid bruising the edges of the dovetails, especially with small dovetails where there is too little room to skew the blade ..
It is important to retain the first 1” from the bevel with the existing sharp edge. From that point back, use a fine diamond plate to smooth over the sharp edge. A few swipes should do the job.
The new chisel comes with a flat bevel. In the case of the ½”, ¾” and 1”, the primary bevel is 25°. Below ½” the primary bevels are 30°. All arrive with a secondary microbevel of 2°.
Why the steeper primary bevel on the narrower chisels? The argument is that these are more likely to be subjected to greater force since the narrower chisels are more likely to be used with a mallet.
There is also another factor to take into account – the hardness of the wood. With softwoods one can lower the bevel more confidently. With harder woods one must use common sense and increase the bevel angle to offer optimum strength.
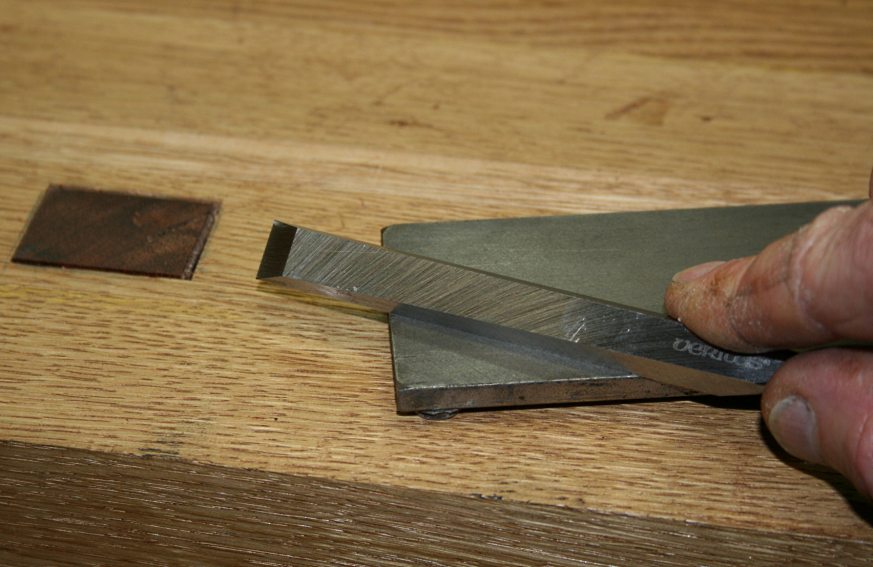
I chose to retain the primary bevel angles used by the factory, but hollow ground the blades as my preference is to freehand hone on the hollow. You may prefer instead to use a honing guide, in which case simply hone the existing micro secondary bevel.
The image below on the left shows a newly-ground primary bevel. This was created on a Tormek wet grinder, which allows one to grind to the edge of the bevel without risk of endangering the temper of the steel. The advantage here is that a minimal amount of steel needs to be removed when honing.


The picture on the right is of a freshly honed and polished edge. Since the edge was so small, a microbevel was easy to achieve on a 6000 waterstone, and then was polished on a 13000 waterstone.
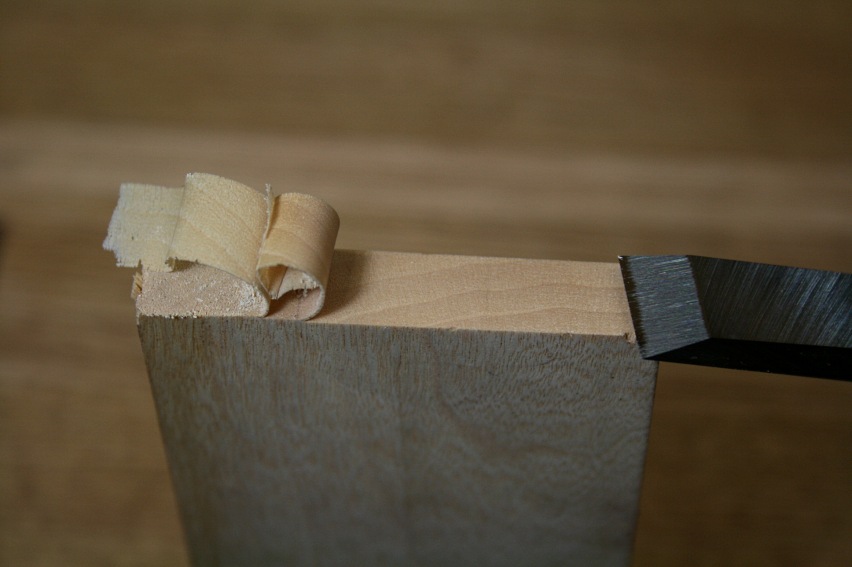
A sharp edge should pare end grain soft wood and leave a smooth finish. Below is the result on a piece of soft Jacaranda …
The Handles
The Veritas chisel handles are another innovative entrant into the world of chisel handles. The handles are “caramelized” (or “torrefied”) Hard Maple.
The process essentially involves roasting the wood at temperatures typically ranging between 200 to 320 °C. This both dries the wood, which stabilises it, and increases its density.
My research into this process did unearth the possibility that it could also become more brittle. I raised this with Rob Lee, who encouraged me to wack the handles as hard as I liked, which I did for a while with a Blue Spruce acrylic-infused mallet – I may as well having been using a steel hammer. The handles did not split, as some might, but I could see a fine dimple on the end of one after a week or two of this treatment …

Stick to using a wooden-faced mallet or wooden-faced hammer for peace of mind.
I really like the warmth of the caramelised Maple. The handles come with a buffed wax finish to allow the natural wood to show through. It is actually quite difficult to see that there is a finish. My preference is to use a product such as Shellawax, which is durable and water resistant, since I wish to protect the wood as much as possible when honing on waterstones. This is how they came up …

The pre-production handles had quite large flat sections. These were to aid in orientating the chisel blade. I was quite critical as I found them intrusive. The size of these flats has now been reduced quite significantly. So much so that I now see the advantage in keeping them – the flats now offer information while no longer imposing themselves on the user.
The length of a chisel handle has been a big deal for me – witness the fact that I modified my Stanley 750 handles. As I noted earlier, your mileage may vary. I do not mean to imply that there is a right and wrong here. There is just personal preference, and you now know what mine is.
One of the reasons I found the Veritas chisels so easy to use was that the handles felt so familiar. They are the same length and diameter as the handles I custom-made for the Stanley’s. It was as though I had commissioned these for my personal use.
Keeping in mind that the original Stanley 750 chisel was copied by Lie-Nielson, handle and all, I thought that readers would be interested to see the two chisels side-by-side (the LNs belong to a friend). The LN chisels are similar in price.


This is how the Veritas handle looks in my hand …

This is the Stanley handle ..

For me the difference is that the Veritas handle combines the ease to push along with the advantages of a paring chisel. For some, however, I am sure that the Stanley would be preferred with the balance towards being a chopping chisel, since the smaller handle alters the balance towards the blade.
Using the Veritas chisels: how they feel in the hand
In a nutshell, the Veritas chisels feel very similar to a Stanley-with-long-handle. Although the blade is longer than the Stanley, the Stanley has as much steel owing to its use of a full socket.
Indeed, the thicknesses of the blades are very comparable.
Veritas above, and Stanley below on a ¾” size …

I find the chisels’ balance to be excellent – literally as much as subjectively. The larger chisels, in spite of thicker, longer and wider blades on the same-size handles, are still not blade-heavy. As one can see below, where a 1” and a ¾” straddle a Starrett blade, these chisels balance on their centres.

In the hand the blades are comfortable to hold (once the lands are softened), and the balance enables one to hold the blade near the end when paring …


So how does the steel hold up?
I spent some time pounding on these blades. The results were a surprise.
The assessment involved comparing the 3/8” O1 Veritas with a laminated white steel Koyamaichi and an A2 Blue Spruce of the same size. These were partly chosen as they are all of a similar retail price.
All the bevels were ground and honed at 30°.
The plan was to chop Tasmanian Oak, which is similar to USA White Oak in texture and density, and see which blade lasted longest. The criteria for continuing chopping was that the blade had to pare end grain soft Jacaranda cleanly. Chopping would end when it failed in this regard.

Left-to-right: Koyamaichi, Blue Spruce, and Veritas.
A few comments leading into the evaluation: The Koyamaichi was a known factor. In this test it outperformed chisels made from M4 and 3V steel. It was therefore expected to outperform the chisels here. About the Brue Spruce - I had mixed feelings in including it here. I love my set of Blue Spruce chisels. They are superior performers when asked to hold an edge in paring hard woods, and are comfortable workers in the hand. However the blades are thin and I did not know how they would stand up to chopping, something I do not ask them to do. However I did not have another A2 chisel available (the LN chisels, above, were not available). Still, I expected the A2 steel to outlast the O1 of the Veritas.
Below is the test set up. It consists of a Tasmanian Oak board held firmly in the position typical for morticing. The method consisted of taking 1/16” slices to a depth of 1”. Each chisel was tapped into the wood. I used a steel gennou for the hooped Koyamaichi, an acrylic-infused wooden mallet for the caramelized Veritas, and a plastic-headed hammer for the African Blackwood Blue Spruce (I am sure that Dave Jeske of BS would have told me I had nothing to be concerned about).


Each chisel completed 10 strokes into the Oak, and then had to pare end grain Jacaranda. If a chisel failed to pare end grain cleanly, then it fell out of the test.
Below is an example of the Koyamaichi on the Oak.

And the Veritas …

The results ...
Both the Koyamaichi and the Veritas experienced no difficulty in chopping 3 sets of 10 in the Oak. Both were still continuing to produce smooth surface on the Jacaranda end grain. However the Blue Spruce stuttered to 10 chops, and then could not complete the first paring test.
Below is the Blue Spruce after 10 strokes …

… and weak shavings on Jacaranda.

The edge had small chips, which indicated to me that the steel was not coping with the impact. I reground and resharpened the blade, then repeated the test. Same result. Knowing as I do how good this chisel is when only used for paring (which is its brief), the message is ‘do not chop with thin paring blades’.
Back to the Koyamaichi and Veritas. The test was increased in difficulty by chopping thicker sections, this time about 1/8”.
Below is the Veritas after 10 chops.

It could still pare end grain reasonably well.

However, it lasted 5 more chops before I halted the test since it had begun to struggle to pare end grain. A close look at the edge (without magnification) failed to reveal any chipping. Essentially, the O1 had worn its edge.
The Koyamaichi completed a further lot of 10 chops beyond the Veritas, at which time I was noticing a moderate fall off in performance. It likely could have gone another 10 chops before failing.
Below is the evidence of the test, that is, the amount of Oak chopped by each chisel …

What do these results mean?
The bottom line is that the Veritas steel is pretty decent stuff. It takes a fine edge and holds it well. I really cannot imagine anyone being disappointed with these blades.
Not as good as the Koyamaichi, so why not get the Koyamaichi? Well why not indeed! OK, it is not that simple. These Japanese bench chisels are designed to be used with a gennou. They are most uncomfortable when pushed by hand. The hoops cut into the palm. One needs to pair them with paring chisels (slicks) to have an all round tool. Performance comes with a price tag (twice as many chisels).
This is what a Western bench chisel is all about. It is a chisel that can do everything moderately well. For many woodworkers this is sufficient for all their needs.
A little project
One can only really determine the usability of a tool after .. well .. using it. As I mentioned at the start that I have been using a few preproduction chisels of different sizes for about a year. I have now spent a few weeks on the production versions. I cannot see much of a difference in performance (outside of the improvements to the handles), and this leads me to believe that the results of the test above is a decent indicator of the reliability of the steel.
For the purpose of collecting my thoughts for this review I did build something. I built a box for these chisels. The Jarrah comes from the stash I collect whenever I find more. The Jacaranda comes from a bough off a large tree outside the workshop that broke off in a storm a few years ago. The bough landed on the roof, causing damage and allowing rain in. I saved the bough, and a short while ago sliced up some into boards. This is divine retribution!


Summing up
Veritas (aka Lee Valley) have produced a set of bench chisels that is every bit in the tradition of Veritas. They are innovative insofar as introducing an Eastern construction into a Western chisel, with the hybrid tang/socket. They are innovative for using a torrefied process to create a stable and hard wood for the handles.
The handle design offers something for those who want a chisel for paring and those that use a wooden mallet. The ergonomics are good. They are balanced in the hand and comfortable to use.
The O1 steel is not the last word in steel, but there are those who prefer the ease of sharpening it offers. These Veritas chisels hold an edge very well, kept up very respectfully with the Koyamaichi, who are the leaders here in my book. For those that want something more durable than O1 steel, Lee Valley will also be bringing out these chisels in a powdered metal steel, PM-VII. This is, however, a topic for another time.
Regards from Perth
Derek
May 2012